ThinOS Recovery From ISO Image when Encounter Fatal Error: Can not decrypt Root partition"
Summary: OptiPlex 3000 thin clients with ThinOS 9.x versions may encounter failure to boot with an error prompt as "Fatal Error: Can not decrypt Root partition. This may cause by TPM/PTT/NIC device disable or enable in BIOS." This article is to instruct the recovery process using a USB drive with ISO image. ...
This article applies to
This article does not apply to
This article is not tied to any specific product.
Not all product versions are identified in this article.
Symptoms
Affected Products:
- Dell OptiPlex 3000 Thin Client
Affected Operating Systems:
- ThinOS 9.x
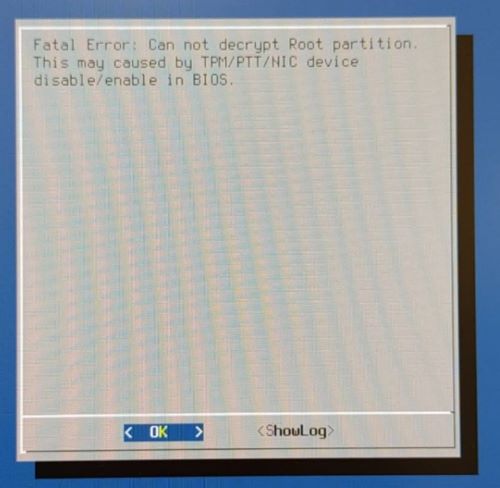
Dell OptiPlex 3000 Thin Client (OptiPlex 3000 Troy TC) runs any ThinOS 9.x versions may fail to boot successfully. An error message shows Fatal Error: Can not decrypt Root Partition. This may be caused by TPM/PTT/NIC device disabled/enable in BIOS.
Cause
For security reasons, ThinOS supports device level disk encryption. Disk encryption depends on platform hardware. Any platform hardware configuration changes, such as service tag, network adapter, or TPM/PTT, can cause disk decryption failure. This blocks operating system boot processes from completing.
Resolution
If clearing TPM / PTT causes the error or for any unknown reason which has not been able to be recovered, then reinstall ThinOS by ISO image.
Prerequisite:
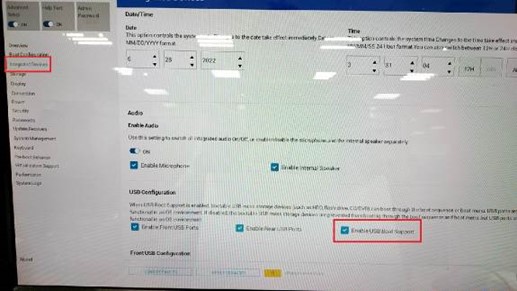
- Enable USB Boot Support in BIOS. The default is disabled.
- Turn on the device > Press F12 > enter BIOS Setup > negative through Integrated Devices > USB Configuration > check Enable USB Boot Support.
Reinstall ThinOS image using ISO file on the failed OptiPlex 3000 Thin Client
- Download the Dell OS Recovery tool and install on a Windows computer.
- From a Windows computer, download ThinOS ISO image file from DELL e-support. Extract the file into a single .iso file. Suggest always downloading the latest ThinOS version for the platform: https://www.dell.com/support/home/product-support/product/optiplex-3000-thin-client/drivers
- Plugin a USB drive to the Windows computer, and then launch the Dell Recovery Tool.
- Follow the instructions in below to generate a USB Installation key.
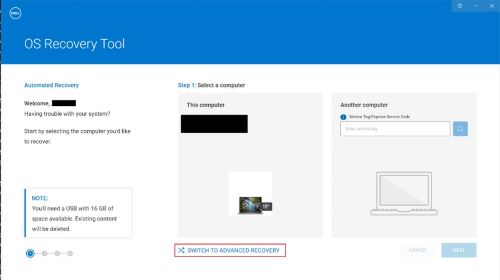
- Click SWITCH TO ADVANCED RECOVERY.
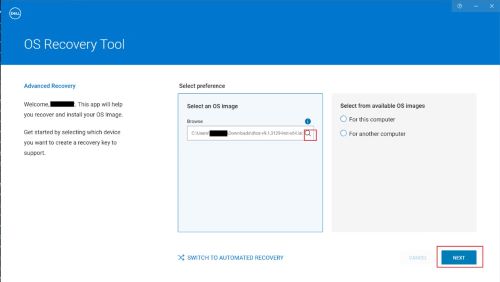
- Select the ISO image from where the ThinOS ISO file is stored. Click NEXT
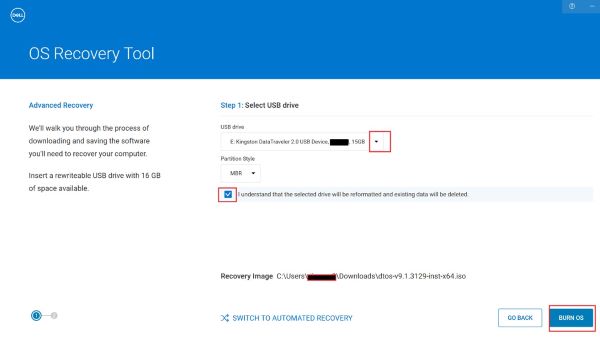
- Select target USB disk12, check understand drive content is erased, click BURN OS
1The USB disk internal data is erased and repartition.
2Partition style can be either MBR or GPT, recommend using GPT for ISO.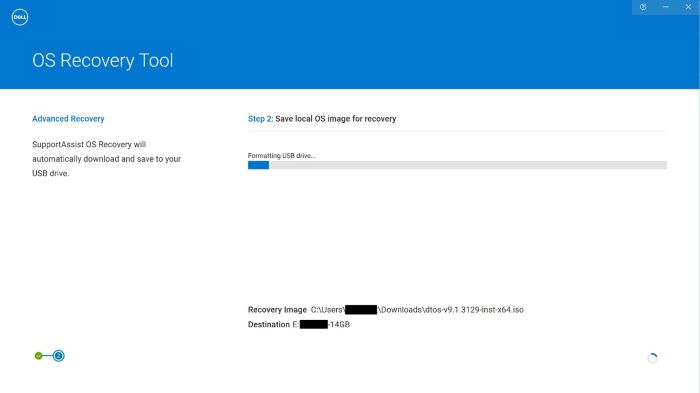
- Click SWITCH TO ADVANCED RECOVERY.
- Once the USB Installer key is created, then plug in the OptiPlex 3000 Thin Client (OptiPlex 3000 Troy TC) USB port.
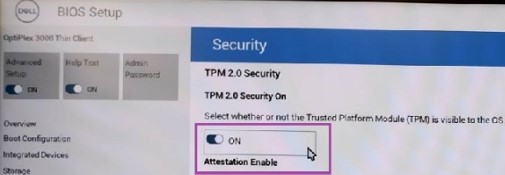
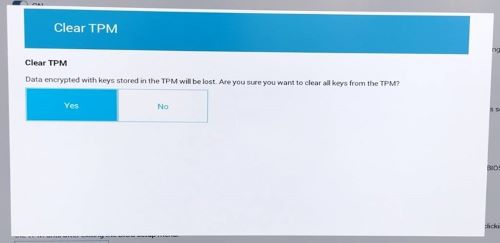
- Manually clear TPM data once before installing the operating system
- TPM setting path: Power on device > press F12 > BIOS Setup > Security > Clear > Turn ON > Apply Changes.
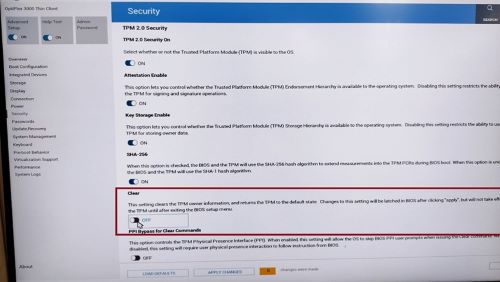
- Clear TPM and Apply Settings Confirmation.
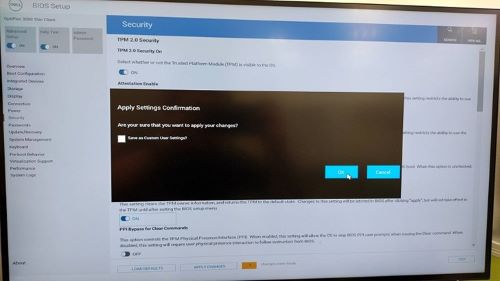
- TPM setting path: Power on device > press F12 > BIOS Setup > Security > Clear > Turn ON > Apply Changes.
- Power on the OptiPlex 3000 Thin Client (OptiPlex 3000 Troy TC) to boot from a USB disk. The ThinOS image installer is started in a short time. Press Enter or leave it for a few seconds to proceed automatically.
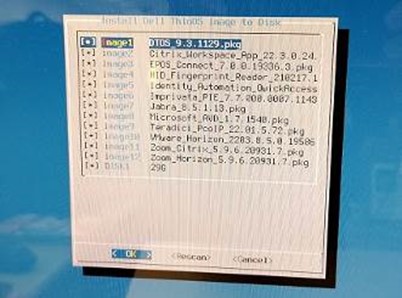 Note: If the ThinOS image installer is not showing, try the following.
- Change the USB drive and create the USB installation key again.
- Reinstall the Dell OS Recovery tool on another Windows computer and retry again.
- Change USB partition type in OS Recovery tool while USB drive creation.
- When the installer process completes, the OptiPlex 3000 Thin Client (OptiPlex 3000 Troy TC) auto shuts down.
- Power on the OptiPlex 3000 Thin Client (OptiPlex 3000 Troy TC) manually and then operating system installation and disk encryption are started.
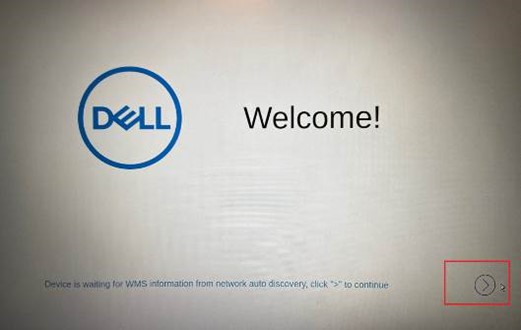
- When all processes are 100% finished, the computer restarts and shows the ThinOS OOBE menu.
Affected Products
OptiPlex 3000 Thin Client, Dell ThinOSArticle Properties
Article Number: 000201437
Article Type: Solution
Last Modified: 23 Apr 2025
Version: 8
Find answers to your questions from other Dell users
Support Services
Check if your device is covered by Support Services.