Networker How to configure Mtree replication to migrate volumes between Data Zones
Summary: This kb provides a step by step guide to configure Mtree replication that will allow customer to migrate existing Networker volumes between Data Zones
This article applies to
This article does not apply to
This article is not tied to any specific product.
Not all product versions are identified in this article.
Instructions
On earlier Networker versions we had Networker Volume Move Tool which used nsrmigrate command to migrate volumes between different Networker servers/Data zones.
Starting with Networker 19.7 version, above tool is no longer supported and customer needs to configure Mtree replication configuration.
In order to successfully configure MTree replication, customer needs to perform several manual steps which we will describe on this Kb.
Following this kb lab setup details:


Note: While creating replication pair, do not use the target server name as target mtree name. Instead use a different name, since these mtree are read only and cannot be used in the target to create DD Device.
After creating a replication pair from source DD, a replicated mtree will be created on the target DD. This replicated mtree will be visible in the target DD but not it’s storge unit.
To make the replicated storage unit visible in the target DD we need to update ddboost user for the replicated storage unit using below command.


Running Export on the source Server
Policy and Workflow creation can be done either from UI or CLI but dd-replication creation is supported only from CLI using nsrpolicy utility.
Create Policy:
nsrpolicy policy create -p policy_name
Create Workflow:
nsrpolicy workflow create -p policy_name -w workflow_name


Create dd-replication action:
nsrpolicy action create dd-replication -p policy_name -w workflow_name -A action_name -U export -r Source_Mtree -f Target_Mtree -W source_DD -q target_DD -L "NSR_DD_Replication_name1,NSR_DD_Replication_name2..."

nsrworkflow -p <policy name> -w <workflow name>

replication show config
replication sync <mtree:target mtree>


Running Import on the target server
Create Policy:
nsrpolicy policy create -p policy_name
Create Workflow:
nsrpolicy workflow create -p policy_name -w workflow_name


nsrworkflow -p <policy name> -w <workflow name>

/nsr/logs/policy/….
/nsr/logs/policy/replication
/nsr/replication
Starting with Networker 19.7 version, above tool is no longer supported and customer needs to configure Mtree replication configuration.
In order to successfully configure MTree replication, customer needs to perform several manual steps which we will describe on this Kb.
Following this kb lab setup details:
Source nw server: sourcenw Source DD: DDSOURCE Source DD Mtree: sourcenw Source device: FS
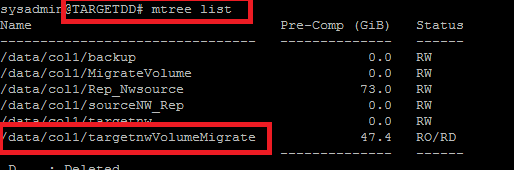
Target nw server: targetnw Target DD: TARGETDD Target DD MTree: TargetnwVolumeMigrate
Target device: TARGETDD.nwvolume.lab_FS
Target nw server: targetnw Target DD: TARGETDD Target DD MTree: TargetnwVolumeMigrate
Target device: TARGETDD.nwvolume.lab_FS
Prerequisites
- Make sure the ddboost user used in the source exists in the target DD with the same UID:
- Prepare Source Server (Create DD devices and run Backup / Clone).
- Add source server as Client in the target server and target server as client in source server:
- Create a replication pair from DD UI.
Note: While creating replication pair, do not use the target server name as target mtree name. Instead use a different name, since these mtree are read only and cannot be used in the target to create DD Device.
- Update the replicated storage unit with the same ddboost username as present in the source.
After creating a replication pair from source DD, a replicated mtree will be created on the target DD. This replicated mtree will be visible in the target DD but not it’s storge unit.
To make the replicated storage unit visible in the target DD we need to update ddboost user for the replicated storage unit using below command.
ddboost storage-unit modify <target mtree> user <ddboost user>

- Creating DD device on the target server from the replicated mtree using SMT option only:
- Give Source server, "Create Application Privileges" permission on the target server:
- Update the management (host, admin user & password) details in the source Server’s NSR DD resource (if not export action will fail with same error message):
Creating NSR DD Device Replication Resource on the source server
NSR DD Device Replication resource can be created from nsradmin visual mode or by using below command in nsradmin
Eg:
create type: NSR DD Device replication; name:RepvolTest; Source server: sourcenw; Target server: targetnw; Source DD NSR resource: DDSOURCE.nwvolume.lab; Target DD NSR resource: TARGETDD.nwvolume.lab; Source mtree: sourcenw; Target mtree: targetnwVolumeMigrate; Source device: FS; Target device: TARGETDD.nwvolume.lab_FS; Exclude indexes: No
- You can enter nsradmin visual mode from CLI by running nsradmin command, followed by v:
Running Export on the source Server
- Creating dd-replication action to perform export using nsrpolicy.
Policy and Workflow creation can be done either from UI or CLI but dd-replication creation is supported only from CLI using nsrpolicy utility.
Create Policy:
nsrpolicy policy create -p policy_name
Create Workflow:
nsrpolicy workflow create -p policy_name -w workflow_name
Create dd-replication action:
nsrpolicy action create dd-replication -p policy_name -w workflow_name -A action_name -U export -r Source_Mtree -f Target_Mtree -W source_DD -q target_DD -L "NSR_DD_Replication_name1,NSR_DD_Replication_name2..."
- Running export from cli:
nsrworkflow -p <policy name> -w <workflow name>
- Validate the export logs:
/nsr/logs/policy/….
/nsr/logs/policy/replication
/nsr/replication
/nsr/logs/policy/replication
/nsr/replication
- Run replication sync mtree command from Source DD:
replication show config
replication sync <mtree:target mtree>
Running Import on the target server
- Creating dd-replication action to perform import using nsrpolicy:
Create Policy:
nsrpolicy policy create -p policy_name
Create Workflow:
nsrpolicy workflow create -p policy_name -w workflow_name
- Create dd-replication action:
nsrpolicy action create dd-replication -p policy_name -w workflow_name -A action_name -I export -r Source_Mtree -f Target_Mtree -W source_DD -q target_DD -L "NSR_DD_Replication_name1,NSR_DD_Replication_name2..."
- Running import
nsrworkflow -p <policy name> -w <workflow name>
- 4.3 Validate the import logs
/nsr/logs/policy/….
/nsr/logs/policy/replication
/nsr/replication
- Validation in the target:
- Replicated Volume flag
mminfo -O

- Replicated Save-sets flag
mminfo -S
Further info and limitations
- A pool with same name as source volume needs ot be created on target server.
- Replicated save-sets cannot be deleted, expired.
- Replicated devices cannot be labelled
Article Properties
Article Number: 000209413
Article Type: How To
Last Modified: 04 May 2023
Version: 2
Find answers to your questions from other Dell users
Support Services
Check if your device is covered by Support Services.