PowerEdge: How to troubleshoot Network Interface Card (NIC) connectivity
Summary: The article describes how to troubleshoot network connectivity issues for network cards.
This article applies to
This article does not apply to
This article is not tied to any specific product.
Not all product versions are identified in this article.
Instructions
Note: Before we begin, understand that this list is not exhaustive and does not include standard troubleshooting steps for extended circumstances like a No POST scenario.
Consult PowerEdge: Troubleshooting a Server that Does Not Start (No Power, No POST, No Boot and No Video) if you have this problem.
Consult PowerEdge: Troubleshooting a Server that Does Not Start (No Power, No POST, No Boot and No Video) if you have this problem.
Table of Content
- Understanding the general differences between network cards
- Basic commands to test the connectivity of the network connection
- Network card troubleshooting (Flow Chart)
- Troubleshooting network cards with RJ45 ports
- Troubleshooting network cards with SFP ports
Understanding the general differences between network cards
In order to understand how to troubleshoot a network connection, one must bare in mind which physical hardware is involved.
For troubleshooting purposes, we differentiate here between cards that are relatively short-range cards with RJ45 ports and fiber-based network cards for potentially longer-range connections.
Note: There are multiple types of fiber-based network cards. For this article we look at network cards with SFP ports, however the troubleshooting is in part similar so might at least partly apply.
Cards with RJ45 port details and additional information:
- Short-range RJ45 based cards are relatively simple. All parts are fixed, and the LEDs are directly visible on the ports.
- The same technology is used for all onboard cards including the integrated Dell Remote Access Card (iDRAC) interface if present.
- All LEDs are found near the top of the RJ45 connector. The orientation of the port can differ.
- The left LED indicates the presence and speed of the network connection.
- The right LED indicates power and flickers with activity on the connection.
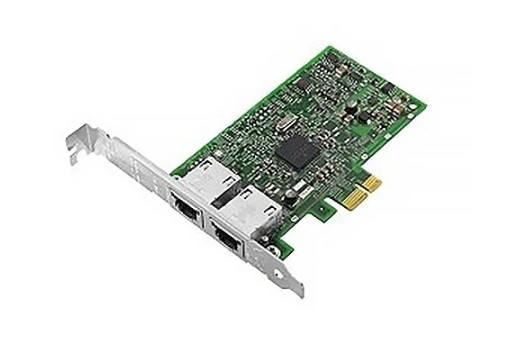
Figure 1: Image of a network card with RJ45 ports (example: Broadcom 57414 Dual Port 10/25GbE SFP28 Adapter, PCIe Full Height)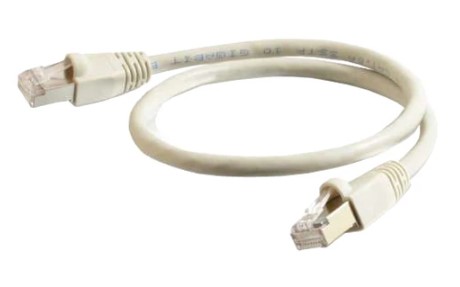
Figure 2: Image of a network patch cable (example: C2G Category 6a Network Cable)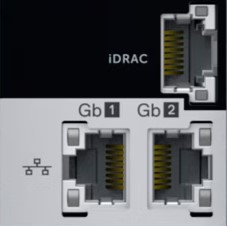
Figure 3: Image of three network RJ45 ports (example: Dell PowerEdge T440 Onboard NICs and dedicated iDRAC port)
Cards with SFP port details and additional information:
- Network cards with SFP ports cannot be connected to the network without the use of a Direct Attachment Cable (DAC) or an SFP module. The difference is that DAC cables come for SFP port connectors fixed and are short-range copper-based cables.
- SFP modules use fiber cables and are intended for different, mostly longer, ranges.
Note: For example, SX connectors have typical ranges from 2 meters up to 500 meters (fiber cable dependent) while LX connectors have typical ranges up to 10 kilometers.
- SFP clip in on the bottom of the port, LEDs are typically found to the right (or below depending on orientation) of the port.

Figure 4: Image of a fiber network card with SFP ports (example: Intel X710 Dual Port 10 GbE SFP+ Adapter, PCIe Low Profile)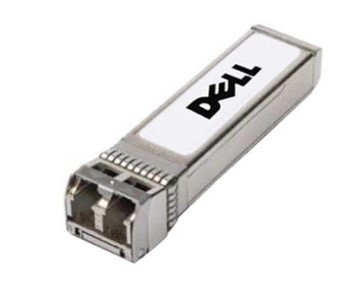
Figure 5: Image of a fiber SFP module (example: Dell - SFP+ transceiver module)
Figure 6: Image of a DAC Twinax network cable (example: Dell Networking Cable, SFP+ to SFP+, 10 GbE, Passive Copper Twinax Direct Attach)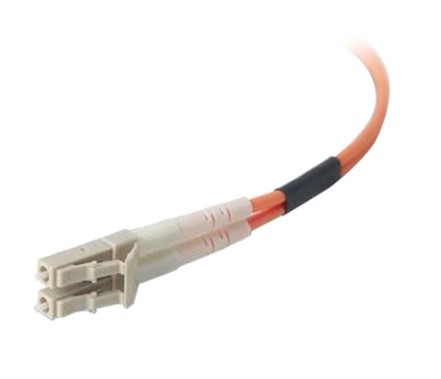
Figure 7: Image of fiber optic LC-LC cable (example: Dell Networking Multi-Mode, LC - LC Fiber Optic Cable)
Basic commands to test the connectivity of the network connection
| Command | Test |
|---|---|
Ping 127.0.0.1 [Loopback address] |
Tests the OS TCP/IP stack, successful return indicates that it is functional. |
Ping <server IP address> |
Tests NIC hardware, connectivity, and latency, successful return indicates function, |
Netsh int ip reset C:\resetlog.txt |
Windows: Resets TCP/IP stack |
Netsh winsock reset |
Windows: Resets Winsock |
ncpa.cpl |
Windows: Network Control Panel Applet lists network connections. |
Ipconfig /all |
Windows: Lists network Interfaces, IPs, MACs, gateway, subnet mask, DNS |
ip a | ip link (old: ifconfig) |
Linux shell: Lists network details |
Ipconfig /release |
Windows: Release computer's current IP address (DHCP assigned) |
Ipconfig /renew |
Windows: Renew computer DHCP IP address. |
(sudo) dhclient -r |
Linux: Release the computer's current IP address (DHCP assigned) |
(sudo) dhclient |
Linux: Renew computer's IP address (DHCP) |
The above commands can be used to test different aspects of the network function. The first Ping test of the loop back address lets you test if the issue is OS or Driver related.
Note: Not all commands might be applicable to your circumstances or setup.
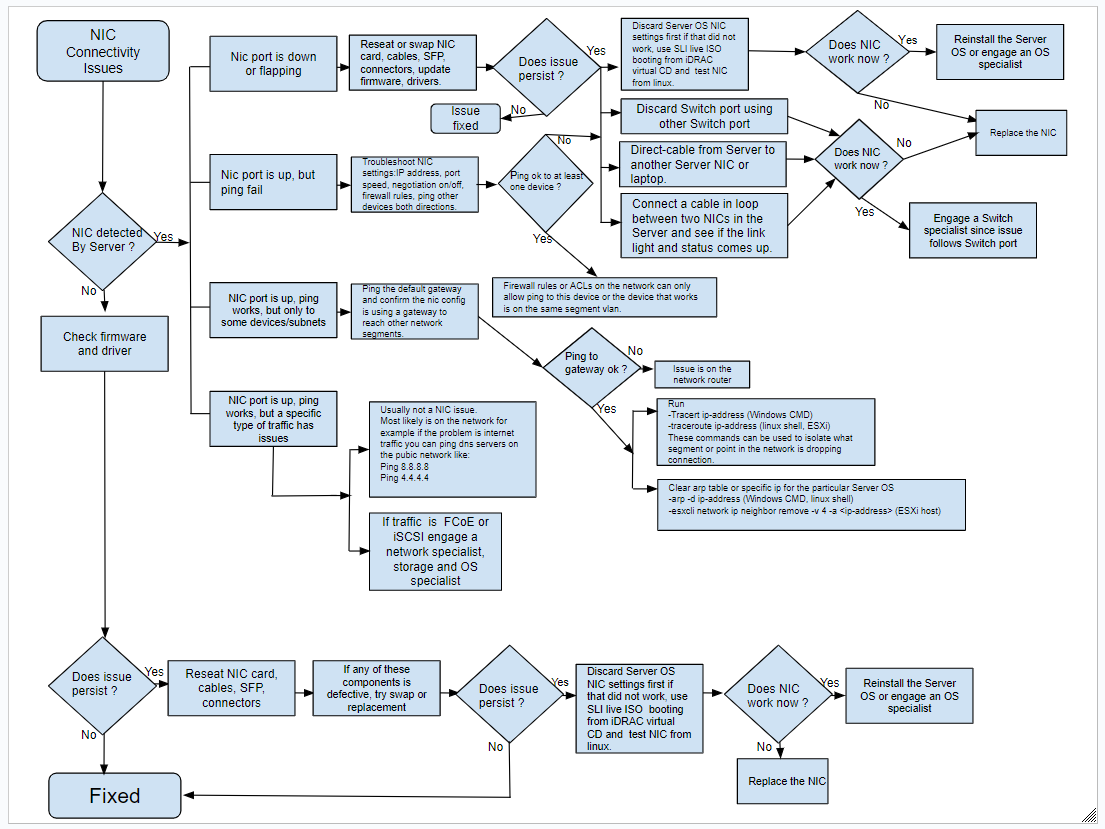
Network card troubleshooting (Flow Chart):
Troubleshooting network cards with RJ45 ports
1. Preparation work
- In order to troubleshoot here, ensure first that the TCP/IP stack is working as intended (Command above).
- Once we are certain that the loopback is working as intended, check next if the server adapter in question has a valid IP address (expected address if fixed) by using the
ipconfig /all or ip a | ip link (old: ifconfig)command. - With a valid IP address on the expected interface in the OS, run the
ping <server IP address>command and see if the outcome indicates a potential network failure (no return, variable latency in returns) as expected. - Once confirmed, move on to 2.
2. After confirming that the network connection potentially has an issue, inspect the physical port the network interface is bound to.
- Is the port accessible?
- Does the network cable sit properly in the port?
- Does it have any LED lid?
- If the port is accessible, the cable is installed correctly and the LEDs are lid (or blinking in case of the activity LED)
- This port is active and working. There is likely no hardware fault.
- We suggest looking into the wider network (switches, routers, defined routes, spanning tree protocol) or potentially higher to the application layer using the network connection established by the OS.
- It is also possible that you are looking at the wrong port, so a check if the port is the port in question is in order.
- Given that you have seen an issue during the preparation work, consider reseating the cable on both ends (NIC and switch port). This triggers a renegotiation for connection and speed.
- This port is active and working. There is likely no hardware fault.
- If the port is accessible and the cable is installed correctly, but no LEDs are lid:
- It is possible that the cable is open, meaning the other end of the cable has not been connected to a network port
- It is possible that the switch port is not working, try to connect another free port and make sure the port is administratively up in the switch OS.
- It is possible that the network card is faulty. If the card has multiple ports, check the status of the other ports to confirm their status as well.
- Here the likely scenario is that the card is faulty if all or sets of ports have no LEDs lid while being connected. A test of the interface as part of the preparation work for the interface likely has found NO interface to use in this case.
- If the port is not accessible and the cable could not be installed, the issue could be external to the machine or be the chassis of the machine.
- If there are any obstructions to the port, ensure that they are removed so the port can be used.
- In case the chassis causes the problem, take a picture of the damage and contact the Dell support team for further evaluation.
- If the port is accessible and the cable could not be or has not been installed correctly
- Investigate if you can install the cable correctly and see if the LEDs light up within seconds of making the connection
- If you can install the cable and the LEDs light up, rerun the preparation tests and see if now all is working as intended.
- If you cannot install the cable correctly, investigate the cable and the port.
- If the port and cable are OK physically, check the other end of the cable and make sure it is plugged in. If it is, change the cable and test again.
- If the cable plug is broken or the cable torn, replace the cable and try again.
- If the port is broken, take a picture of the damage and contact Dell support for further investigation and help.
- Investigate if you can install the cable correctly and see if the LEDs light up within seconds of making the connection
Troubleshooting network cards with SFP ports
- Preparation work
- In order to troubleshoot here, ensure first that the TCP/IP stack is working as intended (Command above).
- Once we are certain that the loopback is working as intended, check next if the server adapter in question has a valid IP address (expected address if fixed) by using the
ipconfig /all or ip a | ip link (old: ifconfig)command. - With a valid IP address on the expected interface in the OS, run the
ping <server IP address>command and see if the outcome indicates a potential network failure (no return, variable latency in returns) as expected. - Once confirmed, move on to 2.
- After confirming that the network connection potentially has an issue, inspect the physical port the network interface is bound to.
- Is an SFP installed?
- Is a fiber cable connected?
- Do we see LEDs lid next to the port?
- If the SFP and fiber cable are installed and LEDs are lid, consult with your networking team to see if they can run more advanced commands to test the SFP power output.
- If the SFP is installed and the fiber cable is missing, investigate which connection is missing and install the cable.
- If the SFP and fiber cable are not installed, make sure you are using a compatible SFP or DAC and if needed cable to connect the port.
- If the SFP is installed and the fiber cable is installed, but the LEDs are not lid, check with your networking team if the port on the switch end has been turned on (the port has been enabled (UP)).
- If the connection has never worked and this is the first time this was tested, ensure that you are using compatible SFPs; not all SFPs work with all server adapters. Contact our support team if you are unsure.
Additional Information
Other articles that might be helpful:
PowerEdge: Network Interface Card (NIC) Testing with Support Live Image (SLI)
If you have an issue with any other PCIe card, you find troubleshooting details here: PowerEdge: Troubleshooting PCIe device detection issues
If you are not sure, if the NIC is even compatible with your system, follow this article:
Affected Products
Network Adapters, C Series, HS Series, Rack Servers, Tower Servers, XE Servers, XR ServersArticle Properties
Article Number: 000227983
Article Type: How To
Last Modified: 20 Aug 2025
Version: 7
Find answers to your questions from other Dell users
Support Services
Check if your device is covered by Support Services.