VxRail: How to Deploy the VSAN Witness appliance
Summary: This explains how to get and deploy the vSAN virtual Witness Appliance (OVA).
This article applies to
This article does not apply to
This article is not tied to any specific product.
Not all product versions are identified in this article.
Instructions
How to download VMware vSAN Witness Appliance from the Broadcom portal
- Log in to your Account: https://support.broadcom.com/contact-support.html
- On the left side, select "My Downloads"
- Select "VMware Cloud Foundation" on the upper right corner (besides your Account Name)
- In the Product Selection, select "VMware vSAN"
- Select the intended version.
- Select the section "Drivers & Tools"
- Look for the wanted Version of "VMware vSAN Witness Appliance"
- Select the arrow on the right side to expand the entry.
- Download the wanted Version.
Deploy the Witness appliance.
To deploy the downloaded OVF Template login to your vSphere Client and follow the steps.
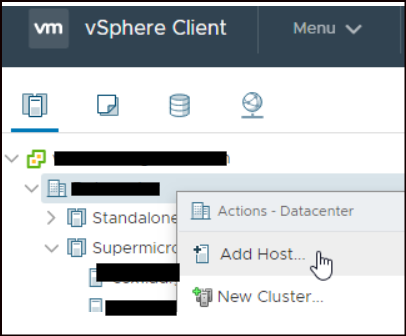
- Right-click your Datacenter and select Deploy OVF Template.

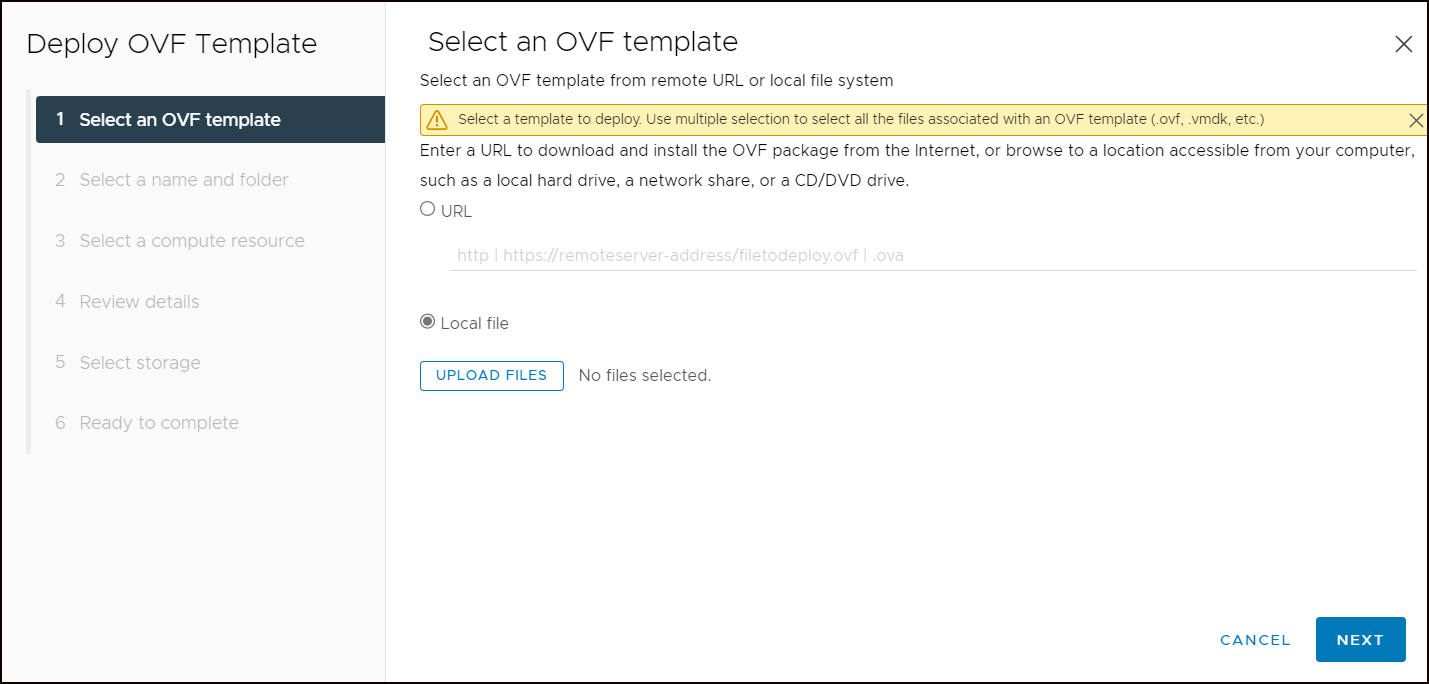
- Select the Local file, then select the downloaded OVA file, and click Next
- Give your new appliance a name and select a folder where the appliance should be placed. Example: crop the build number but keep the main, and update version in name so you can later identify the "old" and "new" appliance.

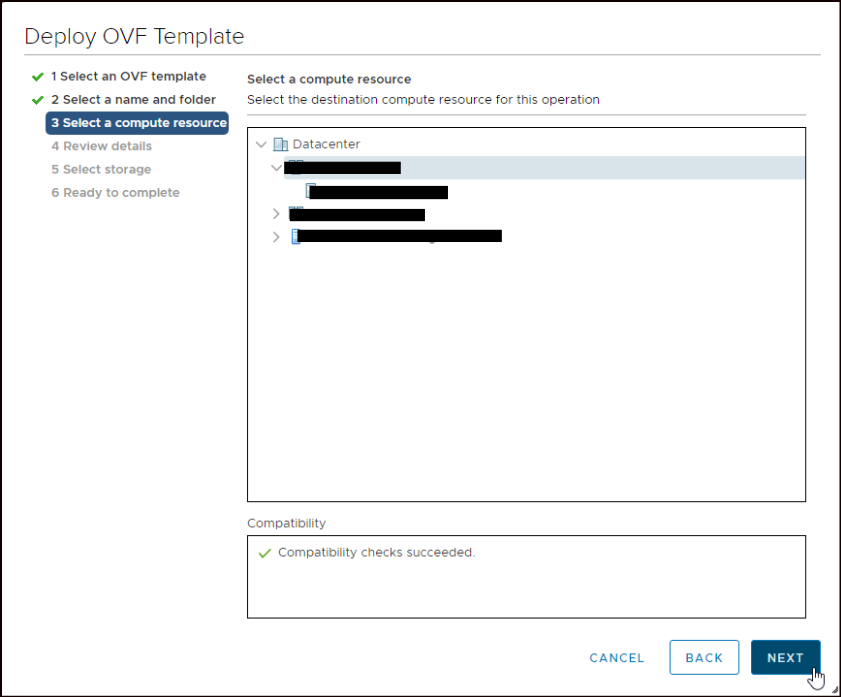
- Choose on which compute resource the Witness should run and click Next (in my case a standalone ESXi)
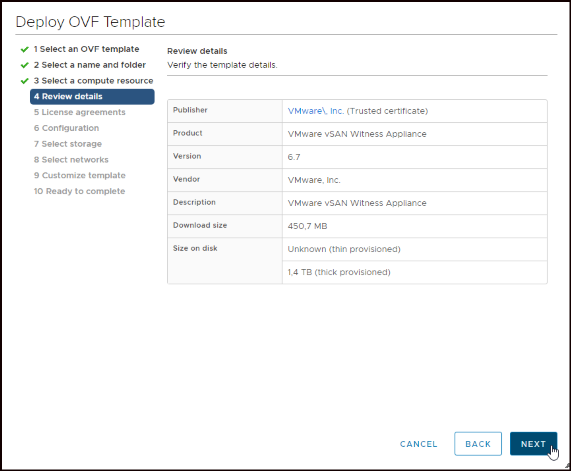
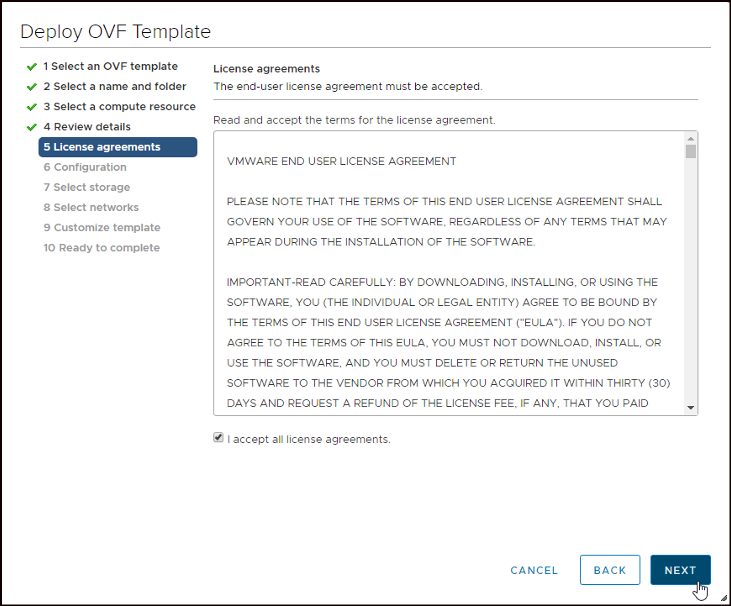
- Review the details and click Next. Accept all license agreements and click also on Next.
- Now you have to choose how many VMs are inside your vSAN. This affects the size of the Witness host. Where the Tiny version runs with 2 CPU, 8 GB vRAM and about 40 GB VMDK the Large version runs with 2 vCPU, 32 GB vRAM and over 1 TB VMDK.
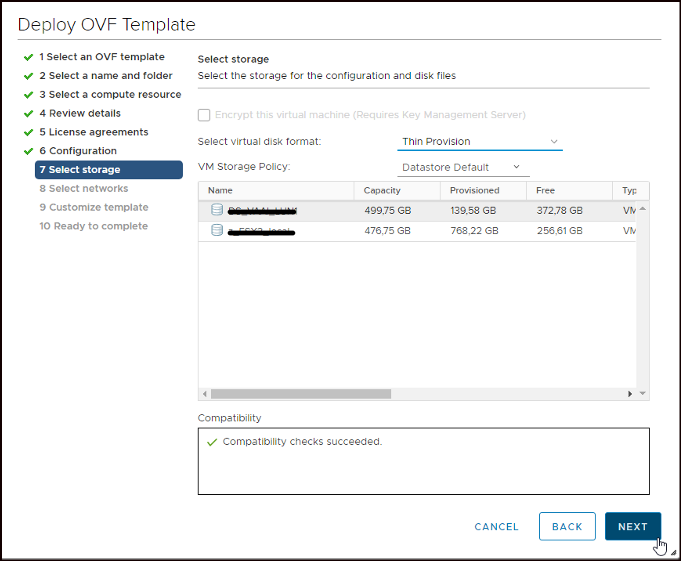
- You can choose Thin Provision to save space.

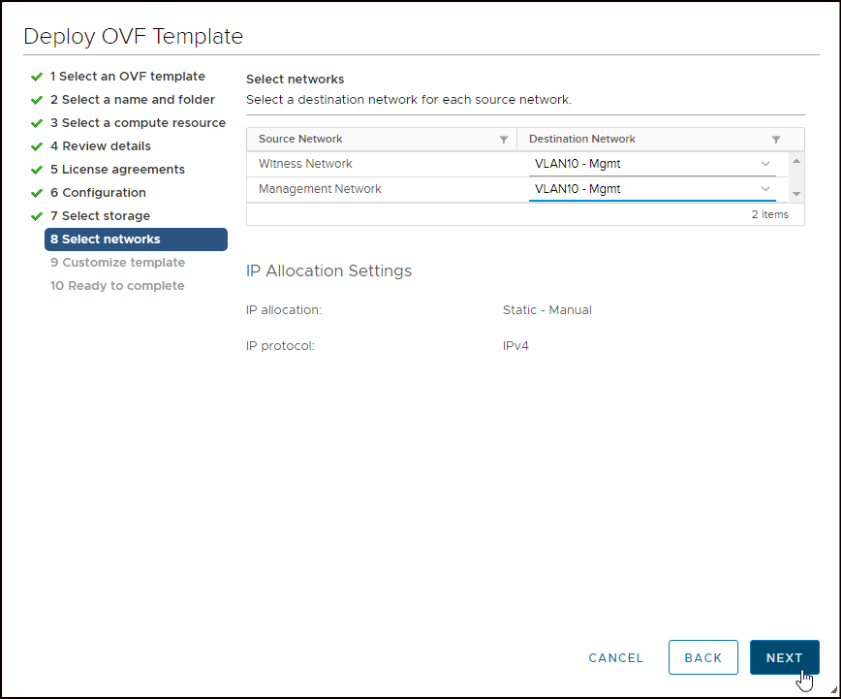
- After that, you have to select the networks for the VMkernel ports. In my case, both are running in the same VLAN. In a production environment: The Management and vSAN traffic runs on different networks.
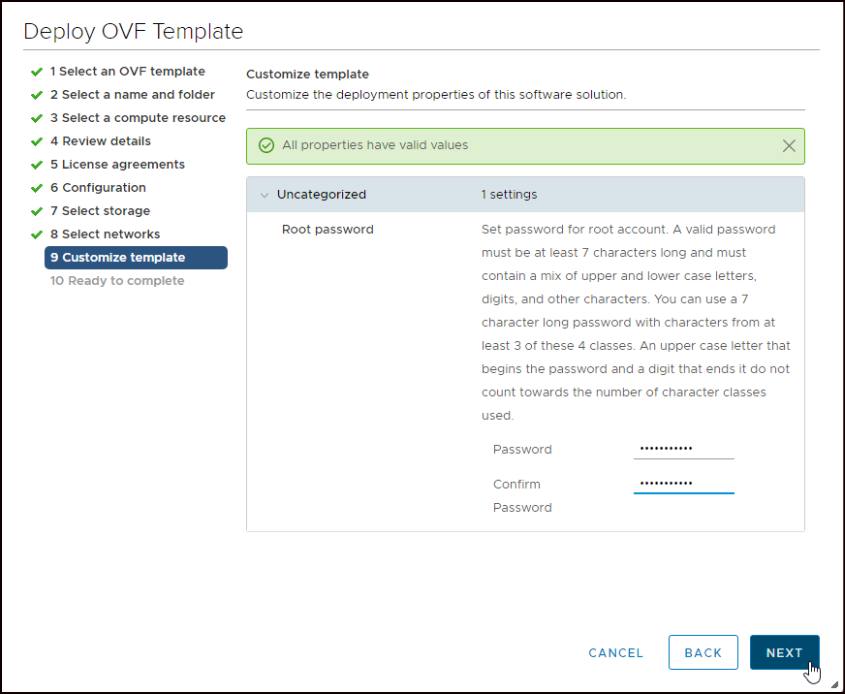
- At least set the root password for the appliance
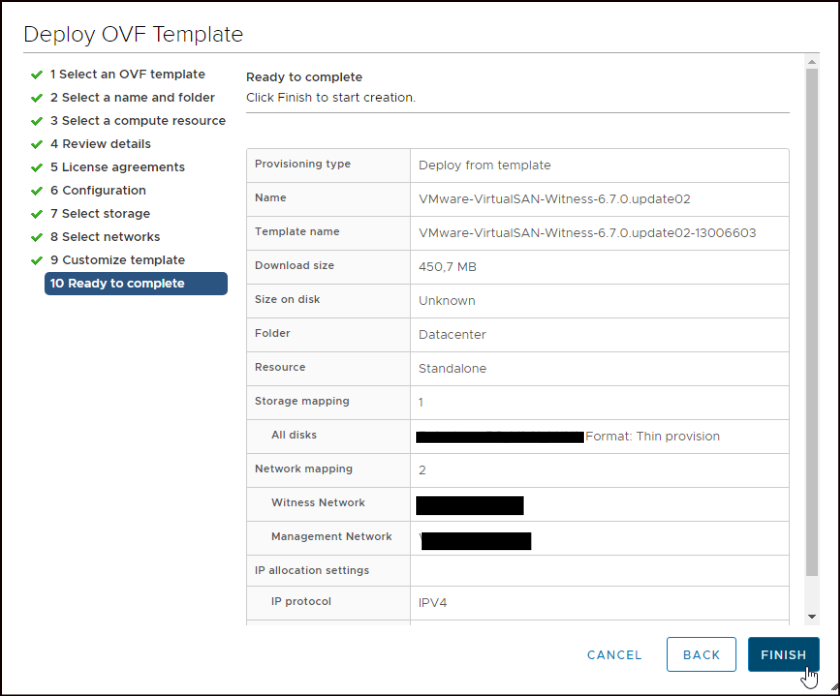
- Review your settings and click Finish
Configure and add the Witness Host appliance.
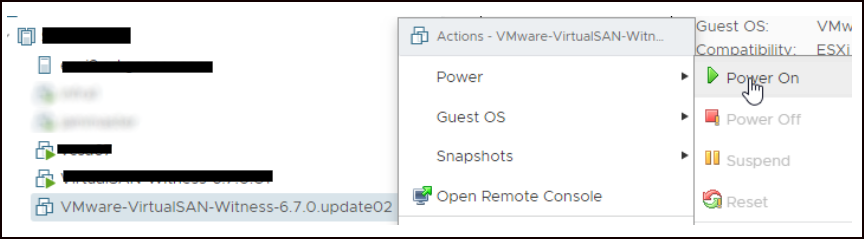
- After the Witness deployment is done, you have to power it on.
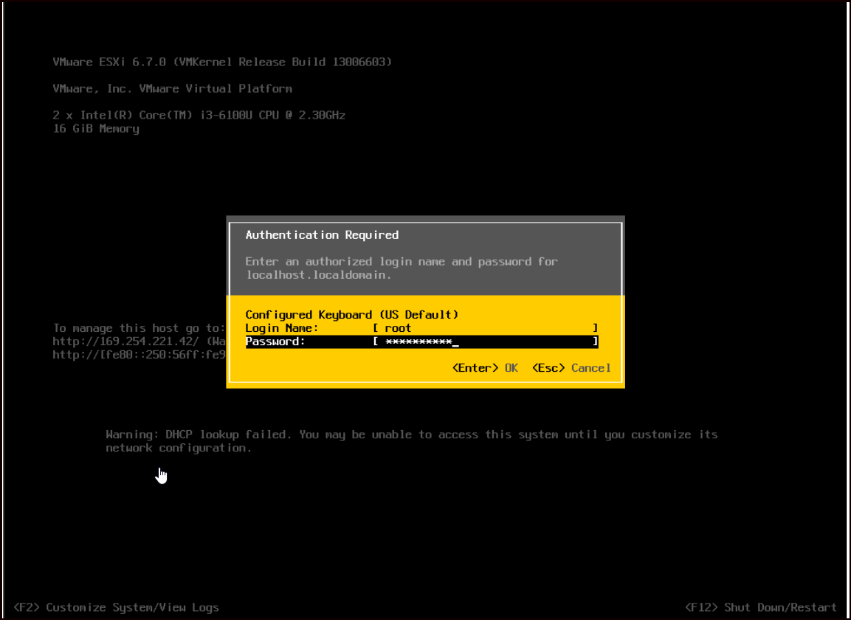
- Maybe you have noticed that there was no point setting the IP of the appliance in the OVF configuration. After the appliance is up, you can see that it is configured to obtain IP by DHCP.

- Login with root and your password after pressing F2
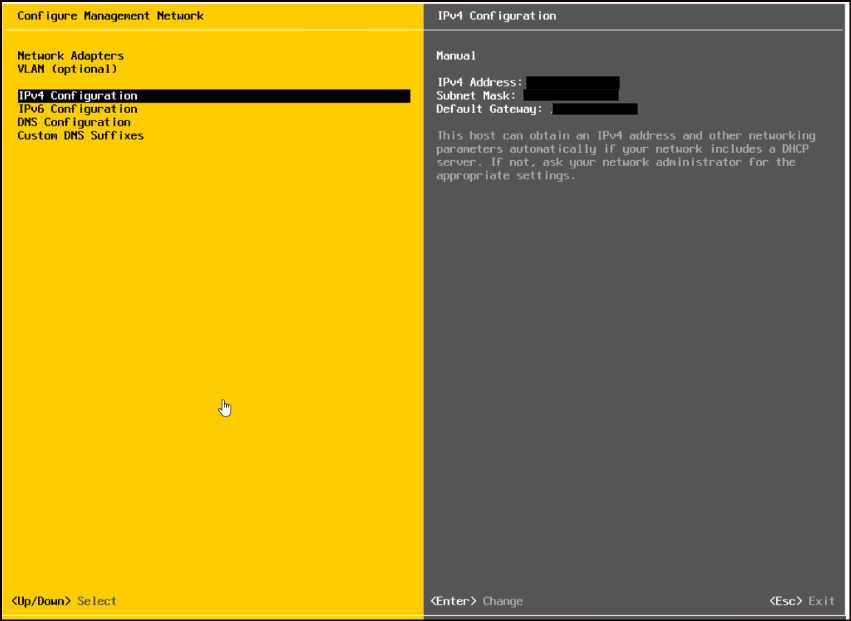
- Select Configure Management Network and configure settings according to your network (VLAN; IPv4; DNS;…)
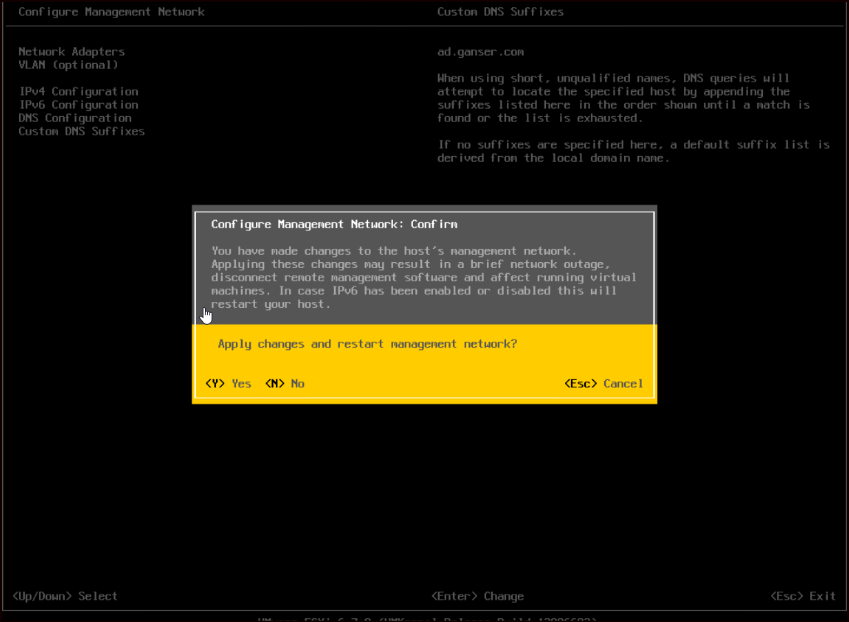
- After you have done all setting changes, the management network must be restarted.
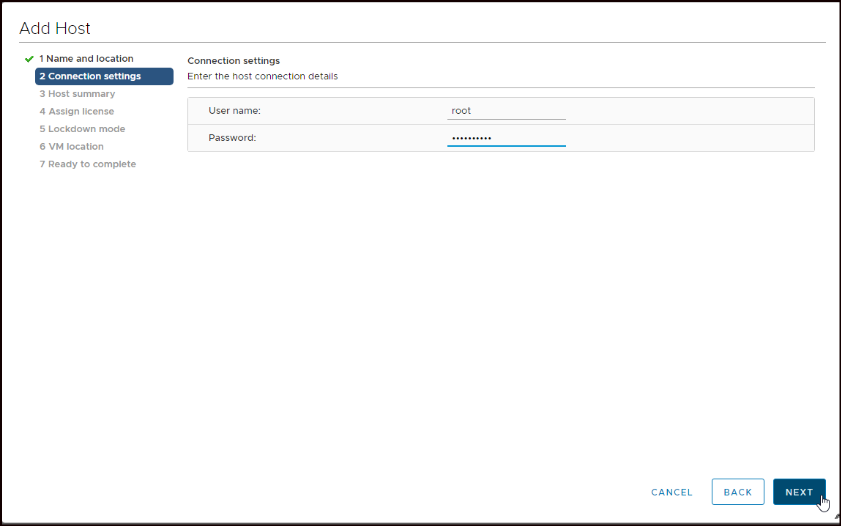
- Switch to the vSphere Client and add the Witness Host to your Datacenter
- Insert configured Witness IP (or FQDN if you have added it to your DNS)

- Type in your root user and password
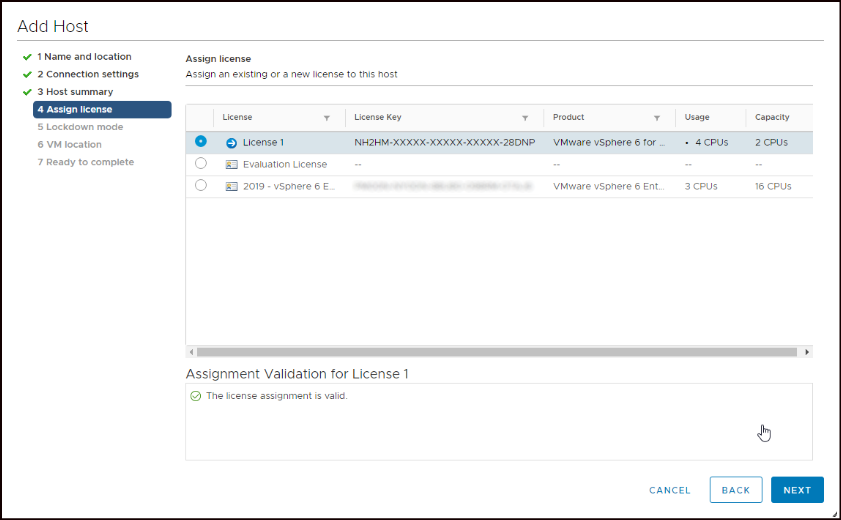
- The vSAN Witness Host has its own license; the multiple Xs are expected.
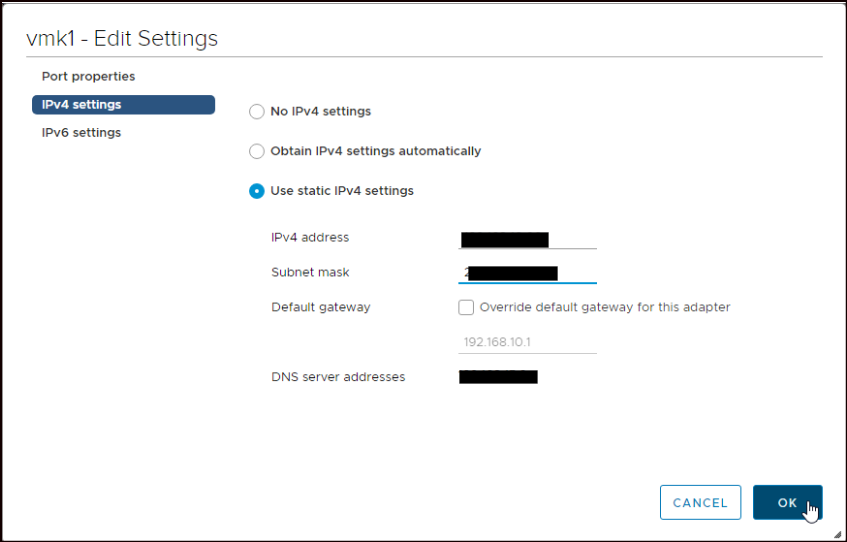
- After adding the Witness Host to vCenter, you have to edit the VMkernel adapter for the witnessPG
- Select the (blue) Witness Host and go to Configure > Networking > VMkernel adapters. Select vmk1 and click Edit
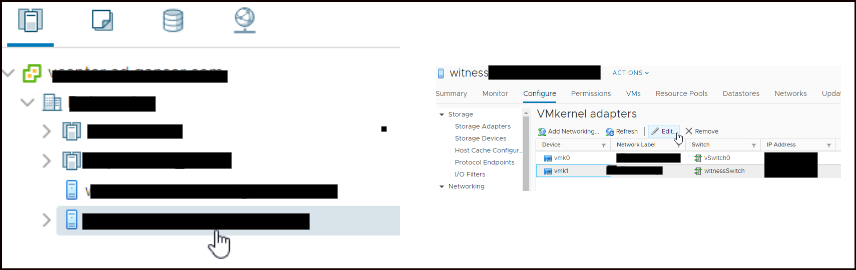
- Type in the IP for vSAN traffic and click OK
Replace the Witness Host.
After all preparations are done, you can replace the "old" Witness Host with the new one.
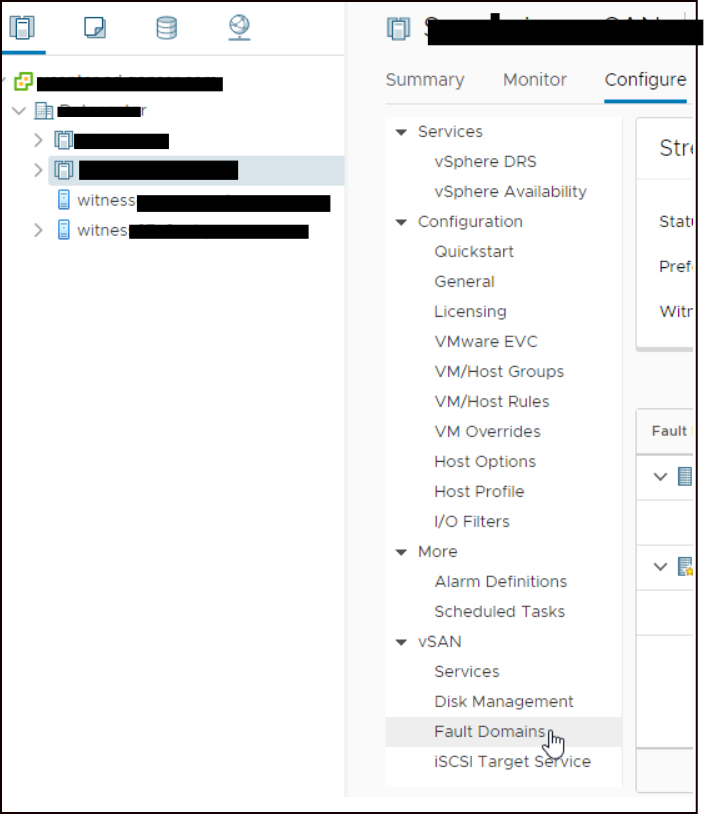
- Select your vSAN cluster where you want to replace the Witness
- Go to Configure and select Fault Domains in the vSAN section
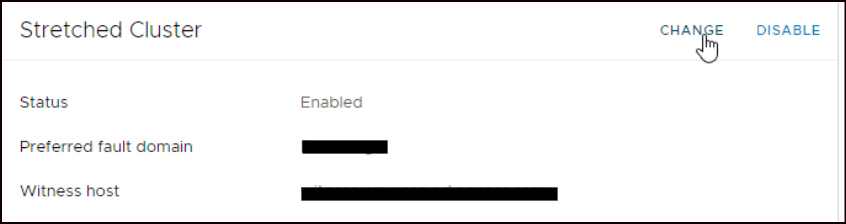
- Click Change in the Stretched Cluster configuration
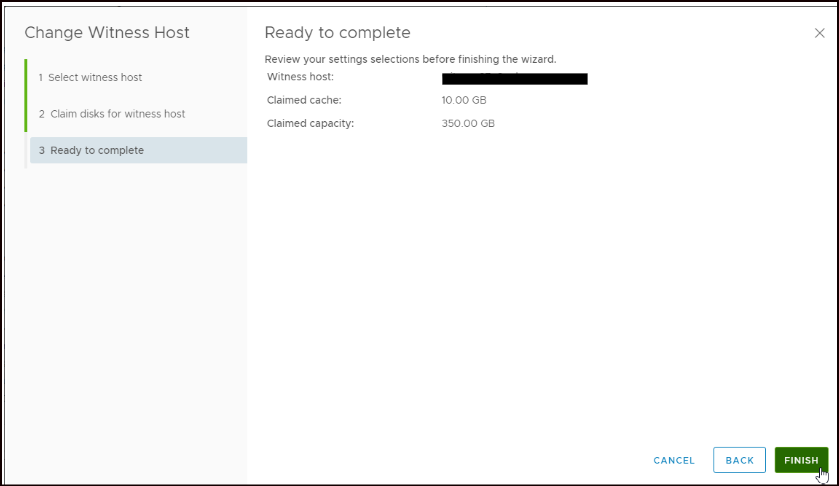
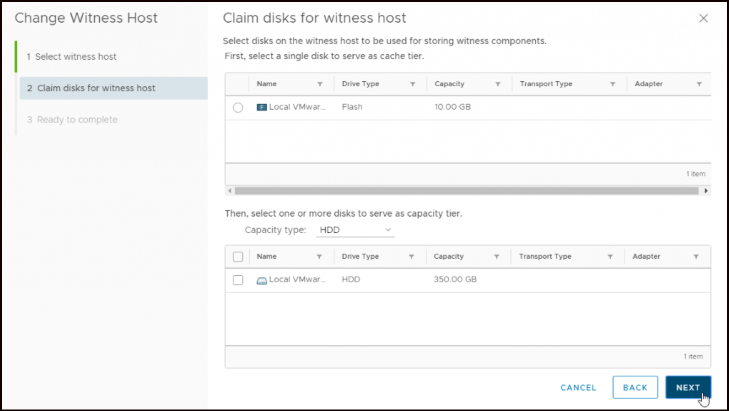
- Three easy steps are needed
- Select the new Witness Host and click Next after the checks succeeded.
- Select the disks (simple because there is only one disk per tier)
- Click Finish to start the replacement.

Check the Health.
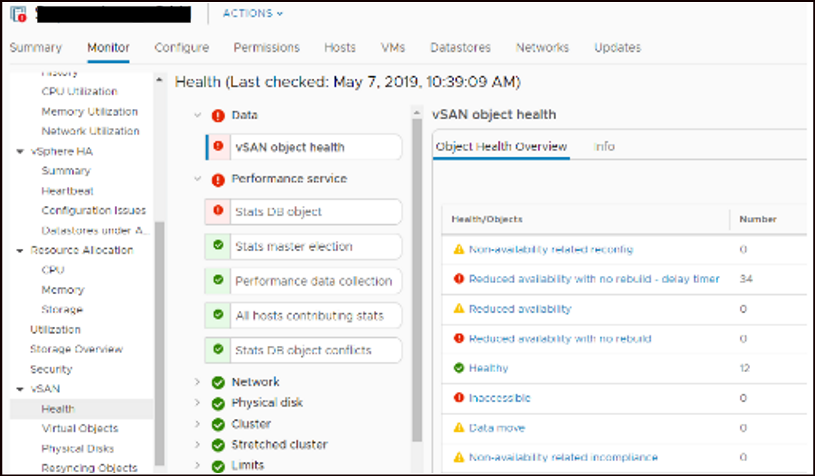
The Replacement of the Witness Host should be finished in seconds. But vSAN can throw a health alert.
- Go to your vSAN Cluster > Monitor > vSAN > Health
- You see many objects with Reduced availability with no rebuild….

- To enforce the rebuild process, click Repair Objects Immediately and wait a moment
- After a refresh, the object health should improve. After a period of time, depending on your object count, the rebuild completes.

- After the rebuild is done, you can shut down the "old" Witness Host.
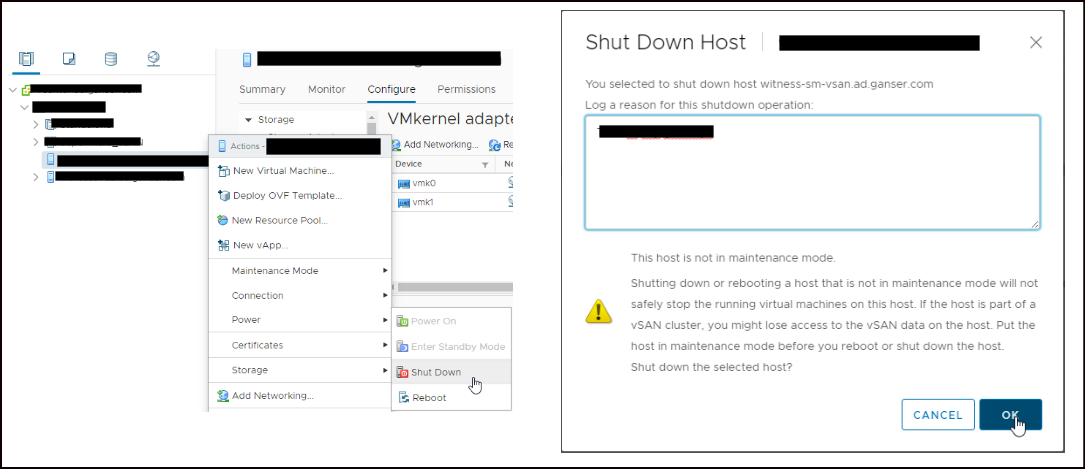
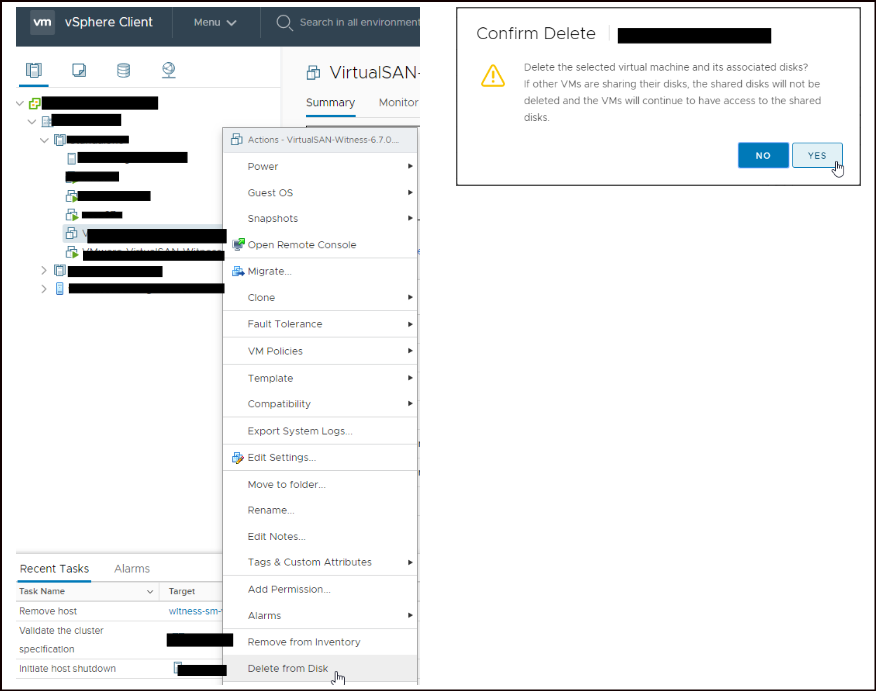
- After shutdown is complete, you can remove the host from inventory and delete the VM

Affected Products
PowerFlex rack, VxRail, VxRail Appliance Series, VxRail SoftwareArticle Properties
Article Number: 000239391
Article Type: How To
Last Modified: 29 Oct 2024
Version: 1
Find answers to your questions from other Dell users
Support Services
Check if your device is covered by Support Services.