How to Install VMware Carbon Black Cloud Endpoint
Riepilogo: Learn about how to install the VMware Carbon Black Cloud Endpoint sensor on a computer using these instructions for Windows, Mac, and Linux.
Questo articolo si applica a
Questo articolo non si applica a
Questo articolo non è legato a un prodotto specifico.
Non tutte le versioni del prodotto sono identificate in questo articolo.
Istruzioni
This article discusses the installation process for the VMware Carbon Black Cloud Endpoint sensor.
Affected Products:
- VMware Carbon Black Cloud Endpoint
Affected Operating Systems:
- Windows
- Mac
- Linux
Note: Before installation, ensure that system requirements are validated. For more information, refer to VMware Carbon Black Cloud Endpoint Sensor System Requirements.
VMware Carbon Black Onboarding Part 2: System Requirements, Download, and Install
Duration: 03:00
Closed captions: Available in multiple languages
For steps on installing VMware Carbon Black Cloud Endpoint, click on Windows, Mac, or Linux.
Windows
VMware Carbon Black Cloud Endpoint can be installed on Windows through the:
Click the preferred method for more information.
UI
- Double-click
installer_vista_win7_win8_<BIT>_<VERSION>.msi.
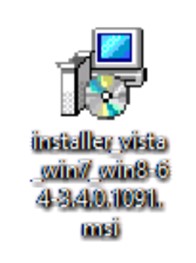 Note:
Note:<BIT>= 32 or 64-bit- The example screenshots use the 64-bit installer.
<VERSION>= Version of the VMware Carbon Black Cloud Endpoint sensor- The
<VERSION>in the screenshot may differ in your environment.
- The
- To obtain the installer, refer to How to Download the VMware Carbon Black Cloud Endpoint Sensor.
- In the Setup UI, click Next.
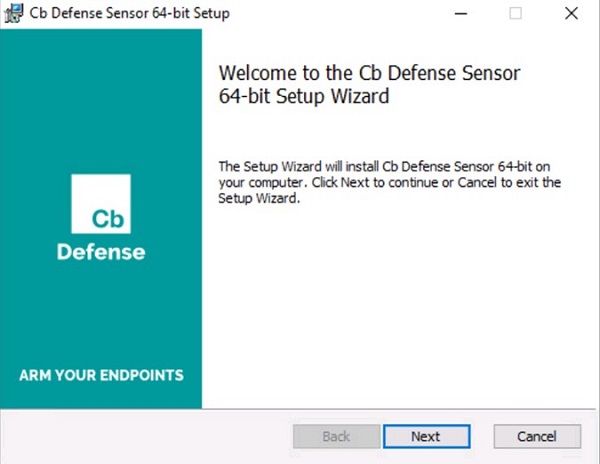
- Accept the terms in the License Agreement and then click Next.
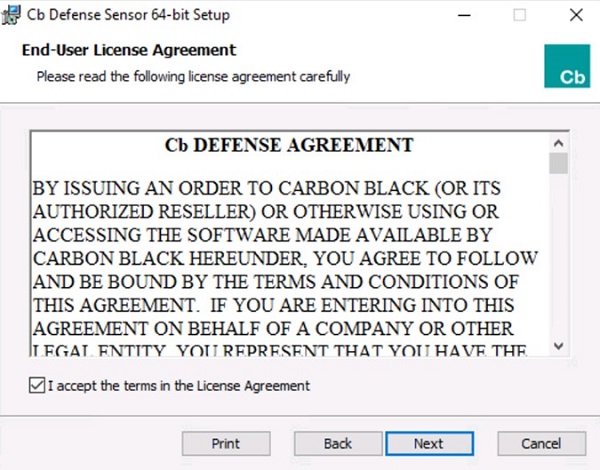
- Populate the activation code and then click Install.
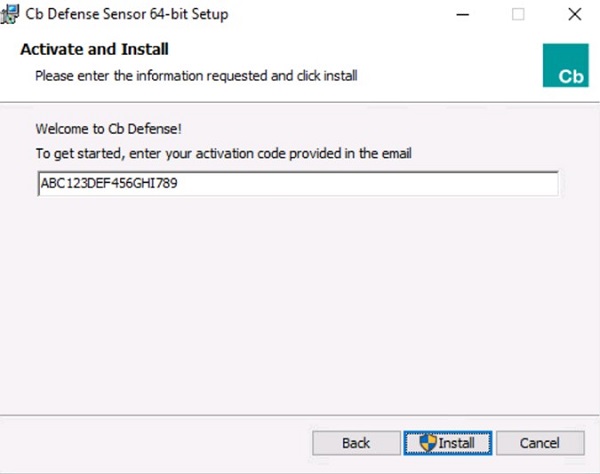 Note:
Note:- For more information, refer to How to Obtain the VMware Carbon Black Cloud Endpoint Activation Code.
- The activation code in the example will differ in your environment.
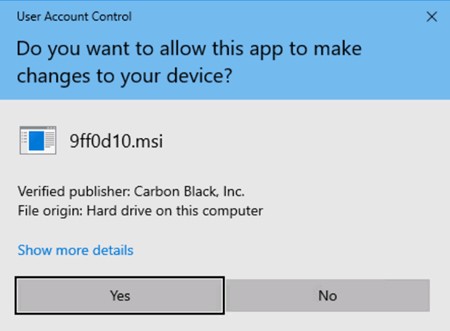
- If User Account Control (UAC) is enabled, click Yes. Otherwise, go to Step 6.
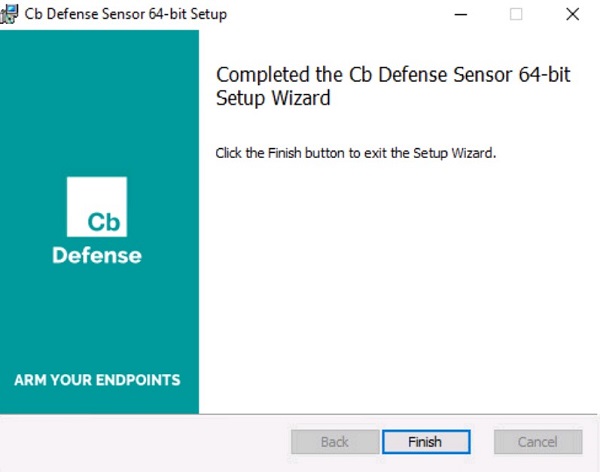
- Click Finish.
CLI
Note:
- CLI installation requires:
- The VMware Carbon Black Cloud company code. For more information, refer to How to Obtain the VMware Carbon Black Cloud Endpoint Company Code.
- Access to the installer. For more information, refer to How to Download the VMware Carbon Black Cloud Endpoint Sensor.
| Switch | Required | Purpose |
|---|---|---|
/i |
Yes | Installs the product. |
/passive |
No | The installer shows a minimal UI with no prompts. |
/q |
Yes | Suppresses UI and prompts. |
/L* |
No | Creates an MSI install log file. |
/L*vx |
No | Creates a verbose MSI install log file. This is recommended over /L* for troubleshooting. |
| Parameter | Value | Required | Purpose |
|---|---|---|---|
AUTO_UPDATE= |
0 | No | Disables auto update. |
AUTO_UPDATE= |
1 (Default) | No | Enables auto update from VMware Carbon Black Cloud. |
BACKGROUND_SCAN= |
0 | No | Disables background scan from running on a device. |
BACKGROUND_SCAN= |
1 (Default) | No | Enables background scan from running on a device. |
BASE_IMAGE= |
0 (Default) | No | Default operation for basic installation. |
BASE_IMAGE= |
1 | No | Used to create base images for cloning. This option is not supported for VDI. |
BYPASS= |
0 (Default) | No | Sends active communication to the cloud. |
BYPASS= |
1 | No | Sets the sensor in bypass mode. Bypass mode does not send any data to the cloud. Used for interoperability testing. |
CBLR_KILL= |
0 (Default) | No | Enables Live Response functionality. |
CBLR_KILL= |
1 | No | Disables Live Response functionality. |
CLI_USERS= |
See Examples | No | Identifies the activation code that is associated with the hostname. Only used with Directory User Integration. |
COMPANY_CODE= |
See Examples | Yes | Ties the sensor to the VMware Carbon Black Cloud console. Enclose the code in double quotation marks. |
CONNECT_LIMIT= |
See Examples | No | Limits the number of connections per hour. Default is no limit. |
DELAY_SIG_DOWNLOAD= |
0 | No | Immediately download signature definitions. |
DELAY_SIG_DOWNLOAD= |
1 (Default) | No | Delay signature definition downloads. Recommended to use when in production. |
FILE_UPLOAD_LIMIT= |
See Examples | No | 4-byte integer representing MB. Example: A value of 3 is a limit of 3*1024*1024 bytes. The default value is 5. |
GROUP_NAME= |
See Examples | No | Method to assign the device to a specific policy aside from automatic assignment. Enclose with double quotes if the policy name includes spaces. |
HIDE_COMMAND_LINES= |
0 (Default) | No | Shows command-line inputs. |
HIDE_COMMAND_LINES= |
1 | No | Obfuscates command-line inputs. |
LAST_ATTEMPT_PROXY_SERVER= |
See Examples | No | Sensor attempts cloud access by using this value as a failover when all other methods fail. |
LEARNING_MODE= |
See Examples | No | Value is the number of hours after sensor install to limit event types. This parameter reduces the load on the backend and reduces reporting. |
PROXY_PASSWD= |
See Examples | No | Password to use with PROXY_USER. |
PROXY_SERVER= |
See Examples | No | IP Address or FQDN for Proxy Server. Format: Server.domain.com:PortNumber |
PROXY_USER= |
See Examples | No | User credential for PROXY_SERVER. |
QUEUE_SIZE= |
See Examples | No | Limits the event backlog in MB. The default value is 100 MB. This option does not include SSL overhead. |
RATE_LIMIT= |
See Examples | No | Limits the amount of data transfer (KB) per hour. Default is no limit. |
VDI= |
0 (Default) | No | Standard deployment method. |
VDI= |
1 | No | Configured required for VDI deployments. |
USER_EMAIL= |
See Examples | No | Email address that is tied to a specific sensor. |
CLI Installation Examples:
Note: The examples may differ in your environment.
Example #1
msiexec /q /i installer_vista_win7_win8-64-3.4.0.1091.msi /L* COMPANY_CODE="ABCD1234#EFGH56789@IJKLM" AUTO_UPDATE=0 GROUP_NAME=Accounting BASE_IMAGE=1Example #1 contains:
- Installer =
installer_vista_win7_win8-64-3.4.0.1091.msi - Bit = 64 bit
- Version=3.4.0.1091
- MSI Logging = Yes
- MSI Location=
%Temp%- Default value since not defined
- Company Code = ABCD1234#EFGH56789@IJKLM
- Auto update enabled= No
- Base Image = Yes
- Bypass mode = No
- Default value since not defined
- Group assigned = Accounting
- Proxy Server = None
- Default value since not defined
- Live Response functionality= Enabled
- Default value since not defined
- Learning mode= No
- Default value since not defined
- Rate limit= No limit
- Default value since not defined
- File upload limit= 5.2 MB
- Default value since not defined
Example #2
msiexec /q /i installer_vista_win7_win8-32-3.4.0.1091.msi /L*vx "C:\CBInstall.txt" COMPANY_CODE="ABCD1234#EFGH56789@IJKLM" BYPASS=1 PROXY_Server="server.domain.com" PROXY_USER=example@domain.com PROXY_PASSWD="P@55w0rd" LEARNING_MODE=48 CBLR_KILL=1 RATE_LIMIT=2088Example #2 contains:
- Installer =
installer_vista_win7_win8-64-3.4.0.1091.msi - Bit = 64 bit
- Version=3.4.0.1091
- MSI Logging = Yes with verbosity enabled
- MSI Location=
C:\CBInstall.txt - Company Code = ABCD1234#EFGH56789@IJKLM
- Auto update enabled= Yes
- Default value since not defined
- Base Image = No
- Default value since not defined
- Bypass mode = No
- Default value since not defined
- Group assigned = None specified.
- Default value since not defined
- Device is assigned based on auto-assignment cloud settings.
- Proxy server = server.domain.com
- Proxy user = example@domain.com
- Proxy user password = P@55w0rd
- Live Response functionality= Disabled
- Learning Mode= 48 hours
- Rate limit= 2088 KB (2 MB) /per hour.
- File upload limit= 5.2 MB
- Default value since not defined
Mac
- Double-click
confer_installer_mac-<VERSION>.dmg.
 Note:
Note:<VERSION>= Version of the VMware Carbon Black Cloud Endpoint sensor- The version in the screenshot may differ in your environment.
- To obtain the disk image, refer to How to Download the VMware Carbon Black Cloud Endpoint Sensor.
- Double-click
CbDefenseInstall.pkg.

- Click Continue.
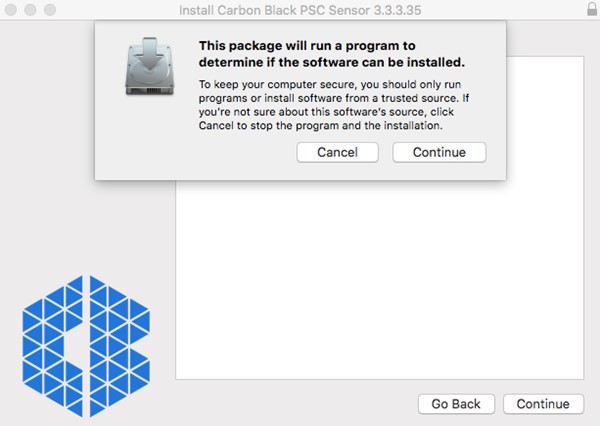
- Click Continue.
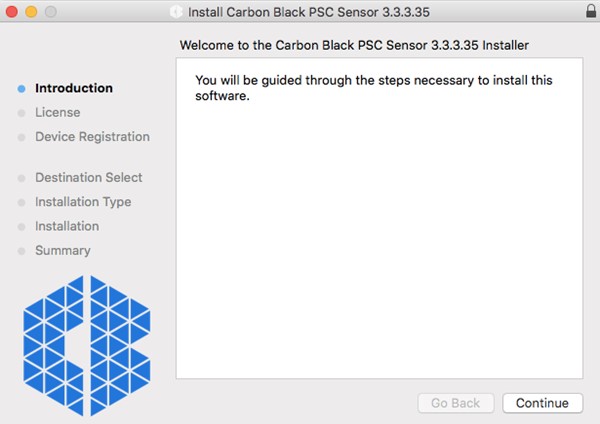
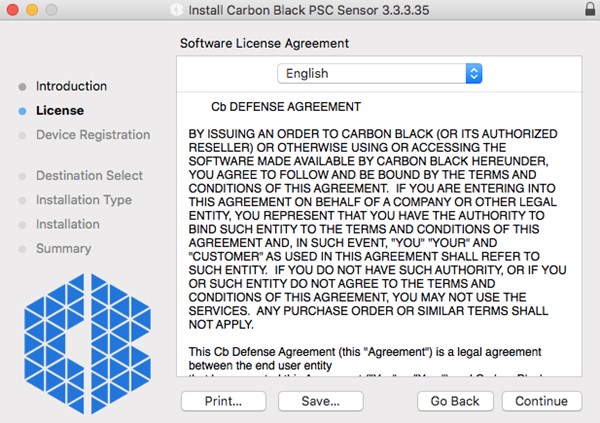
- Review the end user license agreement (EULA) and then click Continue.
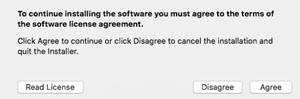
- Agree to the EULA.
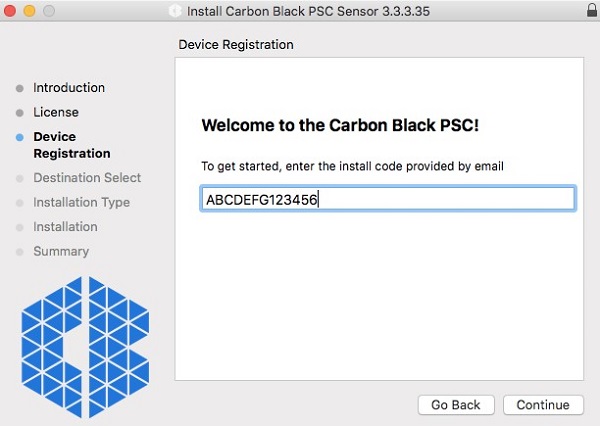
- Populate the install code and then click Continue.
 Note:
Note:- For more information, refer to How to Obtain the VMware Carbon Black Cloud Endpoint Activation Code.
- The install code in the example will differ in your environment.
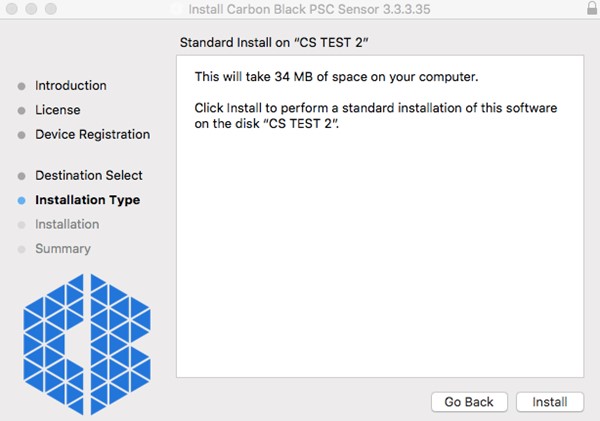
- Click Install.
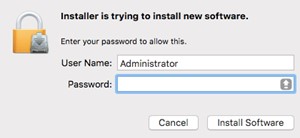
- Populate an administrator’s User Name and Password. Once populated, click Install Software.
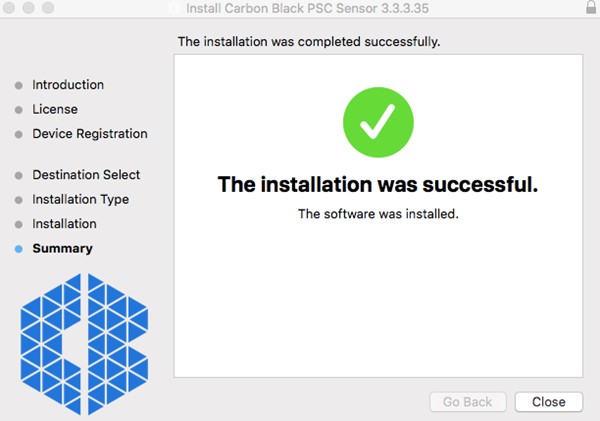
- Click Close once installation is completed successfully.
 Warning:
- Post installation, VMware Carbon Black Cloud Endpoint sensors that are installed on macOS 10.13 (High Sierra) or later require KEXT approval. For more information, refer to How to Allow Dell Data Security Kernel Extensions on macOS.
- Post installation, VMware Carbon Black Cloud Endpoint sensors that are installed on macOS 10.14.5 (Mojave) or later require Full Disk Access. For more information, refer to How to Grant Full Disk Access for VMware Carbon Black Cloud Endpoint.
Linux
- Open Terminal.

- In Terminal, type the following command and then press Enter.
sudo tar –xvf'/FilePathA/cb-psc-sensor.tgz ' –C /FilePathB Note:
Note:- In the above example:
FilePathAis the path where the tar.gz exists.FilePathAexample =/home/administrator/Downloads/
FilePathBis the path where the tar.gz is being extracted.FilePathBexample =/home/administrator/Desktop/cb
- To obtain
cb-psc-sensor.tgz, refer to How to Download the VMware Carbon Black Cloud Endpoint Sensor. - Commands are case-sensitive.
- The example paths may differ in your environment.
- In the above example:
- Populate the password for the account being used and then press Enter.

- Type the following command into Terminal and then press Enter.
sudo 'filepath/install.sh' <COMPANYCODE> Note:
Note:<COMPANYCODE>= The VMware Carbon Black Cloud tenant code. For more information, refer to How to Obtain the VMware Carbon Black Cloud Endpoint Company Code.<COMPANYCODE>is not case-sensitive.<COMPANYCODE>will differ in your environment.
- Populate the password for the account being used and then press Enter.

- Type the following command and then press Enter.
exit
Prodotti interessati
VMware Carbon BlackProprietà dell'articolo
Numero articolo: 000126331
Tipo di articolo: How To
Ultima modifica: 23 lug 2026
Versione: 17
Trova risposta alle tue domande dagli altri utenti Dell
Support Services
Verifica che il dispositivo sia coperto dai Servizi di supporto.