How to Export an Application Signing Certificate in Windows
概要: Learn how to obtain a signing certificate for your application in Windows. Follow this step-by-step guide to export an application signing certificate.
この記事は次に適用されます:
この記事は次には適用されません:
この記事は、特定の製品に関連付けられていません。
すべての製品パージョンがこの記事に記載されているわけではありません。
現象
Affected Operating Systems:
- Windows 10
- Windows 8.1
- Windows 8
- Windows 7
Third-party applications (for example, malware prevention) may require the signing certification for a product to:
- Allowlist or denylist a process
- Monitor a product.
- Determine compliance.
原因
Not Applicable
解決方法
To obtain the signing certificate:
- Right-click the executable and then select Properties.
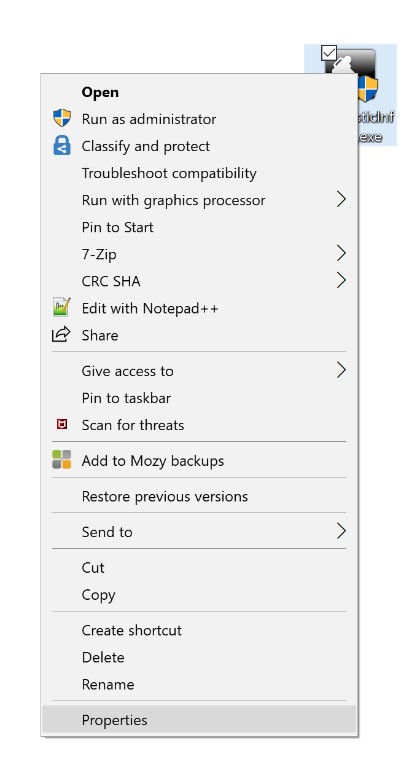
Figure 1: (English Only) Click Properties
Note:
- In the example, DiagnosticInfo is the executable.
- The name of the executable may differ in your environment.
- Select the Digital Signatures tab.

Figure 2: (English Only) Select Digital Signatures tab
- Select the highest available Digest algorithm and then click Details.
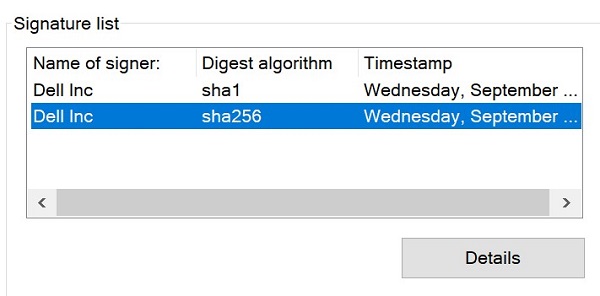
Figure 3: (English Only) Select the highest available Digest algorithm and click Details
Note:
- If no Digest algorithm is available, then the application does not contain a signing certificate.
- The Digest algorithm that is used in the example may differ in your environment.
- Click View Certificate.
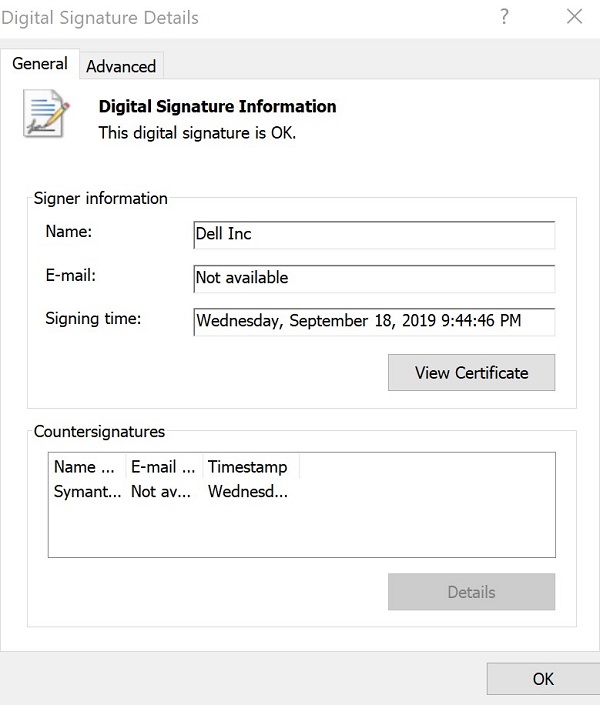
Figure 4: (English Only) Click View Certificate
- Click Install Certificate.
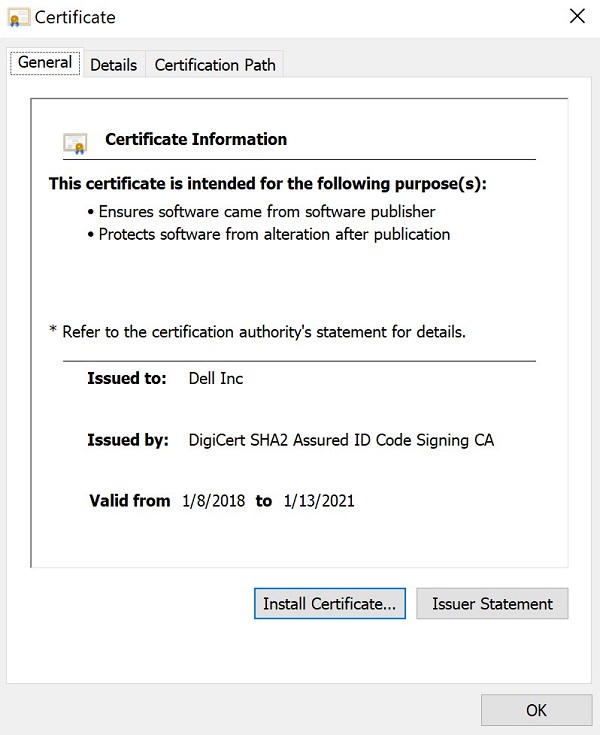
Figure 5: (English Only) Click Install Certificate
- Select Current User and then click Next.
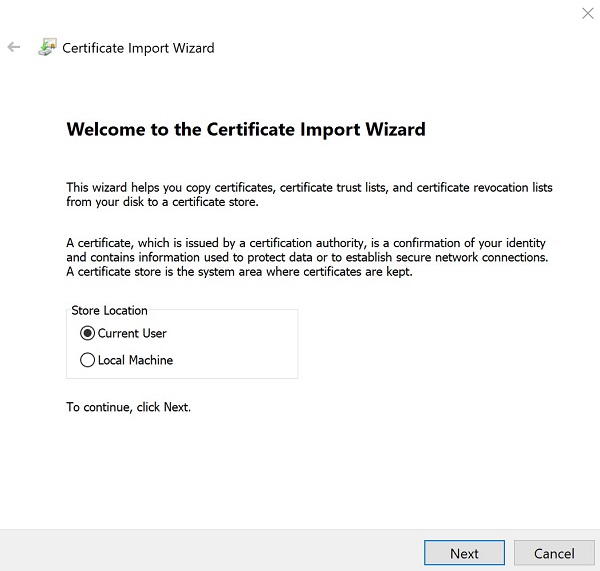
Figure 6: (English Only) Select Current User and click Next
- Select Place the certificates in the following store and then click Browse.

Figure 7: (English Only) Select Place the certificates in the following store and click Browse
- Select Personal and then click OK.
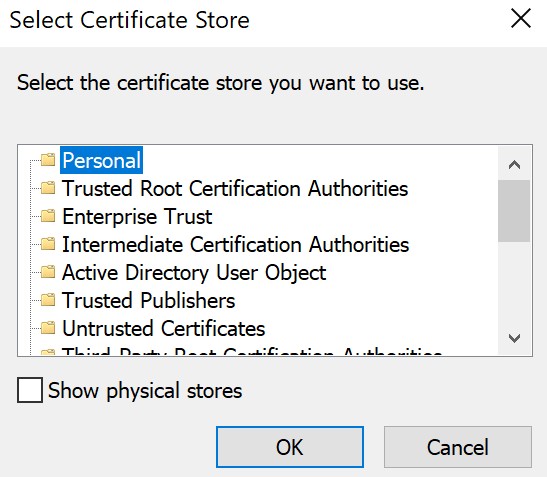
Figure 8: (English Only) Select Personal and click OK
- Click Next.
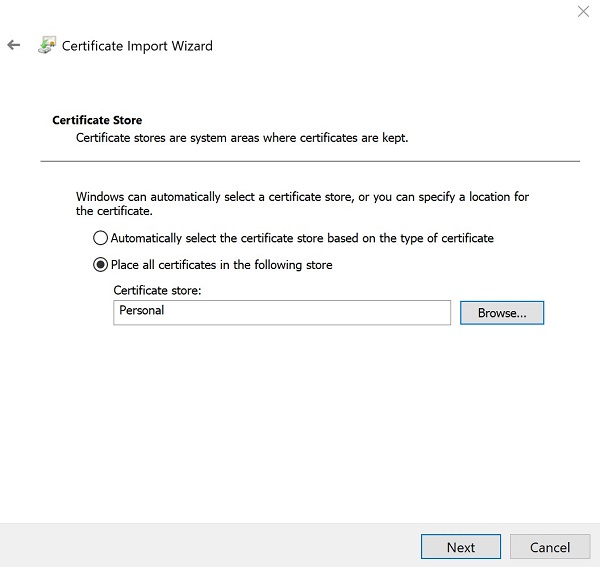
Figure 9: (English Only) Click Next
- Click Finish.
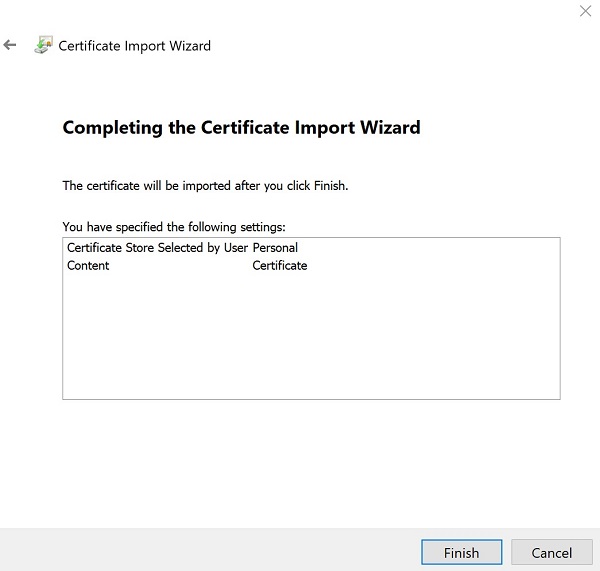
Figure 10: (English Only) Click Finish
- On successful import, click OK.
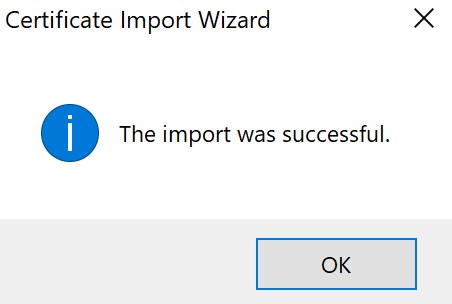
Figure 11: (English Only) Click OK
- Right-click the Windows Start Menu and then select Run.

Figure 12: (English Only) Select Run
- In the Run user interface (UI), type mmc.exe and then click OK.
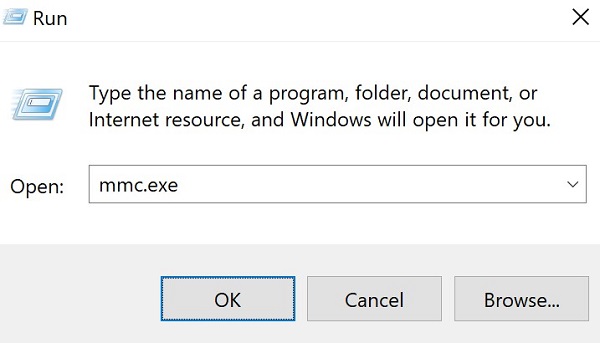
Figure 13: (English Only) Type mmc.exe
- In the Microsoft Management Console (MMC), click File and then select Add/Remove Snap-in.
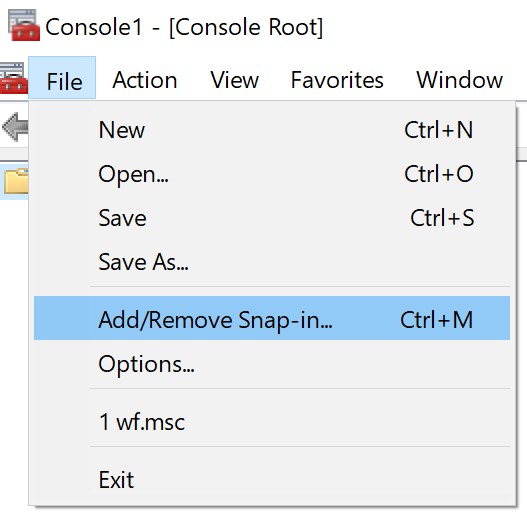
Figure 14: (English Only) Select Add/Remove Snap-in
- In the Add or Remove Snap-ins menu, select Certificates, and then click Add>.
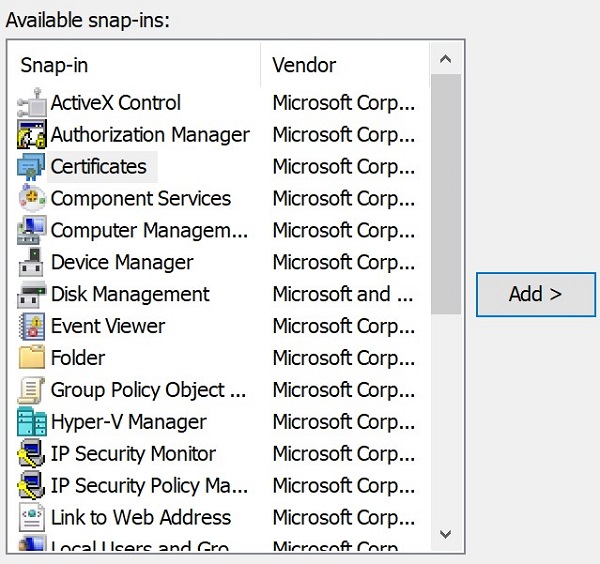
Figure 15: (English Only) Select Certificates and click Add>.
- Select My user account and then click Finish.
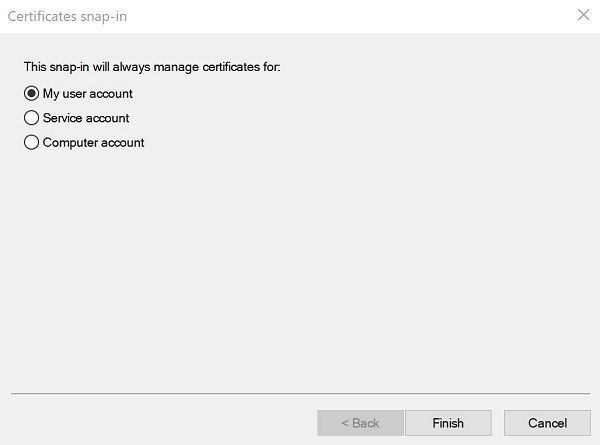
Figure 16: (English Only) Select My user account and click Finish
- Click OK to load the snap-in.
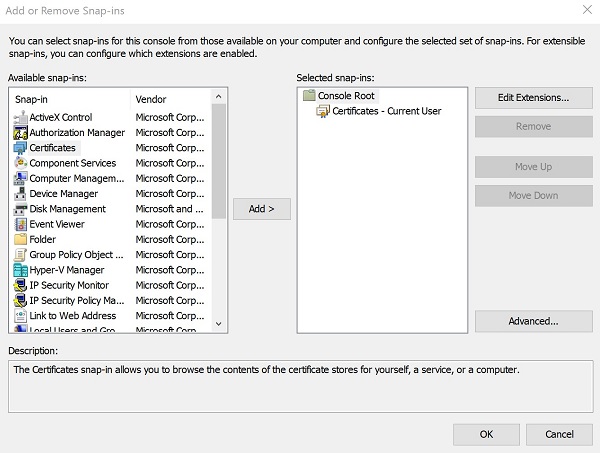
Figure 17: (English Only) Click OK
- In the MMC menu, go to Certificates - Current User > Personal > Certificates.
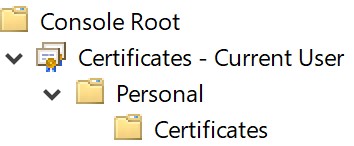
Figure 18: (English Only) Go to Certificates
- Right-click the certificate (step 3), select All Tasks >, and then click Export.
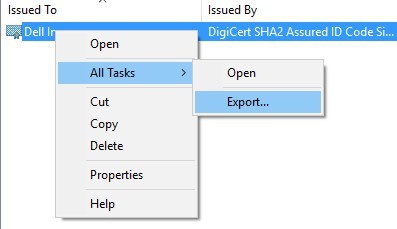
Figure 19: (English Only) Click Export
- In the Certificate Export Wizard, click Next.
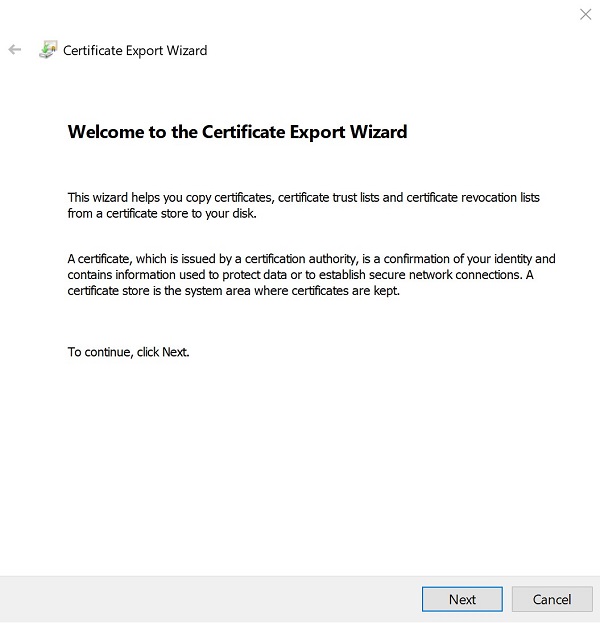
Figure 20: (English Only) Click Next
- Select the DER encoded binary X.509 (.CER) and then click Next.
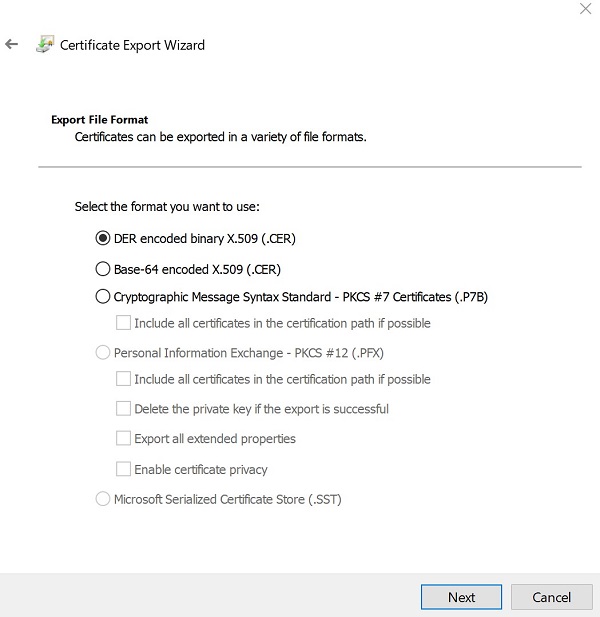
Figure 21: (English Only) Select DER encoded binary X.509 (.CER) and click Next
- Browse to a location to save the certificate and then click Next.
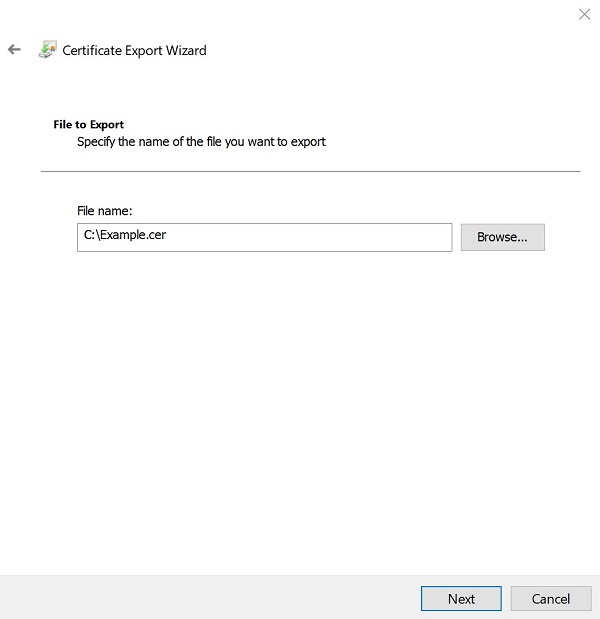
Figure 22: (English Only) Save the certificate and click Next
Note: The certificate name and location may differ in your environment.
- Click Finish.
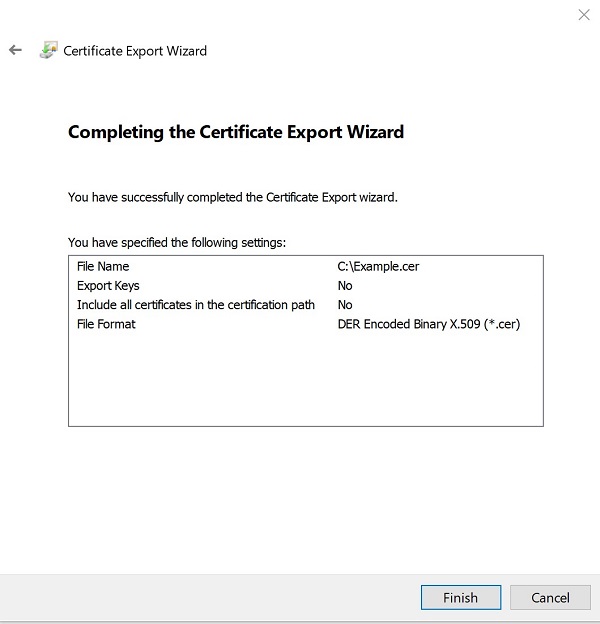
Figure 23: (English Only) Click Finish
- On successful export, click OK.
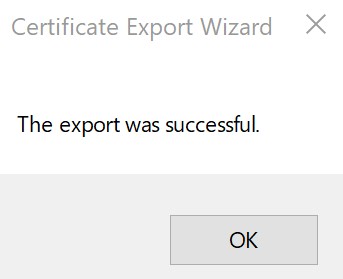
Figure 24: (English Only) Click OK
- In MMC, click File and then select Exit.
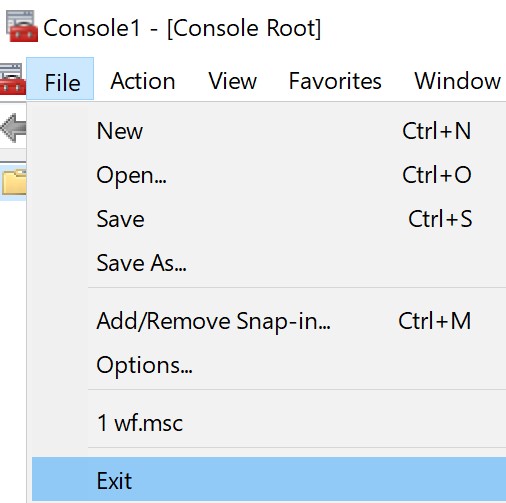
Figure 25: (English Only) Select Exit
To contact support, reference Dell Data Security International Support Phone Numbers.
Go to TechDirect to generate a technical support request online.
For additional insights and resources, join the Dell Security Community Forum.
対象製品
Dell Encryption文書のプロパティ
文書番号: 000126830
文書の種類: Solution
最終更新: 31 10月 2023
バージョン: 8
質問に対する他のDellユーザーからの回答を見つける
サポート サービス
お使いのデバイスがサポート サービスの対象かどうかを確認してください。