PowerEdge: MX7000 - How to Create a Custom Validated MX Catalog
Summary: Platform training video that covers how to create a custom validated MX catalog using Dell Repository Manager.
Instructions
Watch this video for creating a custom validated MX catalog.
How to create a custom validated MX catalog using Dell Repository Manager.
Duration: 00:04:41 (hh:mm:ss)
When available, closed caption (subtitles) language settings can be chosen using the CC icon on this video player.
Overview:
When upgrading an MX7000 baseline, you may have use cases for creating a custom catalog. The Configuration > Firmware Compliance > Catalog Management section of OpenManage Enterprise Modular (OME-M) gives three options:
- Validated firmware solution baseline on Dell Support.
- Latest component versions on Dell Support.
- Network Path:
- NFS
- CIFS
- HTTP
- HTTPS
Dell Technologies recommends being on the validated MX baseline firmware versions, which can be accomplished using the first option or the third option. Cases where the first option does not work may be firewall-related or DNS related. Also, if your MX chassis management modules are at firmware versions 1.20.10 or earlier, the first option does not work. This is due to the move from HTTP to HTTPS for Dell online firmware catalogs. Management module firmware at version 1.20.10 or earlier attempts to connect to Dell's online catalog using HTTP, which has been deprecated. Thus, alternate options for updating your MX7000 baseline if on 1.20.10 or earlier are:
- Use a custom-validated catalog (instructions listed below for CIFS share method)
- Update using the individual package method detailed in the Dell OpenManage Enterprise-Modular Edition for PowerEdge MX7000 Chassis User's Guide on Dell Support.
Steps for creating a custom validated MX catalog:
- Install Dell Repository Manager (DRM)
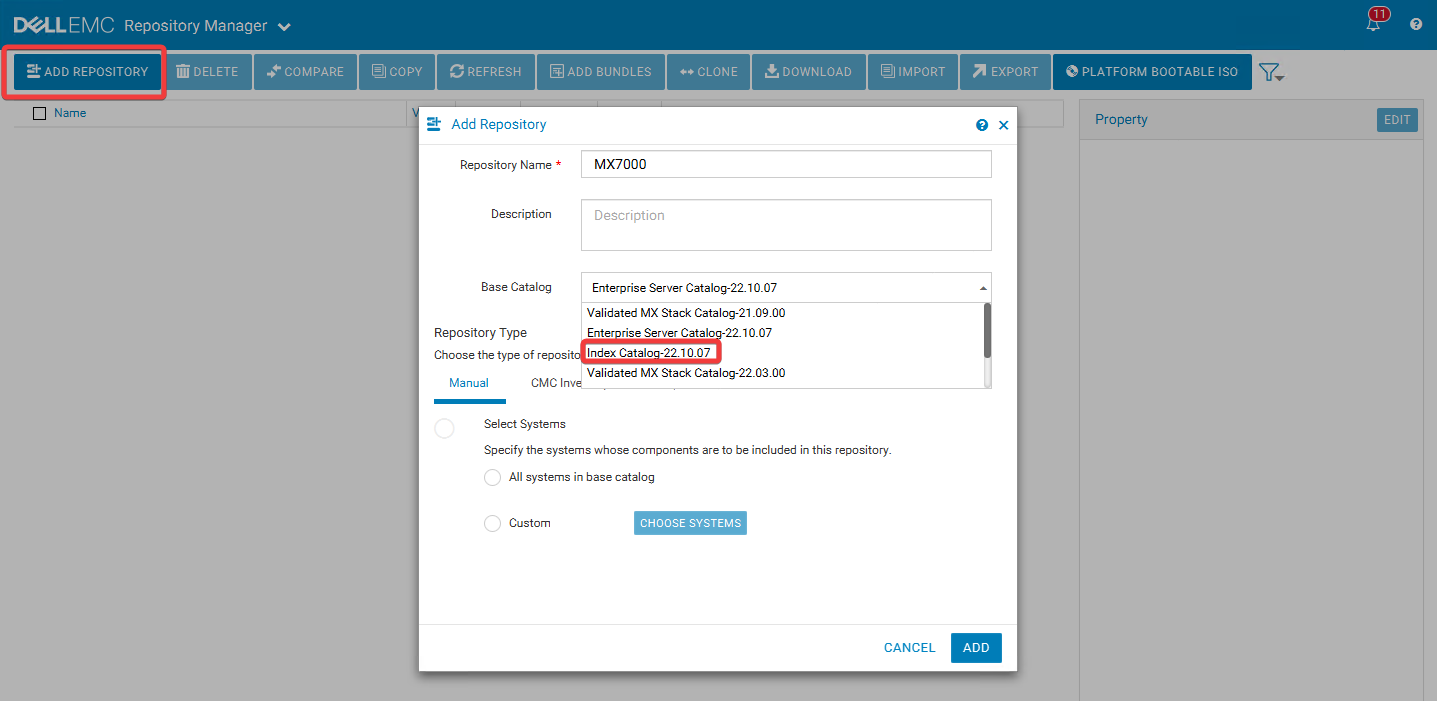
- Open Dell Repository Manager, and select Add Repository
- Give your repository a name
- In the Base Catalog dropdown, select Index Catalog
- In the Catalog Group dropdown, select Validated MX Stack Catalog
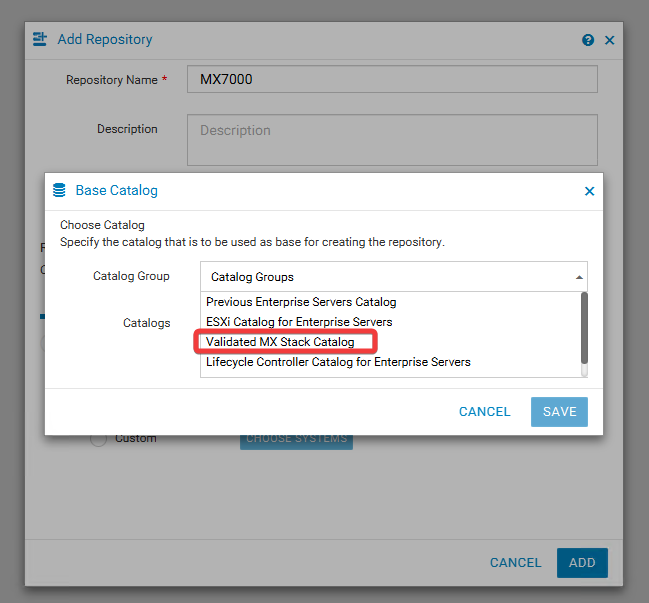
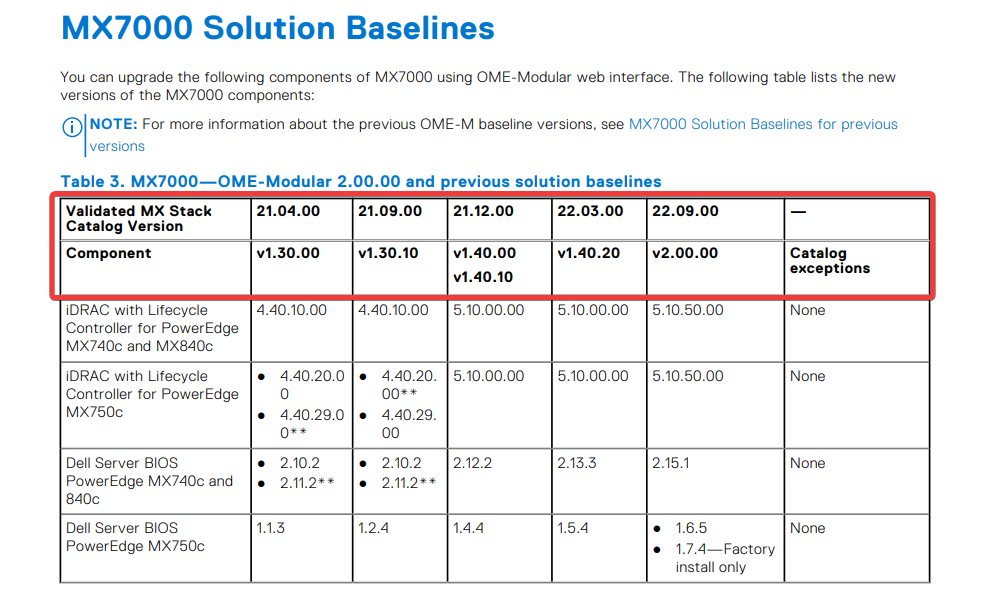
- In the Catalogs dropdown, select the catalog you want to obtain firmware versions from. Catalogs are listed using date, and a Validated MX Stack Catalog Version. You can compare catalog version to baseline version in the Dell OpenManage Enterprise-Modular Edition for PowerEdge MX7000 Chassis User's Guide.

- After selecting the catalog you want to use, select Save and then Add
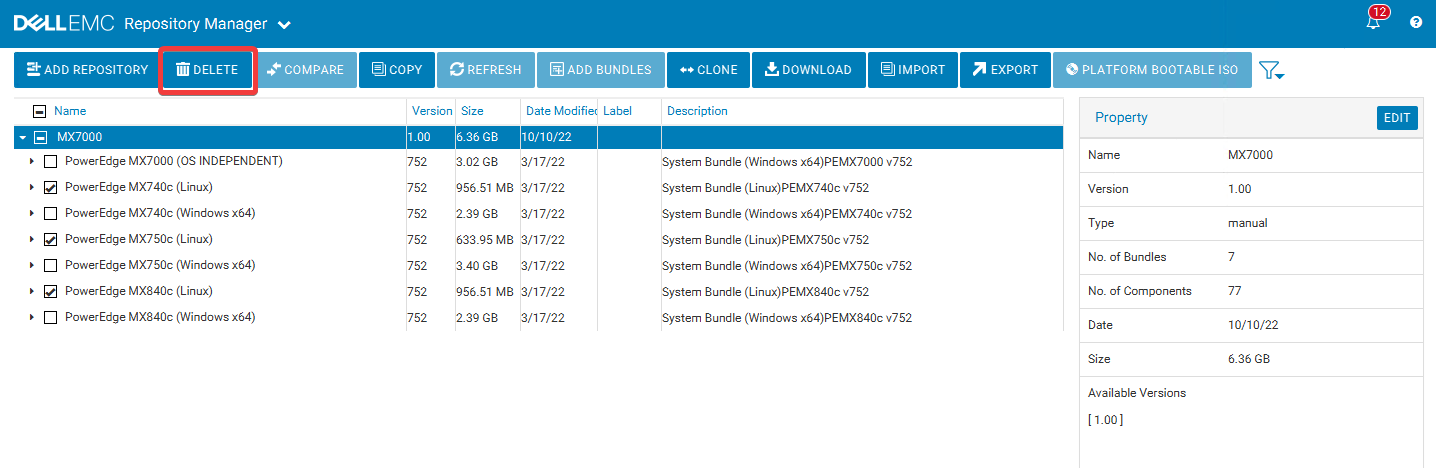
- If updating using iDRAC or OpenManage Enterprise Modular, you do not require the Linux bundles, and instead require the Windows bundles. Linux bundles are in BIN format. The update interface for the iDRAC and OpenManage Enterprise Modular requires firmware to be in EXE format. Select the Linux system bundles and delete these.
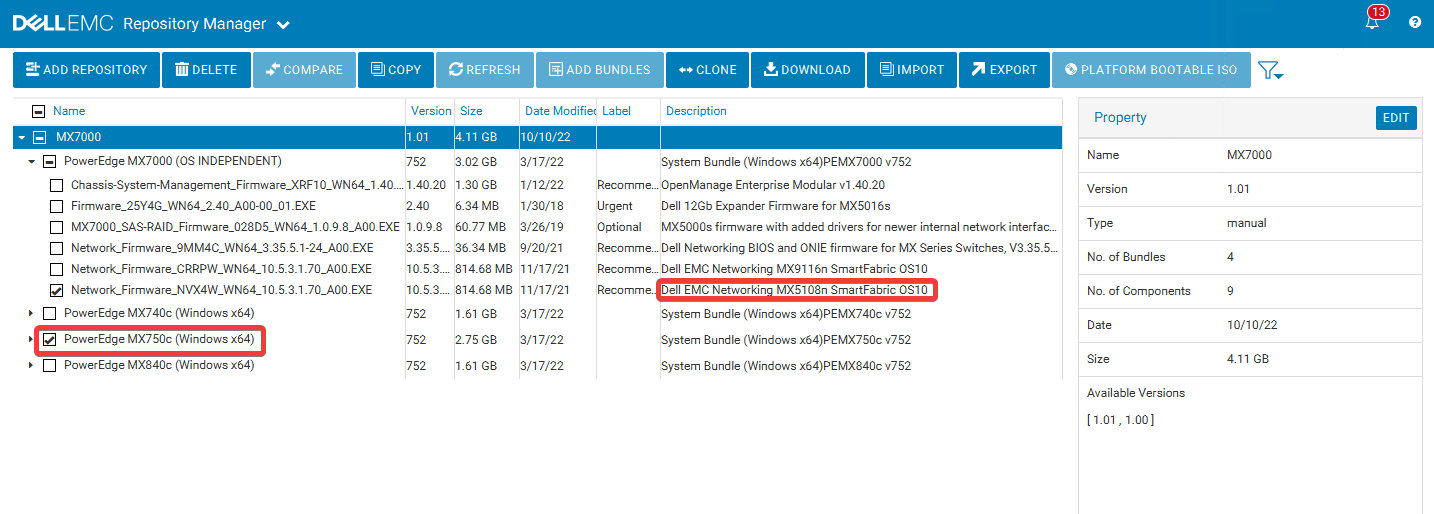
- Other bundles or firmware versions that are not required may also be deleted. For example, if your chassis does not have an MX5108n switch, or MX750c sleds, delete the firmware for these components in your repository:
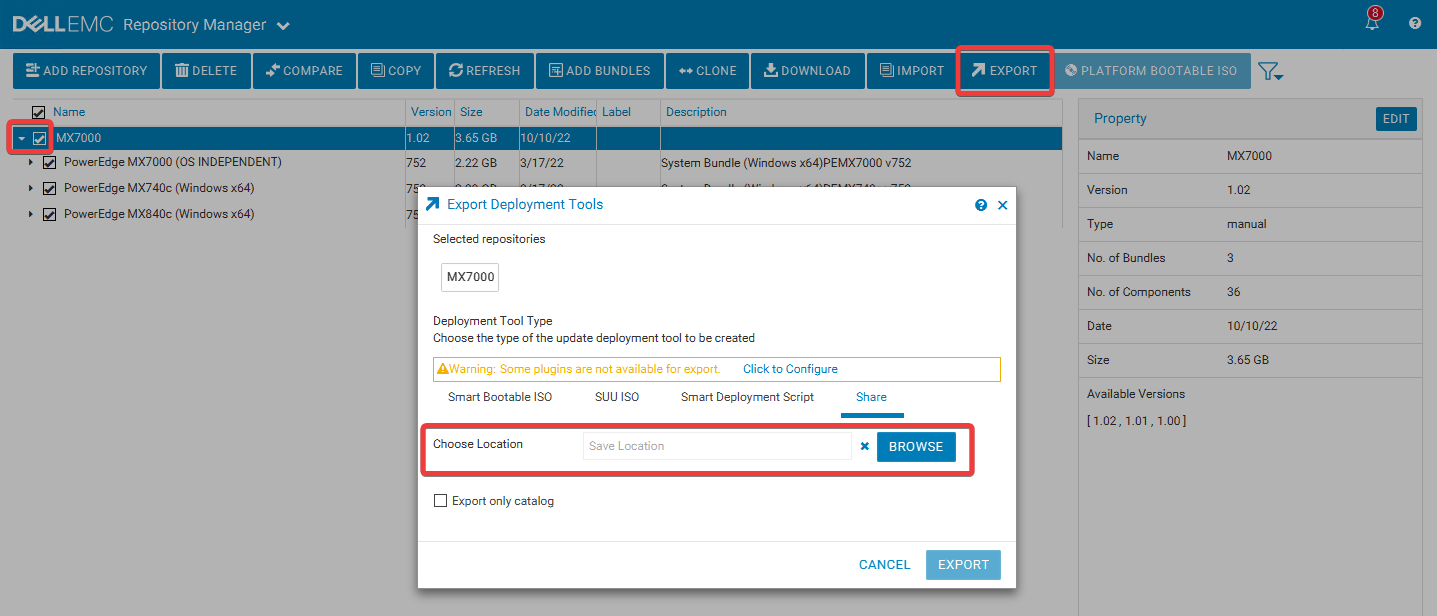
- When you are ready to export your repository, select the checkbox next to your Repository and then select Export. Choose a save location for the repository. The Export only catalog option only exports the catalog file, and not all the firmware folders containing the firmware executables.
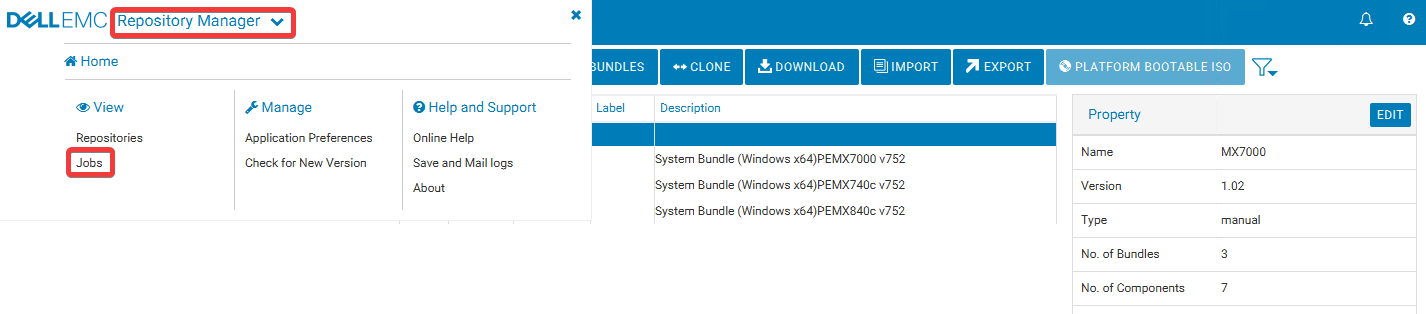
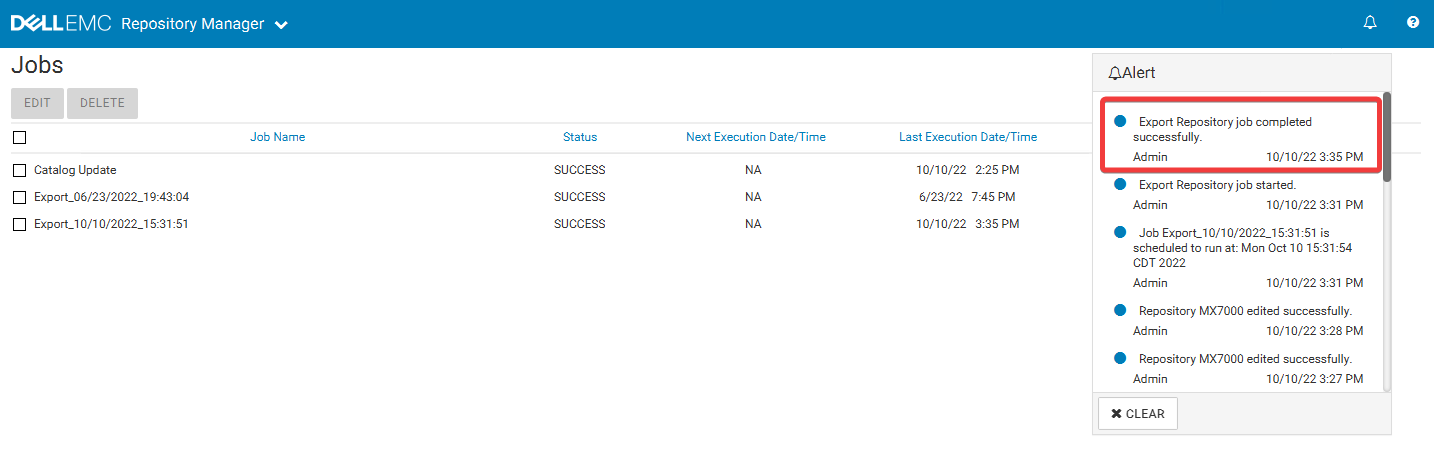
- You can confirm that the export job has started by reviewing Alerts in the upper right corner. You may also go to the job queue from the Repository Manager button at the upper left of the application, to review the progress of the export.
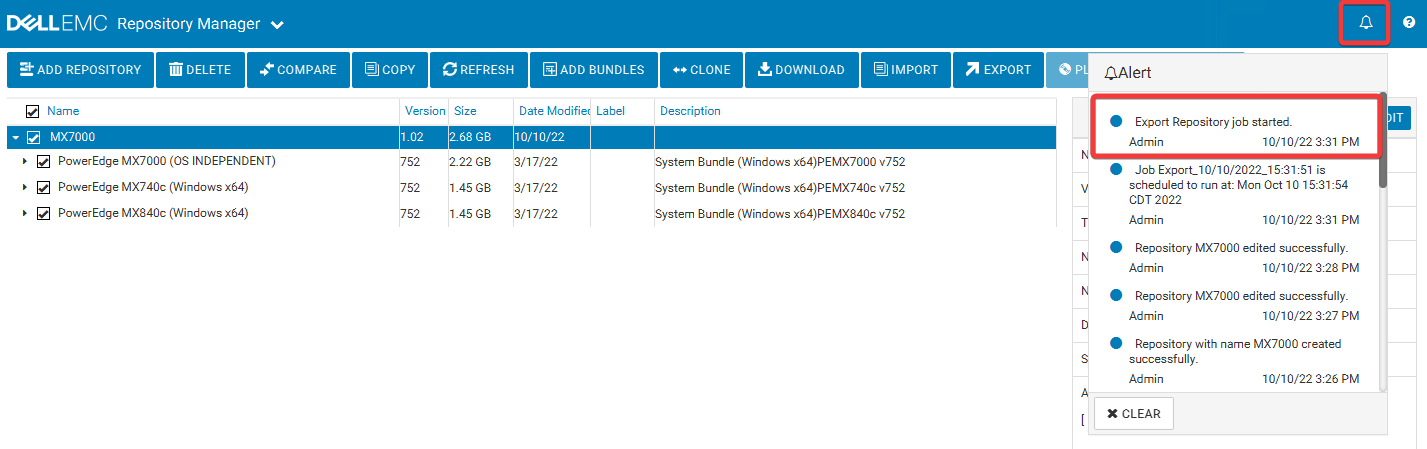

- Once complete, Alerts should have a message stating the job completed successfully.
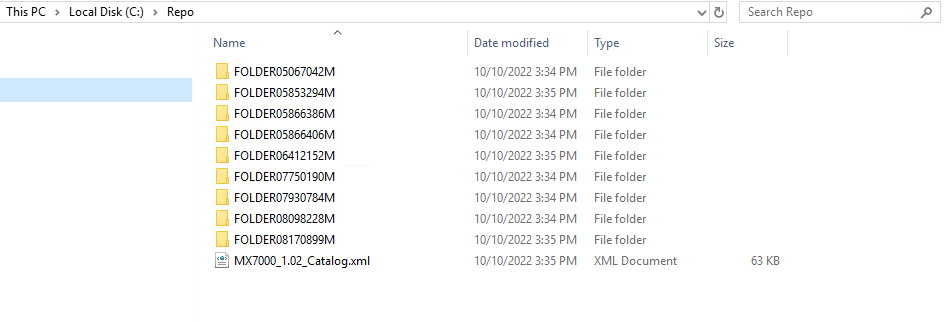
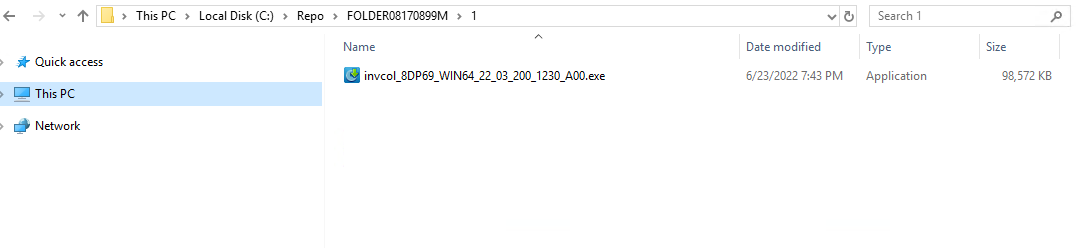
- Review the location that you saved your repository to. If both the catalog and firmware are exported, you should see firmware folders along with a catalog XML file. These folders must be in the root directory of your network share, along with the catalog file, in order for the catalog to reference the firmware properly. This is because the catalog references each firmware file by folder names.

- Setup your repository folder as a share, and ensure that the correct user has permissions to access the folder. Read and Execute permissions are needed.
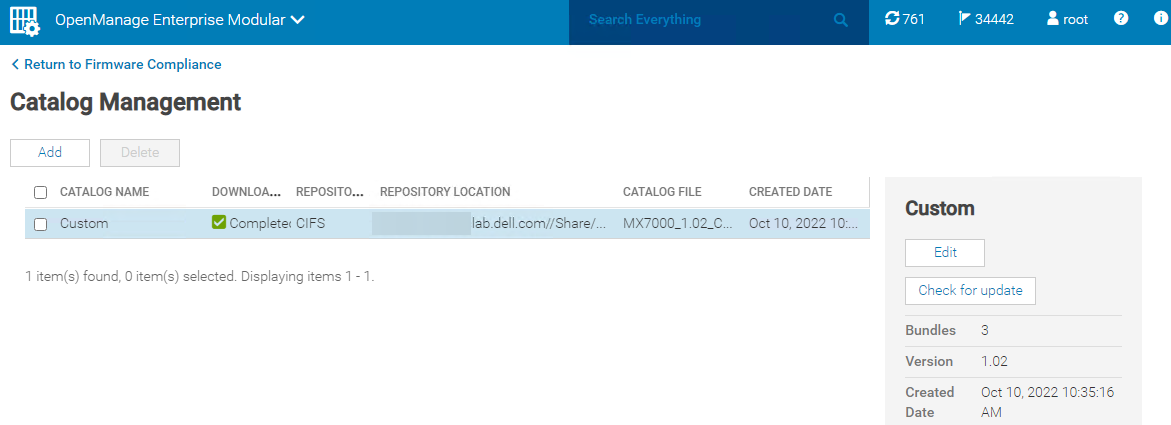
- Login to OpenManage Enterprise Modular, and go to Configuration > Firmware Compliance > Catalog Management.
- Select Add, and then choose Network Path and fill out the information for the share in the same format you see below. The connection to the share may be tested using the Test Connection option.
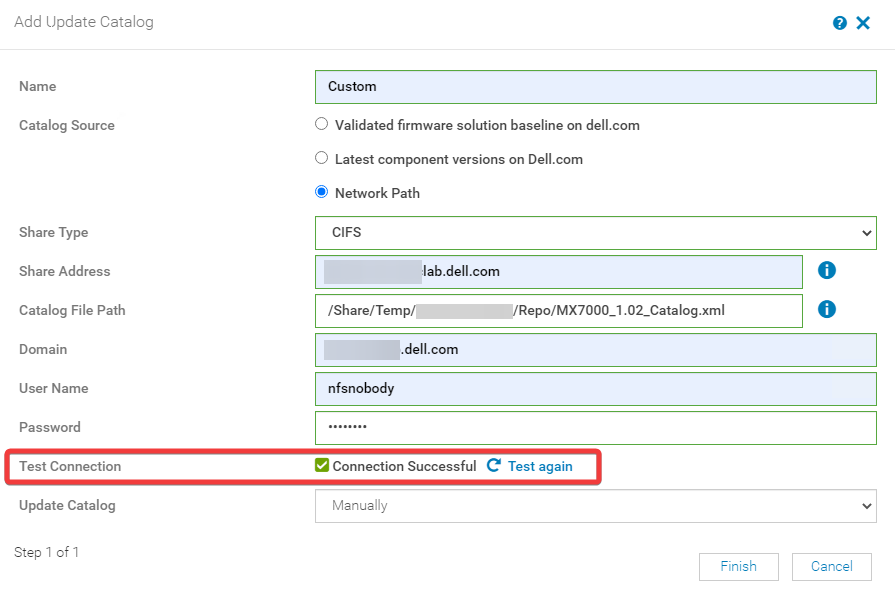
- Click Finish. Your catalog should now be populated in the Catalog Management section of OpenManage Enterprise Modular.