Data Domain: RPS How to Use Automated TC Script
Summary: This KB article highlights the steps to use the Data Domain Automated TC Script, to extract the needed logs for the Automated Pre-Upgrade Assessment.
This article applies to
This article does not apply to
This article is not tied to any specific product.
Not all product versions are identified in this article.
Instructions
WARNING: FOR RPS USE ONLY
Below is a step-by-step procedure for the use of the Data Domain Automated Script.
Step 1: Download and extract the LATEST Data Domain Automated TC Tool .zip file from the link: Data Domain Automated TC Tool
Download the Data Domain Automated TC Tool.zip folder attached and extract the connect.exe file.
Step 2: Run the .exe file to start Health checks.
Open the command prompt in the Data Domain Automated TC Tool folder location and then type connect.exe and press Enter.
Note: The tool may take 35 s to load and download the needed libraries.
Once loaded, you must enter the IP of the Data Domain to start the health checks.
Once you enter the IP, press Enter to enter the "sysadmin" password.
Note: The password is secured and is not displayed on the screen, not even masked with * signs. Also, this is not a linux terminal, thus, Ctrl + U does not delete the password if entered incorrectly.
Note: For this script to run, you must use only the "sysadmin" credentials and not any other user.
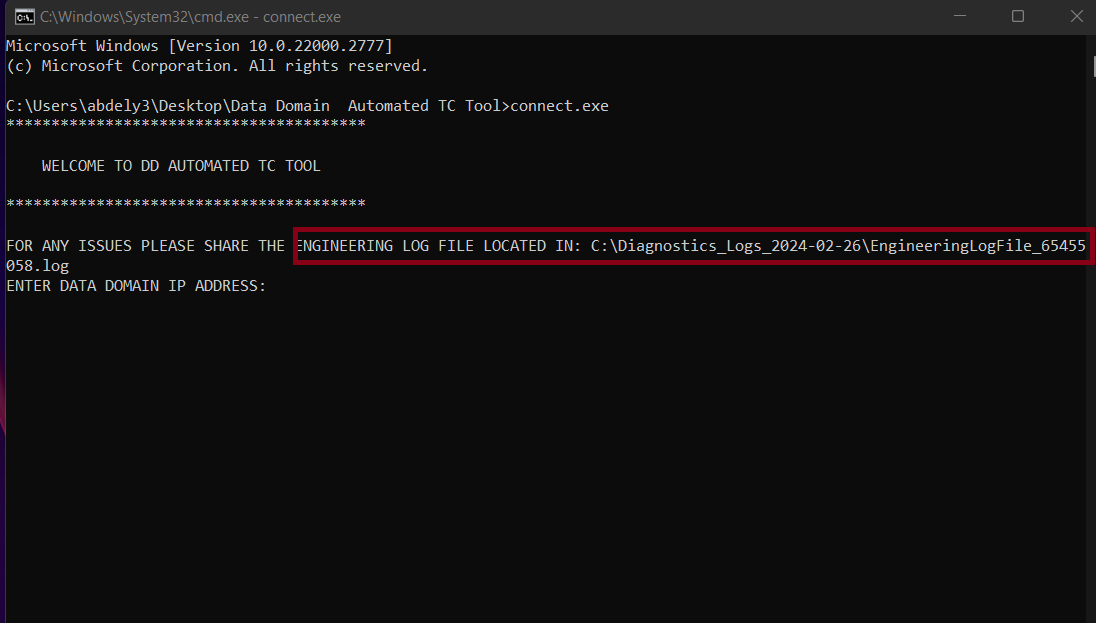
Also, if the password is entered incorrectly, the script displays the below message and exit, you must go to step 1 to launch it again.
Step 3: Gather the Basic Information.
After correctly entering the IP and the sysadmin credentials, the script starts to gather the basic information, such as the Serial Number, Model, and Current Firmware.
Check the Serial Number and make sure you are connected to the correct Data Domain.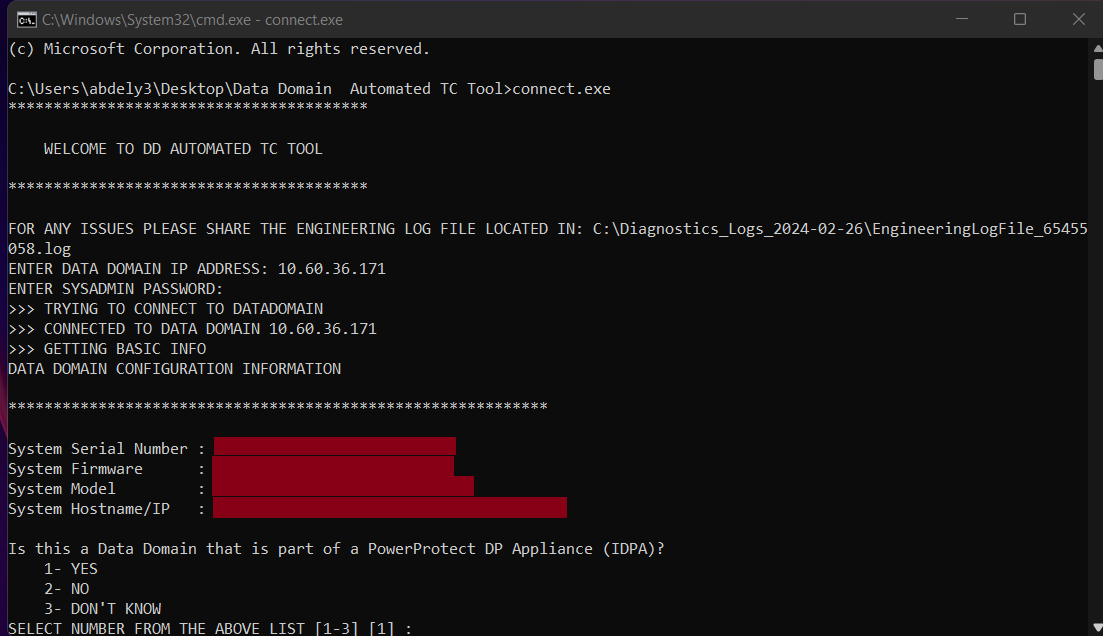
Step 4: Additional Information required from customer
A few Questions are required to be answered and confirmed by the customer, Is this DD part of Integrated Data Protection Appliance, is this DD part of DLM and the required destination code.
Note: If the answer is either "YES" or "DON'T KNOW" for the Integrated Data Protection Appliance and DLM questions, the script cannot proceed and a technical consultation is required.
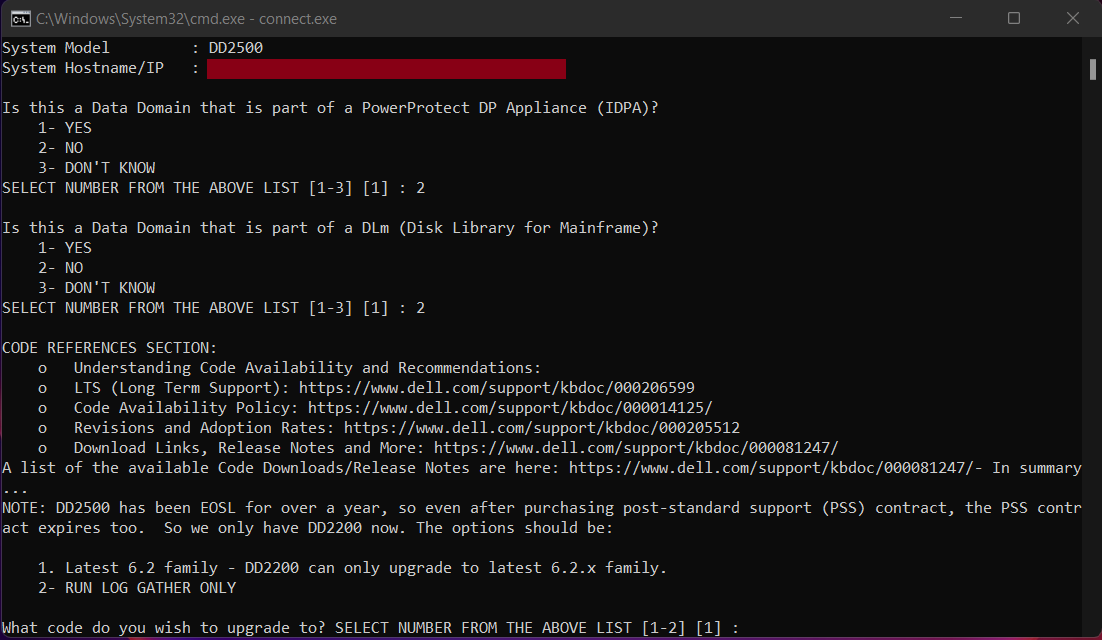
Note: The destination list varies based on the model Number detected and the applicable destination codes.
For EOSL Models except DD2200 and DD2500, the code is displayed but the customer must have a Post-standard Support Contract.
For EOSL Models except DD2200 and DD2500, the code is displayed but the customer must have a Post-standard Support Contract.
Note: In the destination question, if you selected option 2, Run Log Gather, checks proceed but the upgrade plan shows the destination and upgrade path as None.
Step 5: Health Checks are performed, and a list of checks analysis reports are displayed on the console.
Once checks start, it takes 2-3 minutes to run all the needed commands and analyze. A full list of the checks and the output of all commands are added to the rps Log File.
The path of the RPS Log File generated is displayed at the end of the console output.
This file contains the basic information captured, health checks analysis report, upgrade plan, and a list of all checks performed as well as the output of each check, for further analysis, if needed by the engineer during the Triage event or before the upgrade.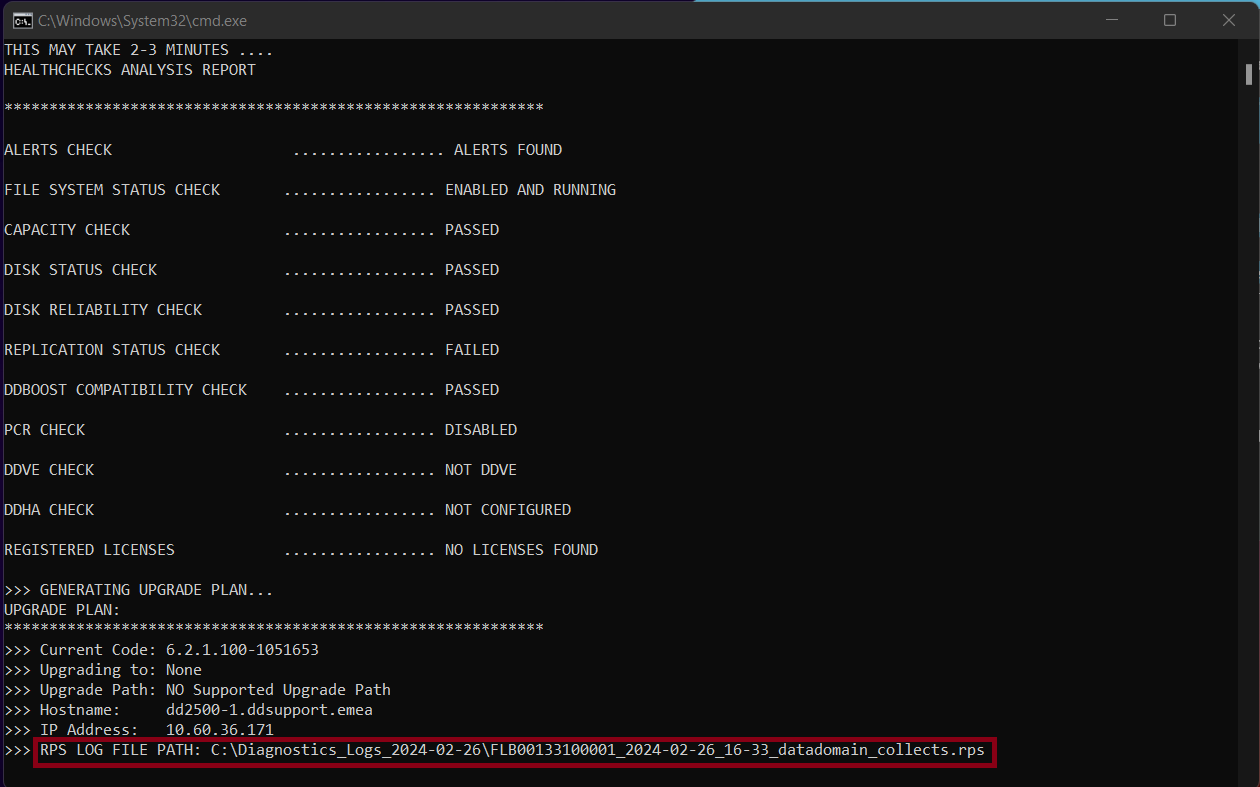
Step 6 (Customers): Send this .rps file to the scheduling specialist for further investigation by the Automated Assessment Tool and scheduling of the needed activity, if any.
ALERTS AND RECENT UPDATES:
Affected Products
Data DomainArticle Properties
Article Number: 000221843
Article Type: How To
Last Modified: 09 Mar 2026
Version: 5
Find answers to your questions from other Dell users
Support Services
Check if your device is covered by Support Services.