Dell Data Protection Secure Lifecycleをアンインストールする方法
Sommaire: 次の手順に従って、WindowsまたはMacコンピューターからDell Data Protection Secure Lifecycleをアンインストールする方法について説明します。
Cet article s’applique à
Cet article ne s’applique pas à
Cet article n’est lié à aucun produit spécifique.
Toutes les versions de produits ne sont pas identifiées dans cet article.
Instructions
注:
- Dell Data Protection | Secure Lifecycleは、2018年11月でライフサイクル終了となりました。この製品およびこの製品に関する記事は、Dellでは今後アップデートされません。詳細については、「Dell Data Securityの製品ライフサイクル(サポート終了およびライフサイクル終了)」を参照してください。代替記事に関する質問がある場合は、担当のセールス チームに連絡するか、またはendpointsecurity@dell.comにお問い合わせください。
- 現在の製品に関する追加情報については、Endpoint Securityを参照してください。
次の操作を行うには、Dell Data Protection | Secure Lifecycleをエンドポイントからアンインストールする必要があります。
- ライセンス不一致の修正
- 製品のトラブルシューティング
- オペレーティング システムの非互換性の解決
対象製品:
- Dell Data Protection | Secure Lifecycle
影響を受けるバージョン:
- 1.0
対象オペレーティング システム:
- Windows
- Mac
アンインストール プロセスは、WindowsとMacで異なります。Dell Data Protection | Secure Lifecycleをアンインストールする手順については、該当するオペレーティング システムをクリックしてください。
Windows
これらの手順を実行する前に、Dell Data Protection | Secure Lifecycleインストーラーをダウンロードする必要があります。
- Windowsの[スタート]メニューを右クリックして、[ファイル名を指定して実行]をクリックします。
- [ファイル名を指定して実行]のUIで、
appwiz.cplと入力して[OK]を押します。これで、[プログラムと機能]が開きます。
![[ファイル名を指定して実行]UI](https://supportkb.dell.com/img/ka0Do0000005wCnIAI/ka0Do0000005wCnIAI_ja_1.jpeg)
- [Dell Data Protection | Secure Lifecycle]をダブルクリックします。
![画像は、[プログラムと機能]の[Dell Data Protection Secure Lifecycle]を示しています。](https://supportkb.dell.com/img/ka0Do0000005wCnIAI/ka0Do0000005wCnIAI_ja_2.jpeg)
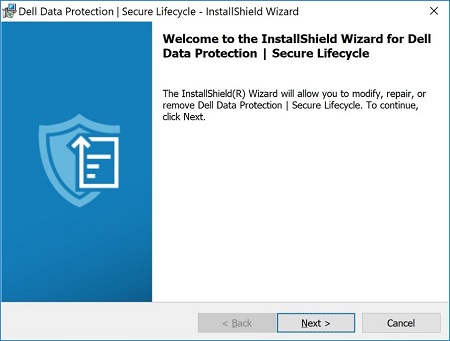
- Nextをクリックして進めます。
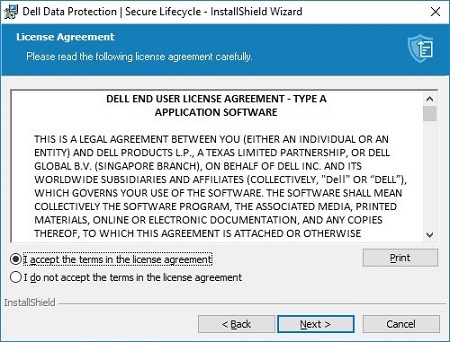
- ライセンス契約の条件に同意してから、Next(次へ)をクリックします。
- [Remove]を選択し、[Next]をクリックします。
![[削除]オプション](https://supportkb.dell.com/img/ka0Do0000005wCnIAI/ka0Do0000005wCnIAI_ja_5.jpeg)
- 削除をクリックします。
![[削除]ボタン](https://supportkb.dell.com/img/ka0Do0000005wCnIAI/ka0Do0000005wCnIAI_ja_6.jpeg)
- 削除後、[Finish]をクリックしてUIを閉じます。
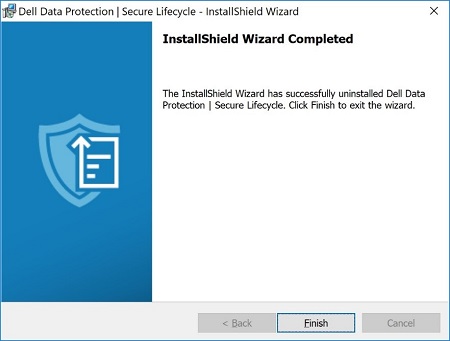
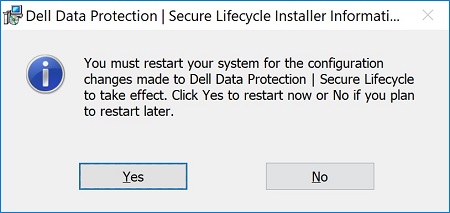
- 「Yes(はい)」をクリックしてマシンを再起動します。
Mac
- Appleメニューの[Go]をクリックし、次に[Applications]を選択します。
![[移動]メニューの[アプリケーション]オプション](https://supportkb.dell.com/img/ka0Do0000005wCnIAI/ka0Do0000005wCnIAI_ja_9.jpeg)
- [アプリケーション]リストで[Secure Lifecycle]アイコンを見つけます。

- [Secure Lifecycle]アイコンを[ごみ箱]アイコンにドラッグします。

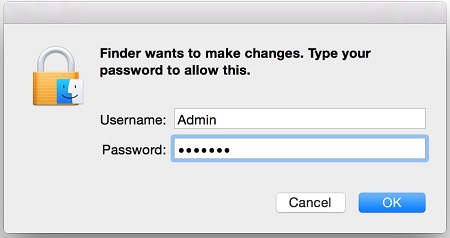
- 管理者アカウントの認証情報を入力し、[OK]を押します。
Renseignements supplémentaires
Vidéos
Produits touchés
Dell Data GuardianPropriétés de l’article
Numéro d’article: 000123295
Type d’article: How To
Dernière modification: 05 août 2026
Version: 17
Obtenez des réponses à vos questions auprès d’autre utilisateurs de Dell
Services de soutien
Vérifiez si votre appareil est couvert par les services de soutien.