Please select a product to check article relevancy
This article applies to This article does not apply toThis article is not tied to any specific product.Not all product versions are identified in this article.
In the vSAN environment in which SSD and hard disk drive are mixed, SSD used as cache memory is called cache disk, hard disk drive used as data space is called capacity disk.
WARNING: You must back up the data before performing this step.
If the problem occurred on the cache disk, it is a disk group level problem.
Therefore, the disk group must be re-created.
Note: Depending on the version, the disk group icon may not appear on the vSphere Web Client even if the problem occurred on a cache disk. In this case, see the steps described in the section below.
Replacement Steps
Click the icon on the top of vSphere Web Client to switch to the maintenance mode.
It is recommended to switch to the maintenance mode before replacement unless there is a special reason.
See the Place a Member of vSAN Cluster in Maintenance Mode for switching to maintenance mode, and its types.
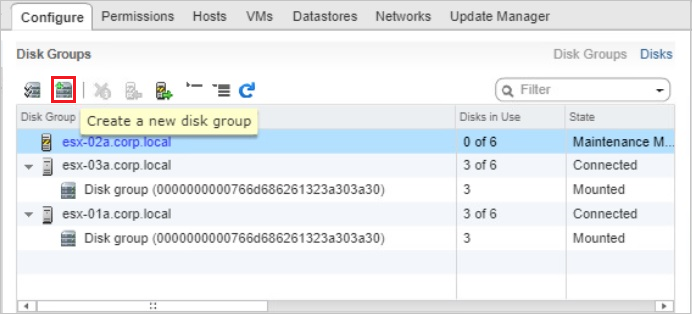
Click the icon at the top to remove the appropriate cache disk.
Removing the cache disk removes the disk group.
Replace the applicable cache disk physically.
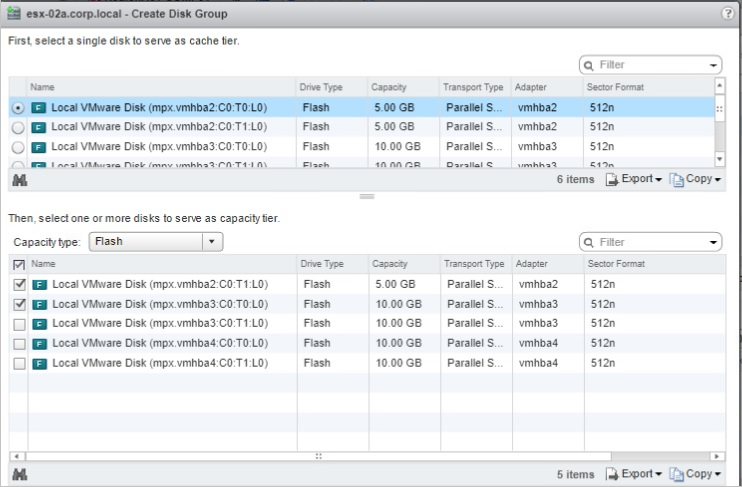
After the replacement, click the "Add" icon at the top of vSphere Web Client.
Select a cache disk from the upper list, a capacity disk from the lower list, and click OK.
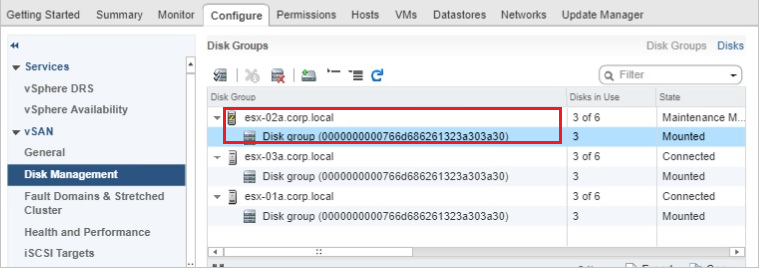
Once the created disk group is displayed, release the maintenance mode.
Confirm that the capacity of the re-created disk group is added to the capacity of the vSAN data store.
Since alerts remain even if the problem is solved, click Confirm or Reset to Green to delete manually.
Additional Information
Unable to Remove Disk Group
The disk group icon may not be displayed on the vSphere Web Client, or removal of the disk group may be failed.
In that case, try the following steps:
Connect to the applicable host using SSH.
Confirm the capacity disk "mpx.vmhbax:Cx:Tx:Lx" by running the command: esxcli vsan storage list or vdq -q -H
Remove the applicable capacity disk mpx.vmhbax:Cx:Tx:Lx individually by running the command: esxcli vsan storage remove --evacuation-mode=noAction --disk=mpx.vmhbax:Cx:Tx:Lx.
Example: esxcli vsan storage remove --evacuation-mode=noAction --disk= mpx.vmhba1:C0:T4:L0
Replace the cache disk physically and create a disk group on the vSphere Web Client.
Now you can select the replaced cache disk and the existing capacity disk which was removed.
for switching to maintenance mode, and its types.