Article Number: 000140714
How To Install Windows 11 and Windows 10 When Intel Optane Is Installed on a Dell Personal Computer
Summary: Step-by-step instructions to guide you through the setup process for Windows 11 and Windows10 on your Dell computer using Intel Optane.
Article Content
Instructions
Affected Platforms:
- OptiPlex
- Precision Workstations
- Alienware
- Vostro
- Latitude
- Inspiron
- G-Series
Note: When the computer is configured with Intel Optane, the SATA Operation Mode in the BIOS must be set to RAID On or Intel Rapid Response…. Also, the Boot mode should be set to UEFI.
- To run the installation disk or installation USB, insert the Windows installation disk or USB into the computer.
Note: You should use the media created on the Windows media creator using: Reset or Reinstall Windows 10 on your Dell Computer or Reset or Reinstall Windows 11 on Your Dell Computer and not the Dell Recovery tool.
- Shut down the computer.
- Press your computer's Power button and watch for the Dell or Alienware logo to appear.
- When the logo appears, press the F12 key to load the Boot menu.
- If this menu does not appear, try restarting your computer again and pressing F12 several times when the Dell logo appears.
- Once the Boot menu opens, select the optical or USB drive to match the Windows installation media and press Enter.
- If you are using UEFI, be sure to select the correct boot option (example: UEFI-USB storage device)
- When Windows Setup appears, confirm that the Language, Time, Currency, and Keyboard Method fields display the correct settings.
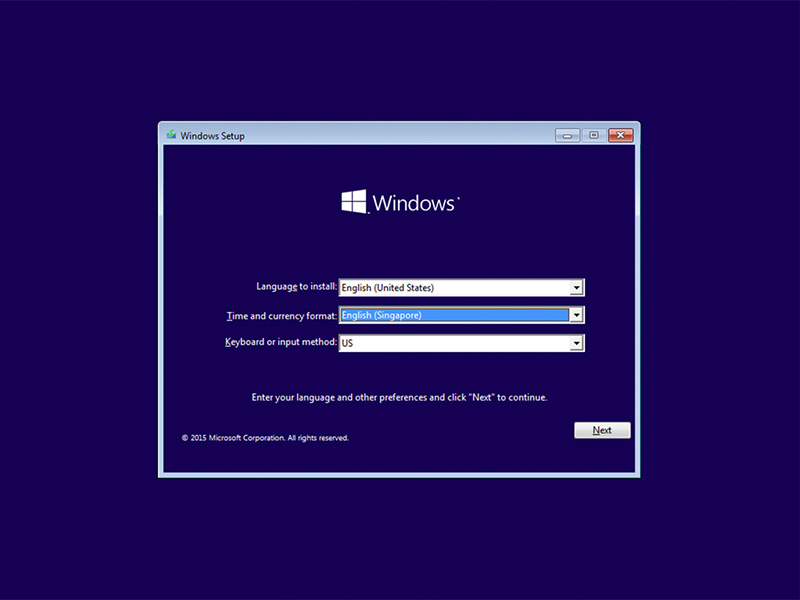
Figure 1: (English Only) Windows Setup
- On the Windows Installation dialog box, click Install Now.
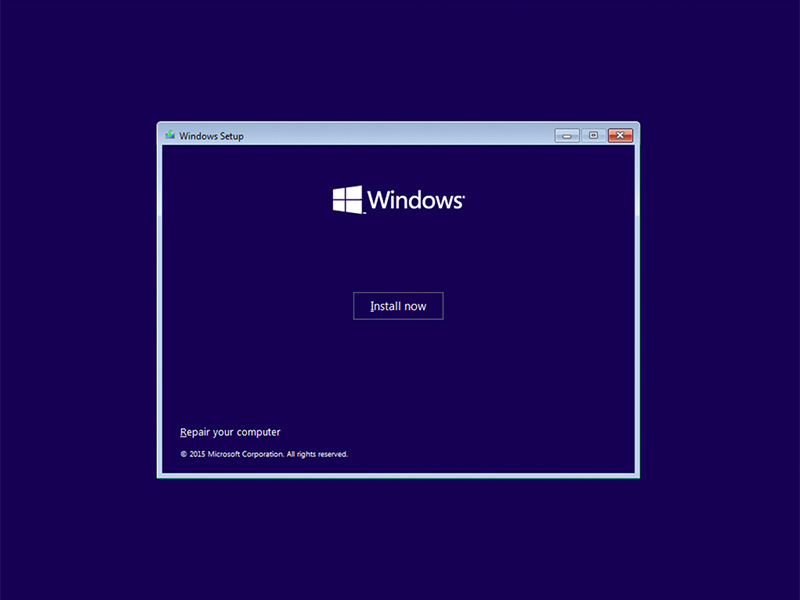
Figure 2: (English Only) Windows Installation screen
- Review the license agreement, and click I accept the license terms.
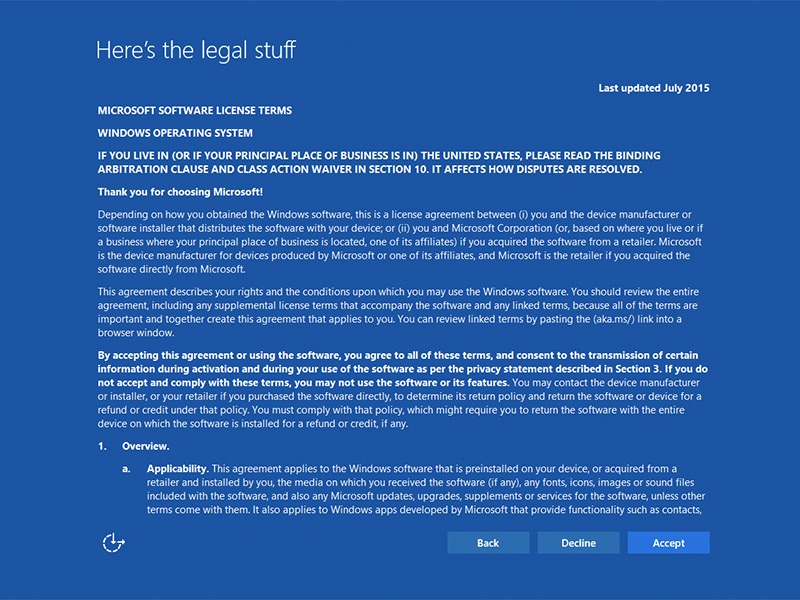
Figure 3: (English Only) Microsoft Software license terms
- On the Which type of installation do you want? window click Custom (advanced).
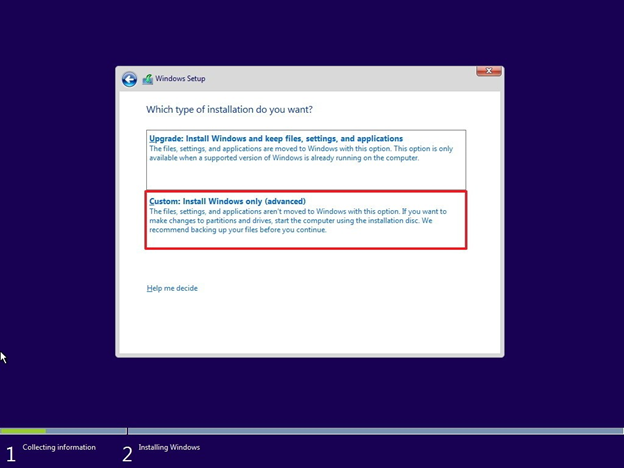
Figure 4: (English Only) Custom Install Windows only(advance)
- Click Drive Options (advanced).
Note: If no drives are detected, the Intel Rapid Storage Technology Driver (F6 driver) must be installed. Click Load Driver and follow the instructions to install the driver from removable media. For Optane drives you can locate the latest IRST driver using the following steps:

Figure 5: (English Only) Local driver
- Go to the Dell Support.
- Enter the service tag or express service code to get drivers specific to how your computer shipped.
Alternatively you can choose the computer from the product list to get a general list of drivers for that computer. - Click the Drivers & Downloads drawer in the menu.
- Ensure you have the correct operating system set.
- Select Serial ATA from the category dropdown.
- Locate the Intel Rapid Storage Technology F6 driver.
- Click the download link.
- Save the driver file to removable media to use on that computer.
Figure 5: (English Only) Local driver
- Select the newly formatted partition then click next to proceed with the Operating System installation. Remember to choose the Mechanical Hard Drive instead of the SSD.
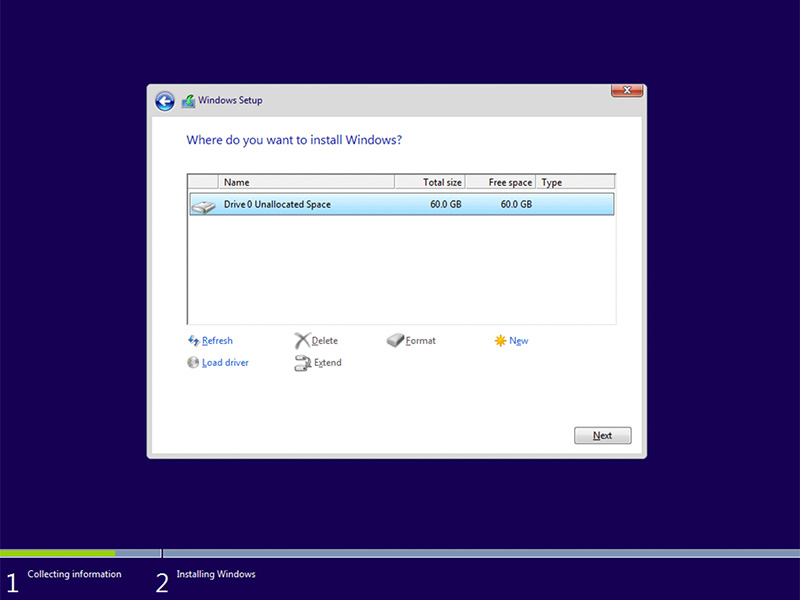
Figure 6: (English Only) Select formatted partition
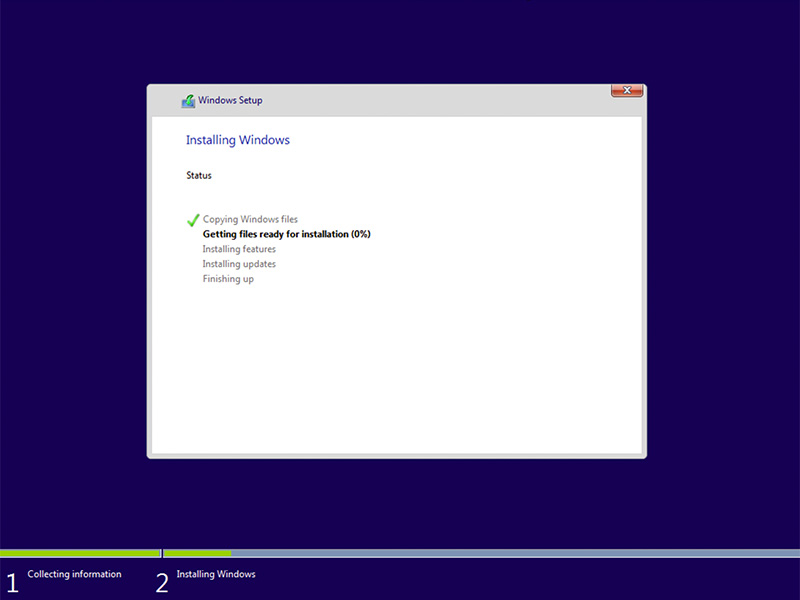
Figure 7: (English Only) Installing Windows Status
- Once Windows is ready, go to install the Intel Rapid Storage Software and follow this configuration:
- Open the Intel Rapid Storage Technology (IRST) User Interface (UI) from the start menu tile.
Note: The Optane memory button may not appear until after clearing the metadata.
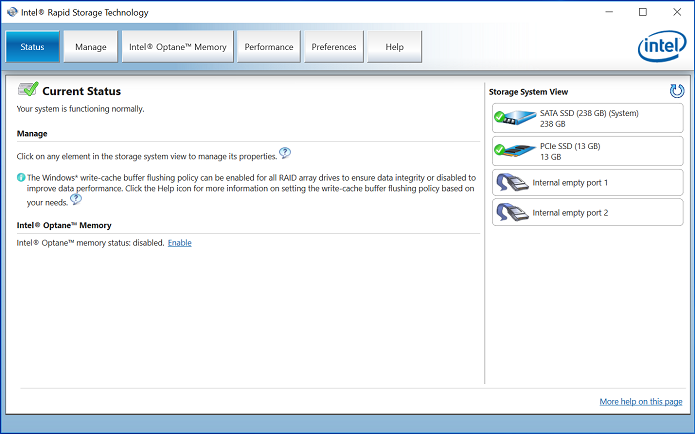
Figure 8: (English Only) IRST UI status
- Click Intel Optane Memory, to access the Optane configuration options.
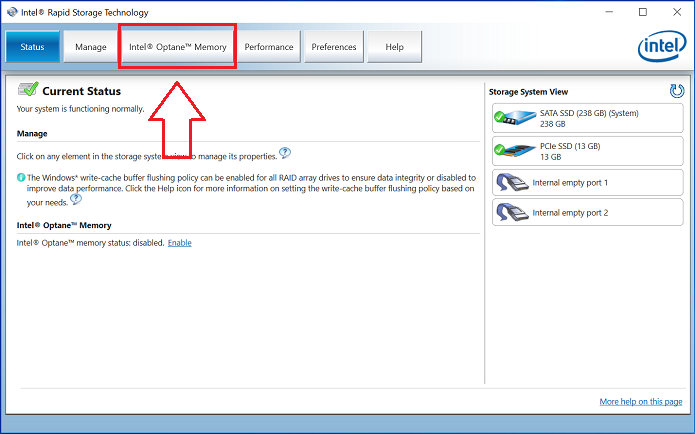
Figure 9: (English Only) Intel Optane Memory
- Click the Enable hyperlink in the IRST interface to pair the Optane module with the SATA 3 drive.

Figure 10: Enable Intel Optane Memory
- A window is displayed showing the Optane device and the computer drive that the Optane device is paired with, then click Yes.
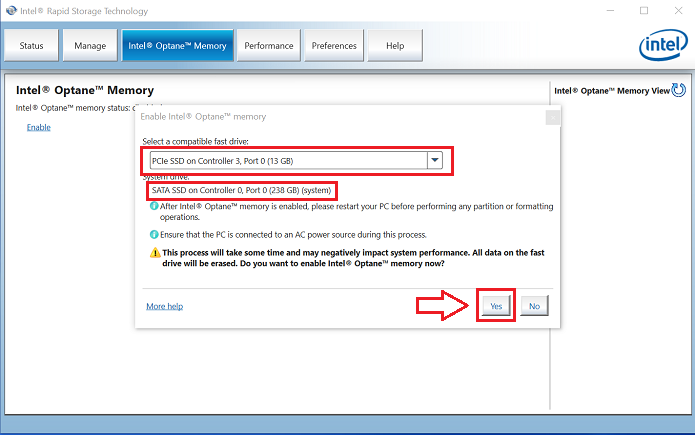
Figure 11: (English Only) Select a compatible fast driver
- Once the pairing is complete, click the Reboot button to complete the Optane configuration.
Note: The SATA Drive, and the Optane device are now shown as an Optane Memory Array.
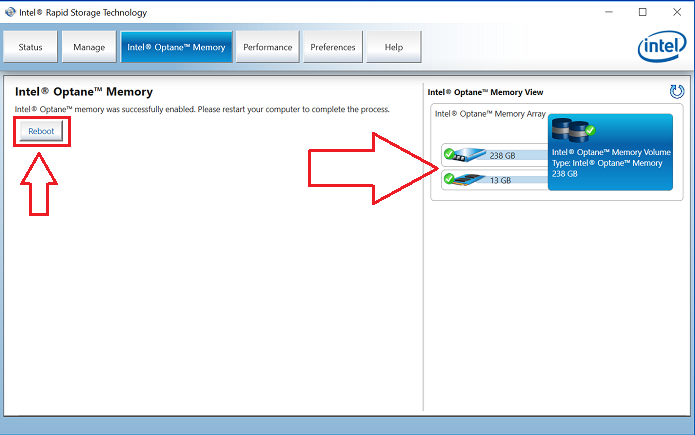
Figure 12: (English Only) Reboot
- After the computer restarts, you can open the Intel Rapid Storage Technology application from the top of the start menu. If you click the Intel Optane Memory tab, you now see that the hyperlink option is now Disable, indicating that Optane is enabled

Figure 13: (English Only) Optane enabled
Article Properties
Affected Product
Alienware, Inspiron, OptiPlex, Vostro, XPS, G Series, G Series, Alienware, Inspiron, Latitude, Vostro, XPS, Fixed Workstations, Mobile Workstations
Last Published Date
30 Apr 2024
Version
8
Article Type
How To