How to Install and Register Wyse Management Suite Repository Hosted on Microsoft Azure
Summary: This article provides the steps to register a Wyse Management Suite (WMS) remote repository hosted on Microsoft Azure.
This article applies to
This article does not apply to
This article is not tied to any specific product.
Not all product versions are identified in this article.
Instructions
Affected Products:
- Wyse Management Suite
Affected Versions:
- v3.6 and later
Affected Operating Systems:
- Windows Server 2016 and later
- Create a virtual machine (VM) on Microsoft Azure following the Microsoft documentation and guidelines. WMS specific server configuration can be found in the WMS Release Notes.
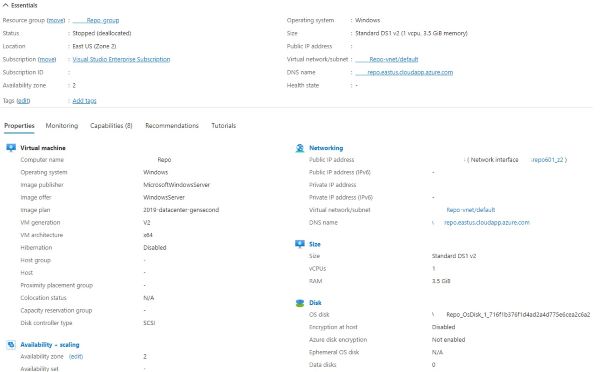
Figure 1: (English Only) Azure Virtual Machine
- Download the latest remote repository from Dell Drivers & Downloads.

Figure 2: (English Only) Dell Wyse Management Suite Repository
- Install the remote repository on the Azure VM following the detailed instructions below:
- Launch WMS_Repo.exe, click Next.
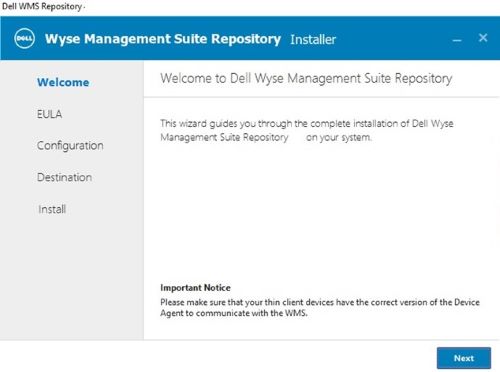
Figure 3: (English Only) Wyse Management Suite Repository Installer
- Accept EULA, click Next.

Figure 4: (English Only) Accept EULA and click Next
- Enter Trust Store Password and Software Vault Password, click Next.
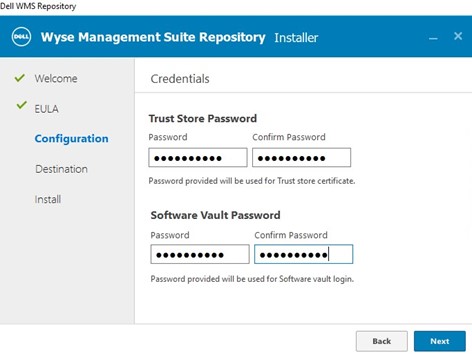
Figure 5: (English Only) Enter the passwords and click Next
- Create a new Service Account User and Credentials or use Existing User, click Next.
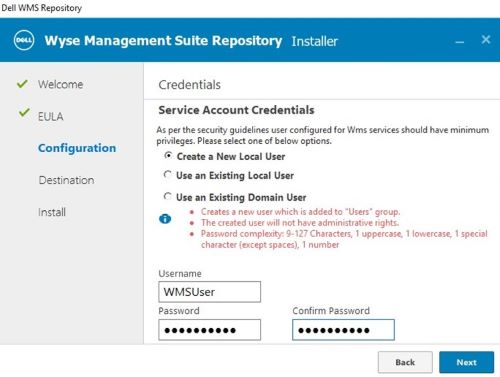
Figure 6: (English Only) Create a Service Account or use an Existing Account and click Next.
- Confirm Security Configuration, click Next.
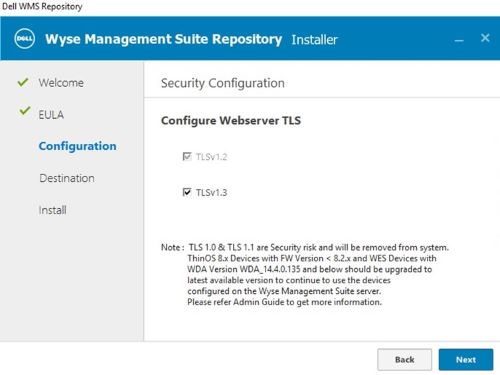
Figure 7: (English Only) Confirm Security Configuration and click Next
- Confirm Destination, click Next.
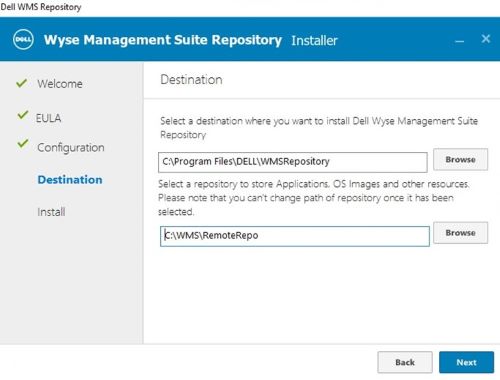
Figure 8: (English Only) Confirm Destination and click Next
- Installation starts

Figure 9: (English Only) Installation starts
- After successful installation, click Launch.

Figure 10: (English Only) Click Launch
- On the Registration page:
- Check the Register to Public WMS Management Portal and select appropriate regional cloud instance.
- Enter the log in credentials for WMS Admin
- Change Repository URL to reflect your Azure DNS Name appended by /wms-repo
- For example, https://YourAzureRepo.eastus.cloudapp.azure.com:443/wms-repo
- Confirm Repository Location
- Click Register
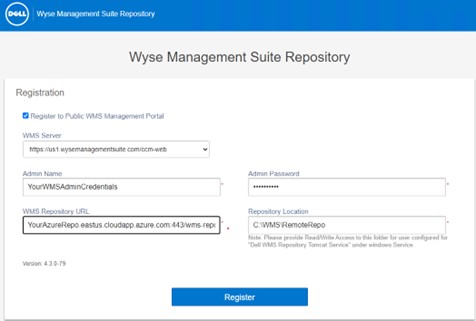
Figure 11: (English Only) Wyse Management Suite Repository Registration
- Registration Successful
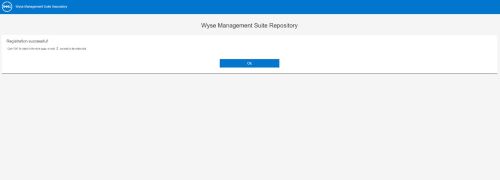
Figure 12: (English Only) Registration successful
- For registration confirmation on the WMS, Log in to the WMS > Portal Administration > File Repository
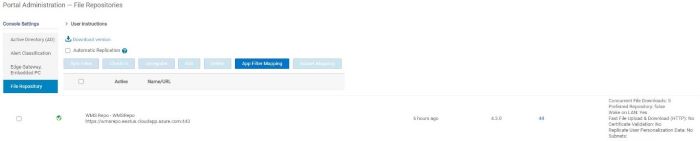
Figure 13: (English Only) File Repository
Affected Products
Wyse Management SuiteArticle Properties
Article Number: 000223718
Article Type: How To
Last Modified: 16 Apr 2025
Version: 4
Find answers to your questions from other Dell users
Support Services
Check if your device is covered by Support Services.