PowerEdge: Establishing a Network Connection using Static IPs in Support Live Image
Summary: This article goes over the basics of managing Network devices, and assigning Static IPs using the UI or Terminal.
This article applies to
This article does not apply to
This article is not tied to any specific product.
Not all product versions are identified in this article.
Instructions
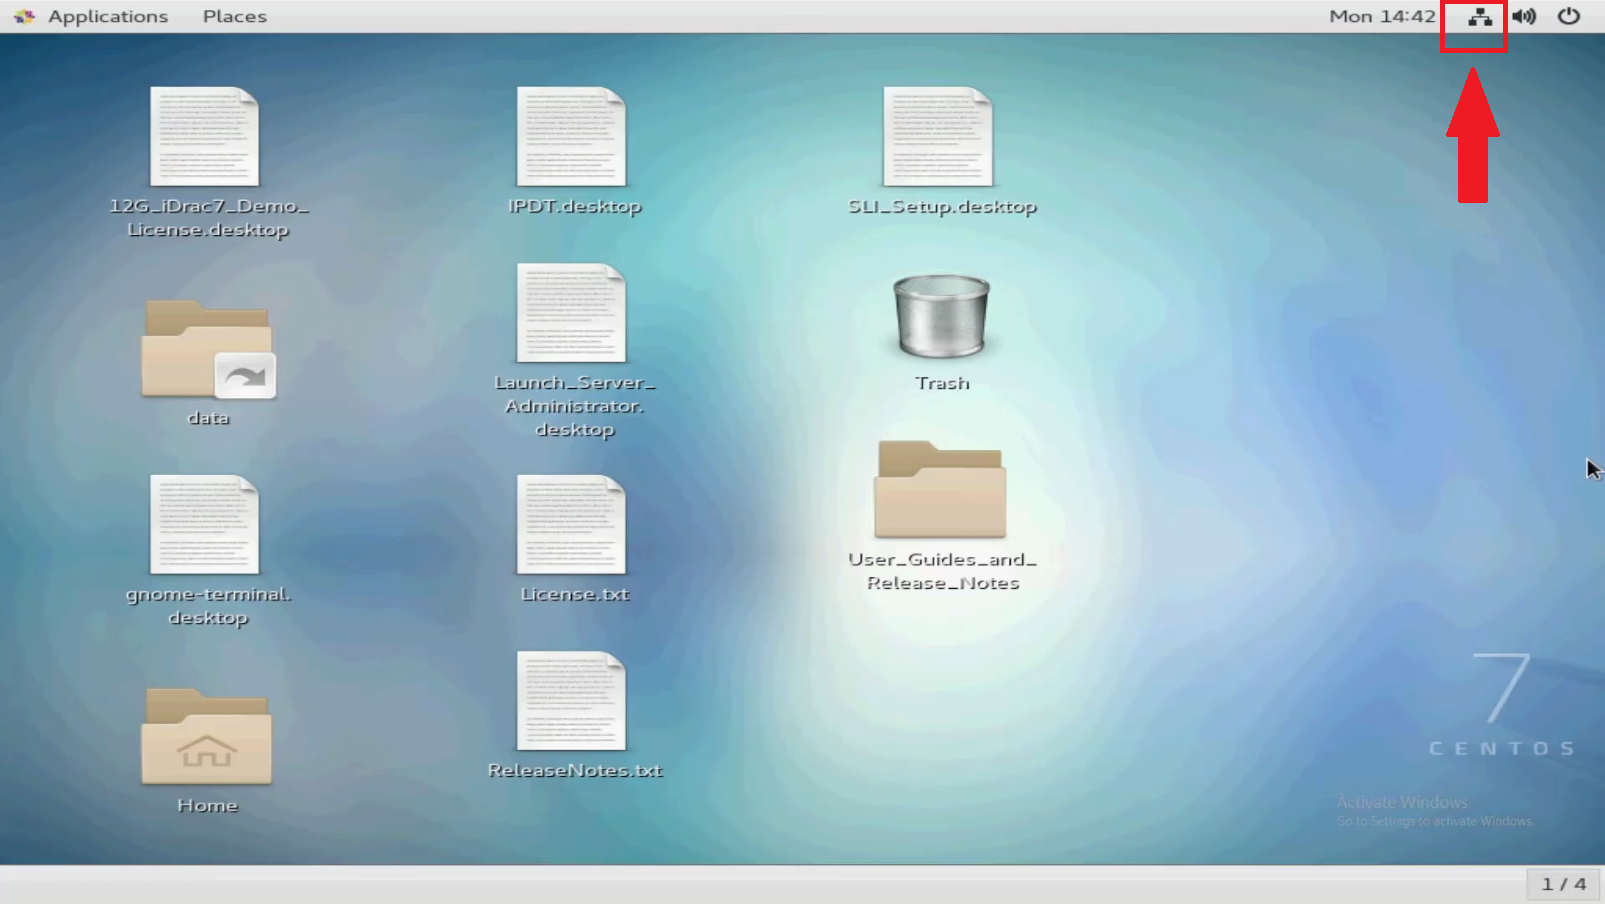
Viewing Network Connections
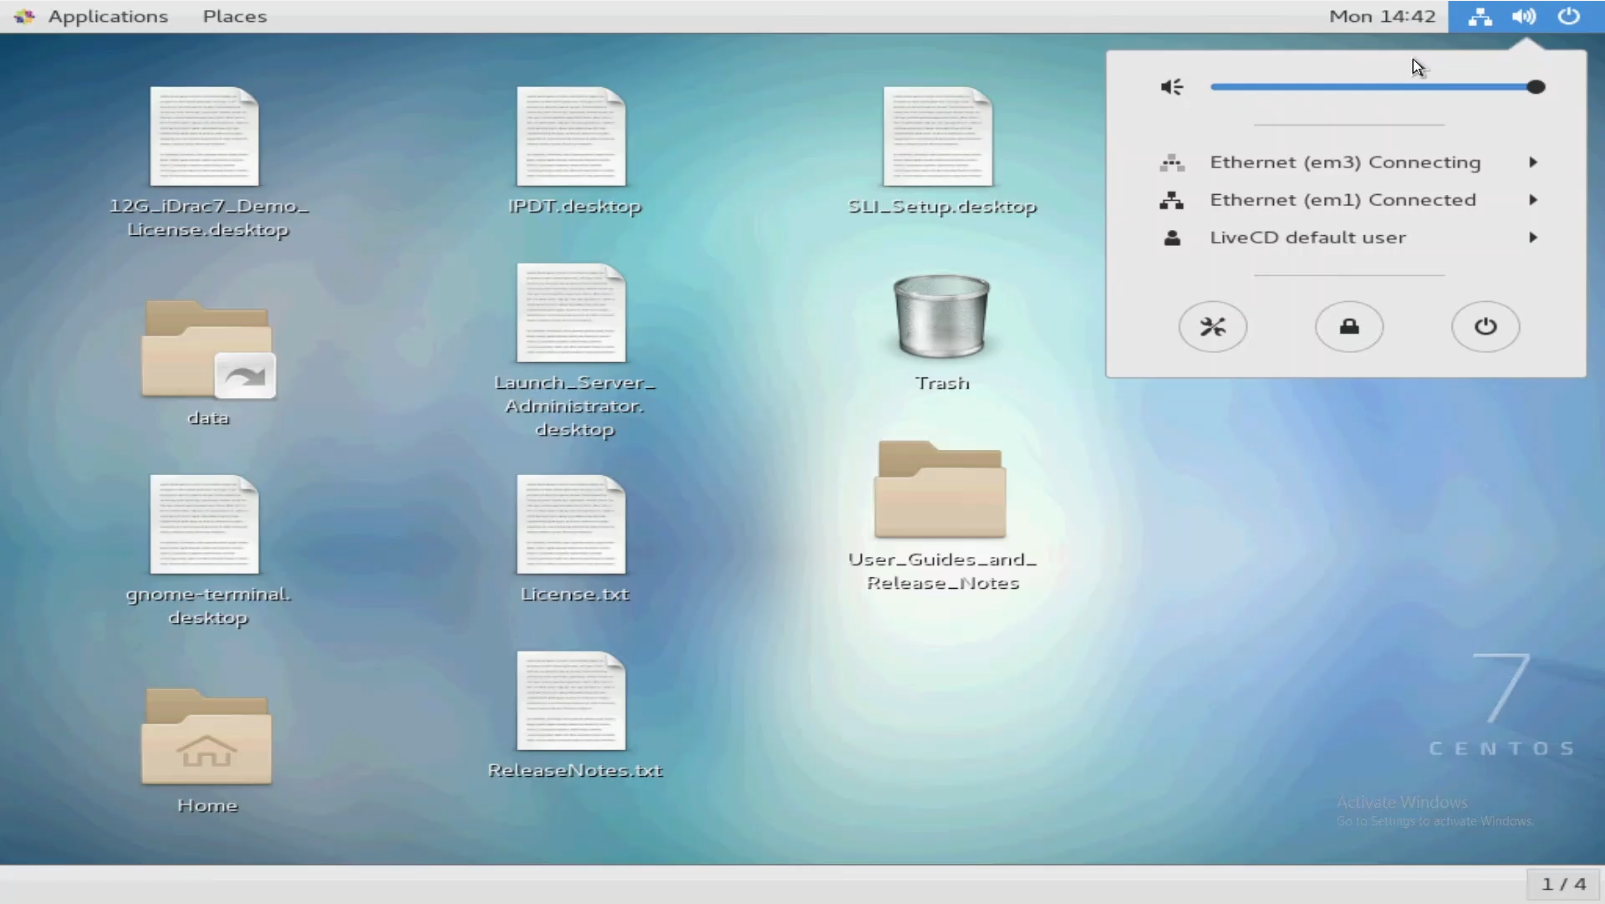
In the upper right corner of the screen you can see the Network icon. Clicking this shows current connections, and you can also view wired settings. SLI is configured for connected NICs as DHCP clients.
If they are connected to a properly configured network with DHCP, a networking connection should automatically be established.
Assigning Static IPs.
Assign static IPs using the UI, or using command line from the Terminal.
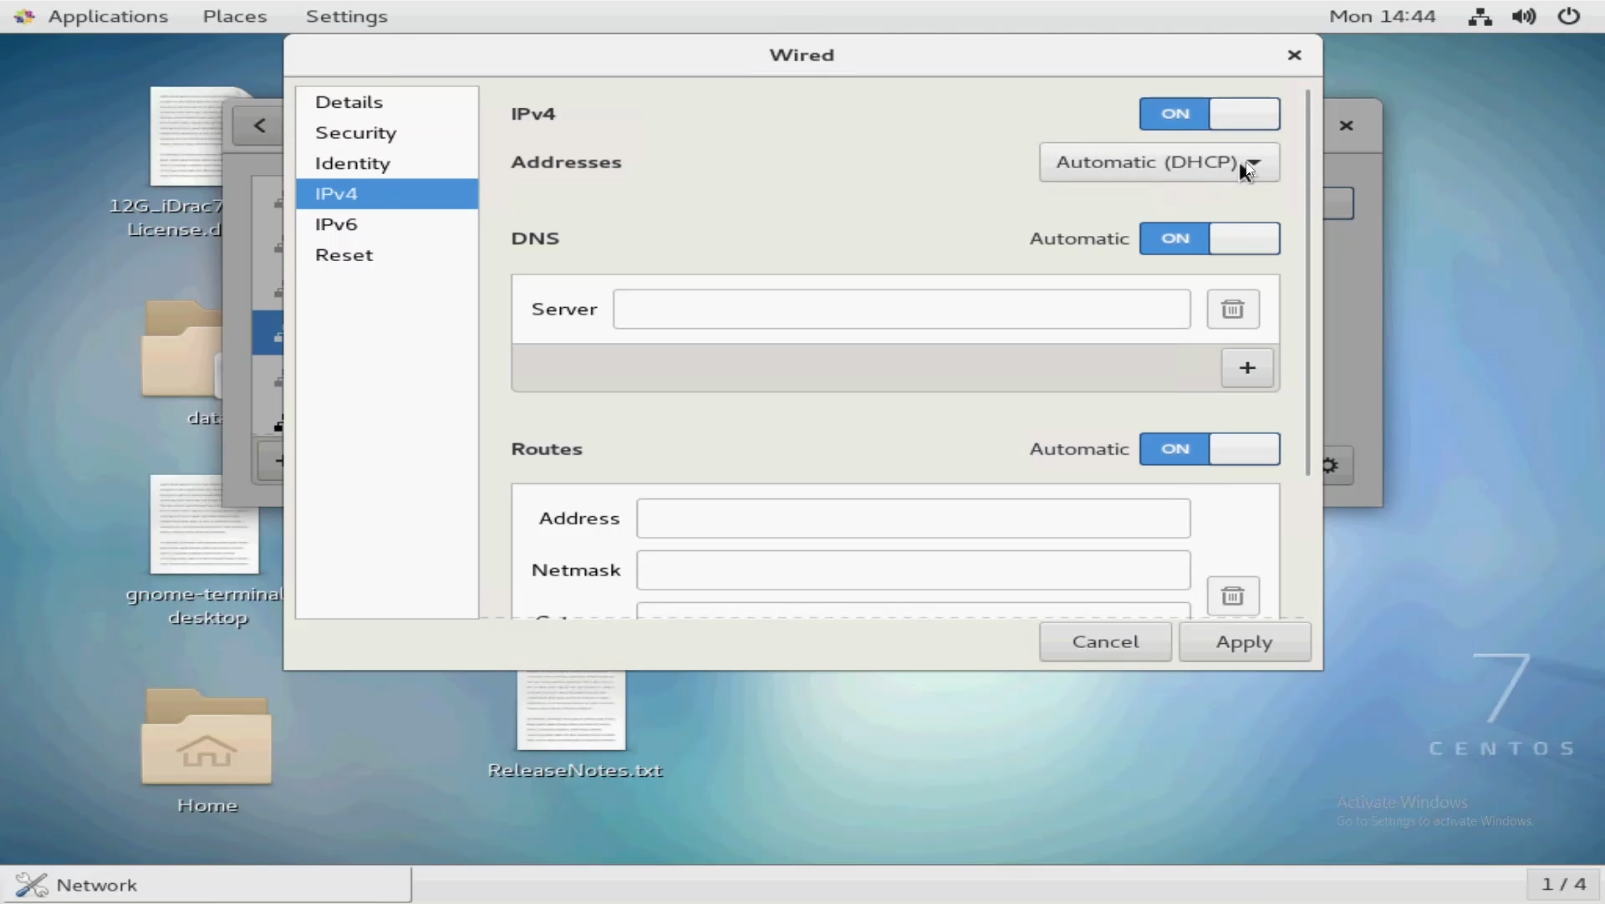
Using the UI
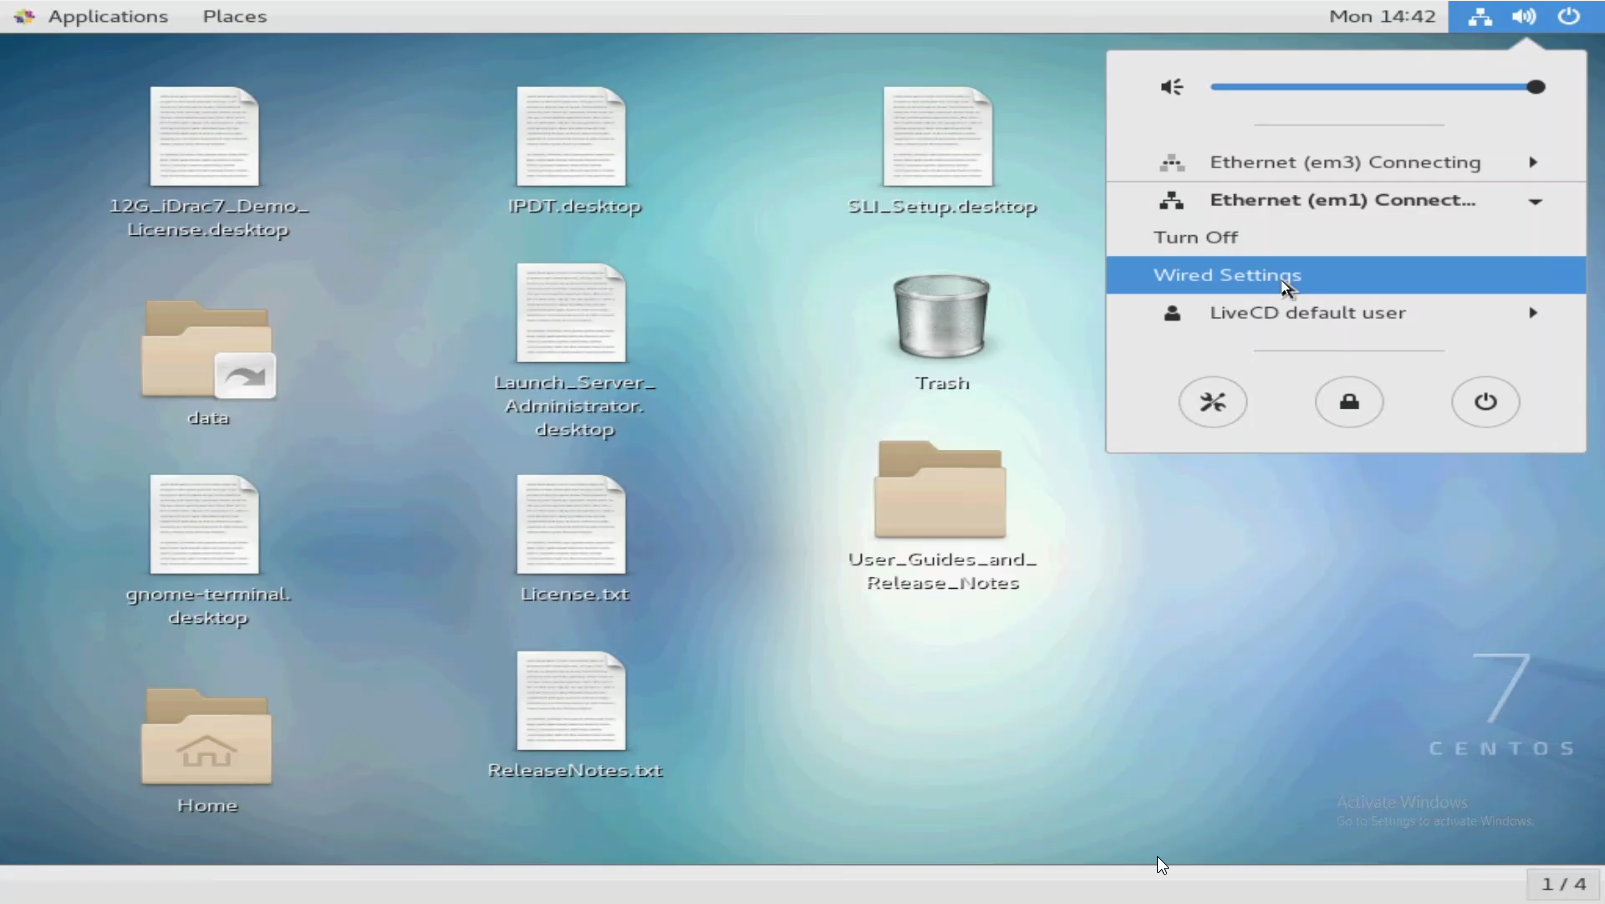
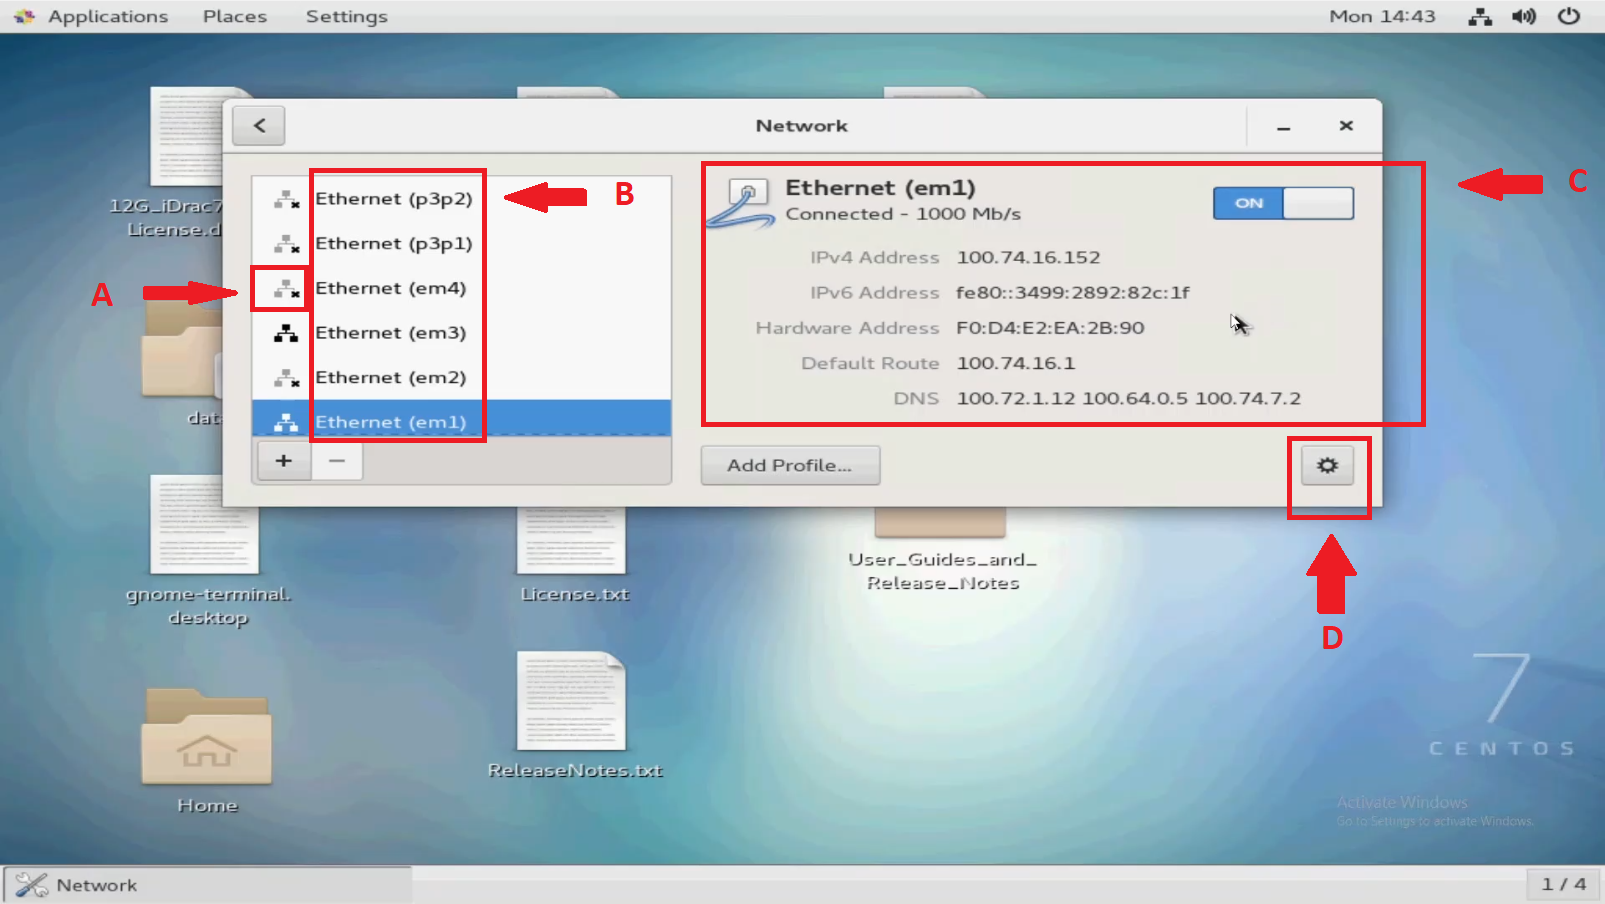
After clicking the network icon, select one of the devices, and then select "Wired Settings." Each Networking Device is listed.
You can select which is needed for configuration and click the gear at the bottom right.
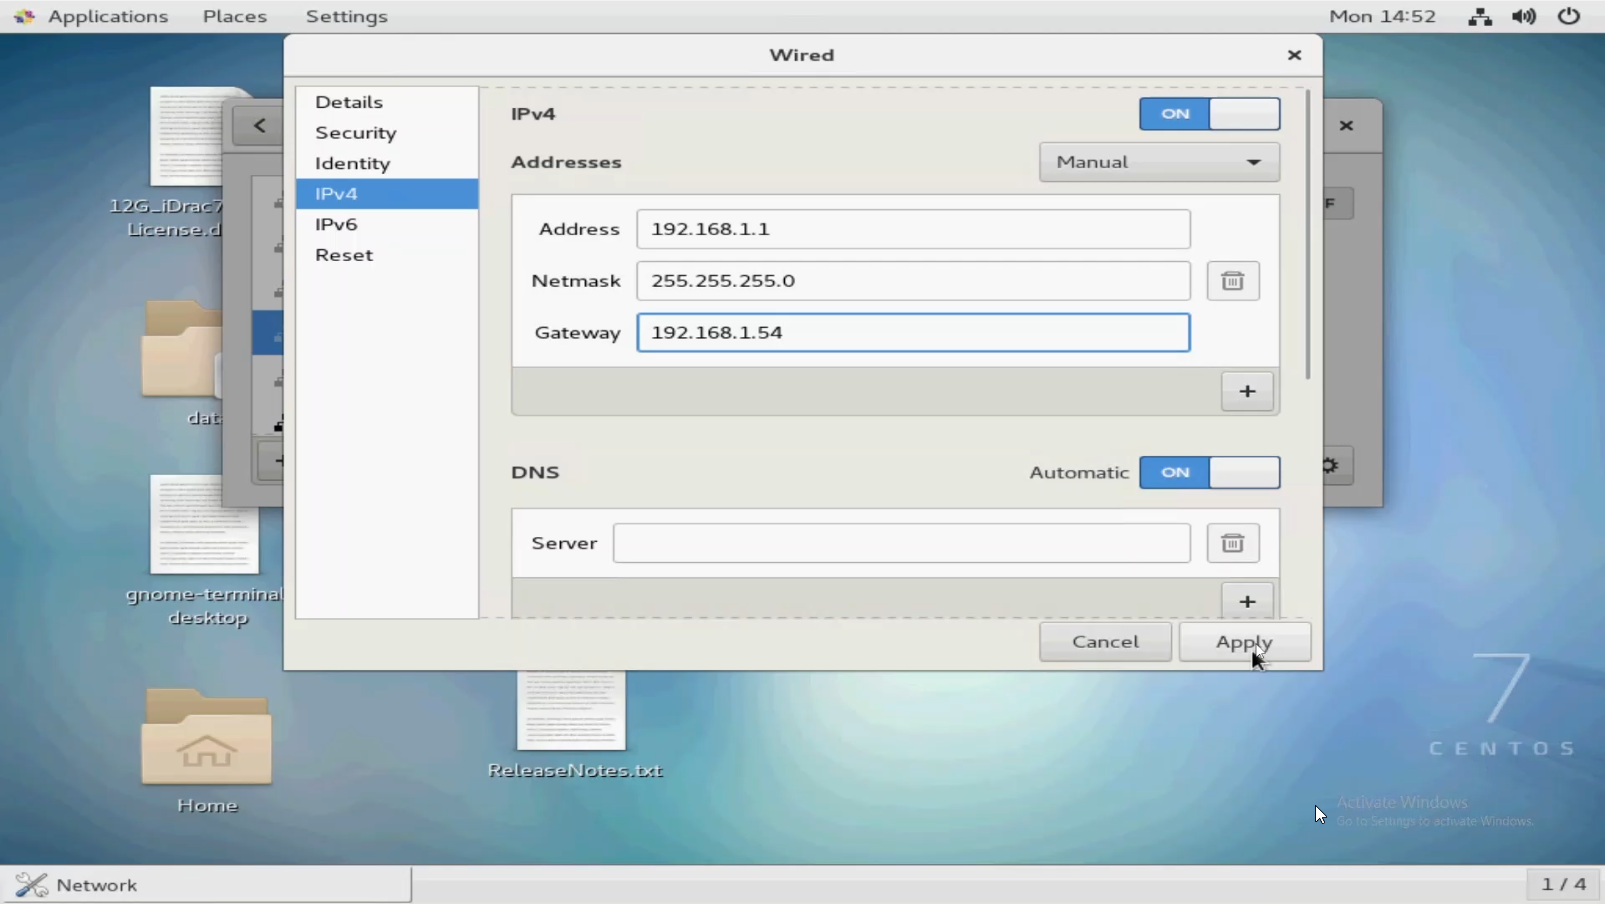
Be sure to change from DHCP to "Manual."
Enter an IP Address, Subnet Mask, and Gateway to apply changes.
Be sure to change from DHCP to "Manual."
Enter an IP Address, Subnet Mask, and Gateway to apply changes.
Using Command Line/Terminal
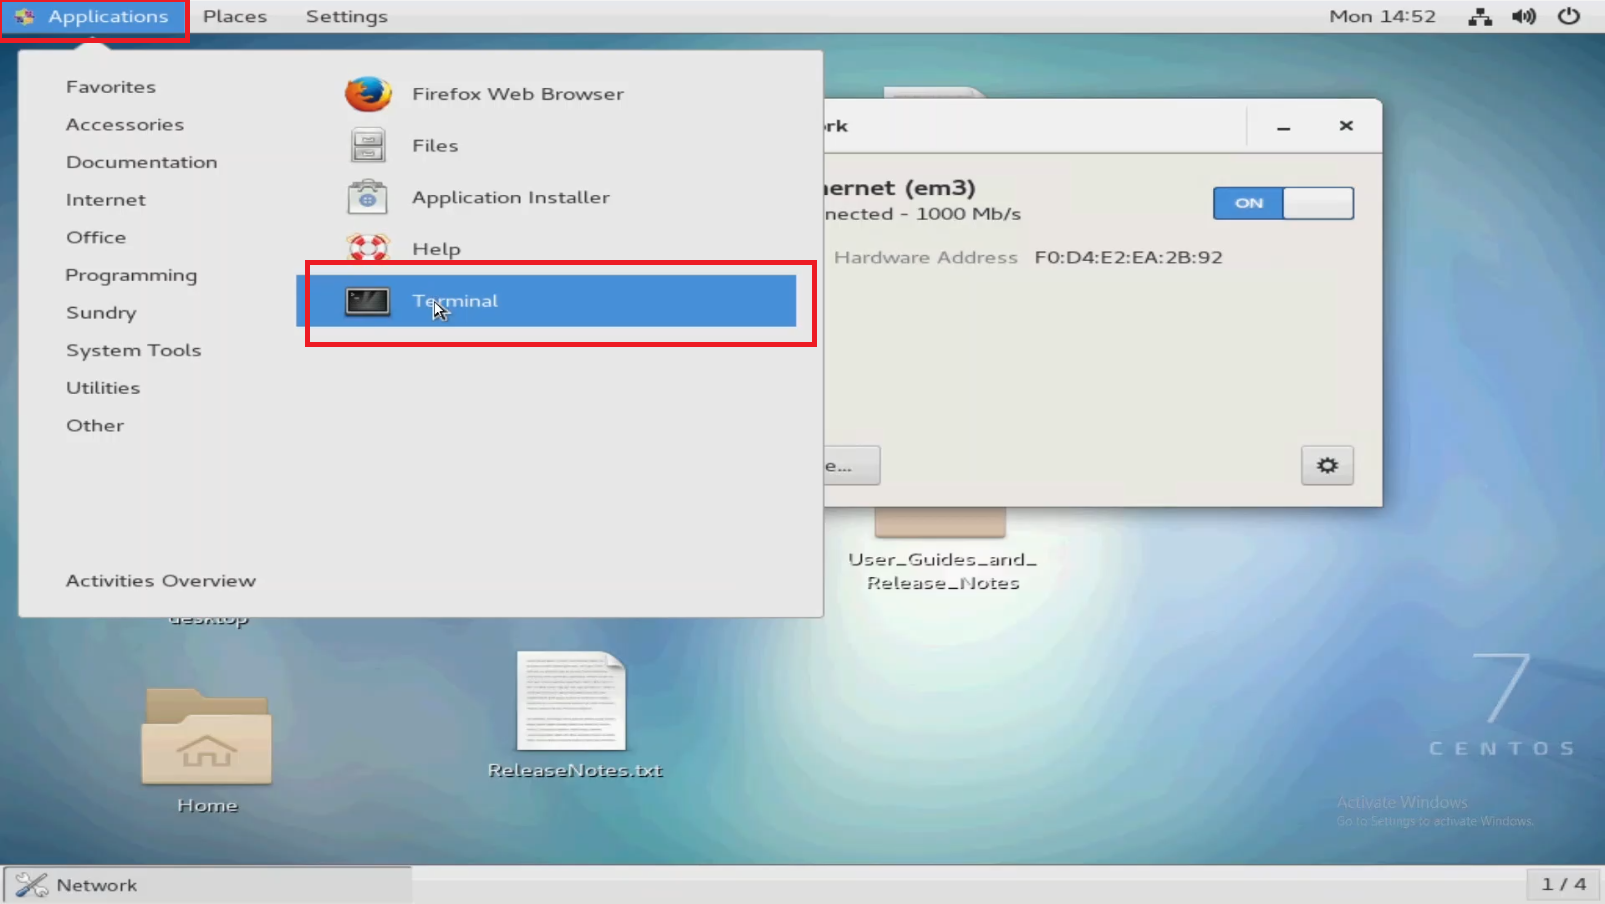
At the upper left, click Applications, and then click Terminal.
Right-click the Desktop and select Open in Terminal.
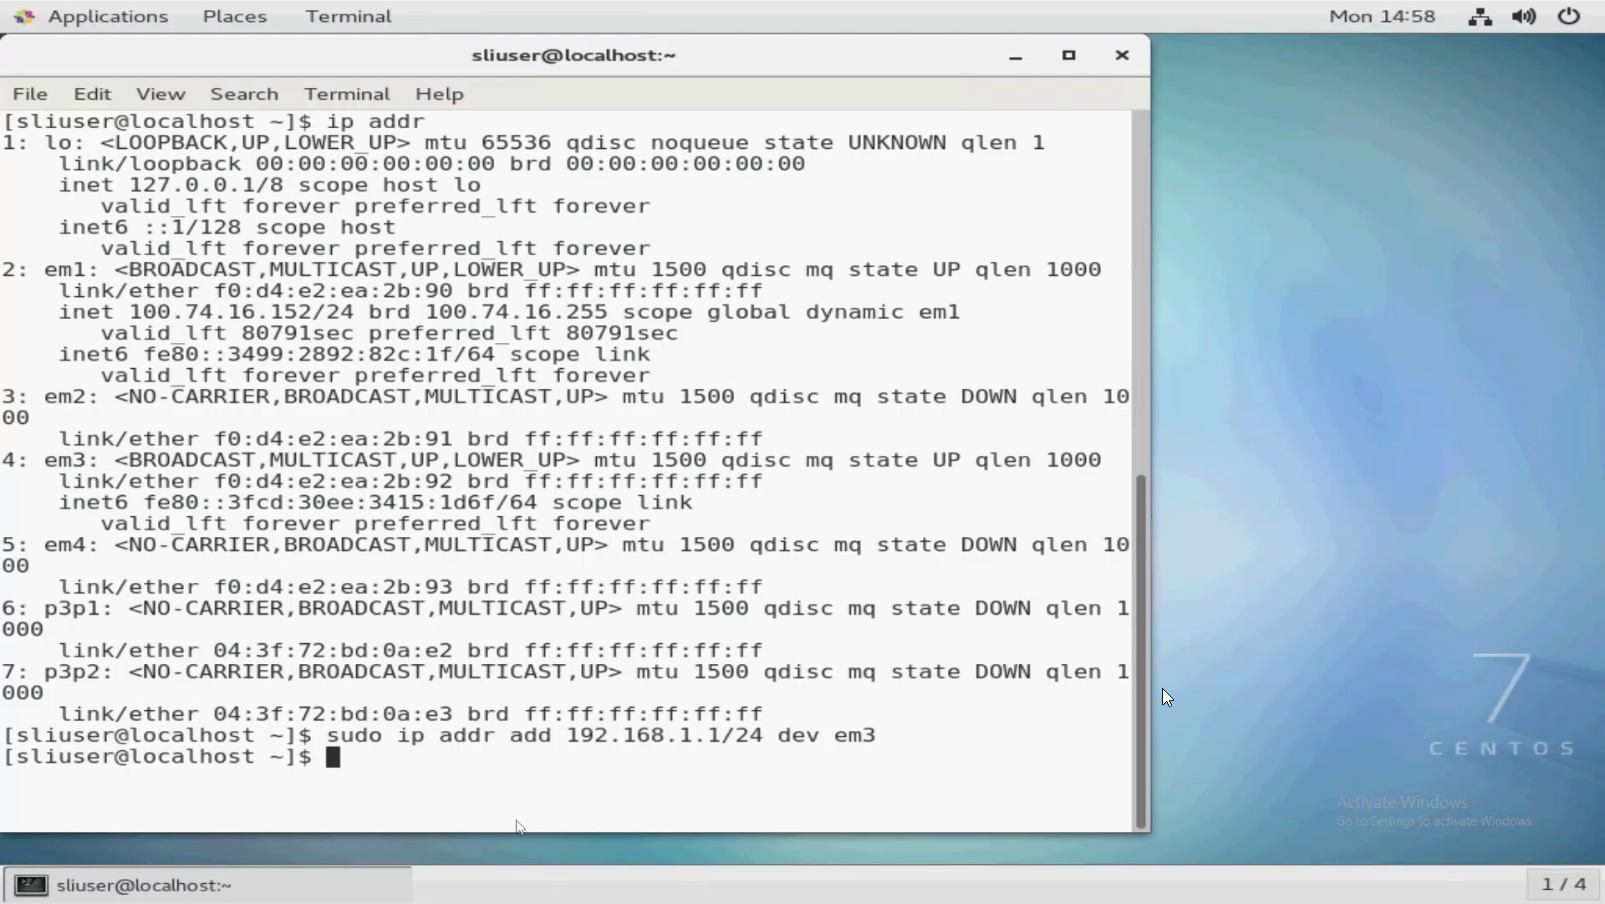
First, run the command ip addr to view network connections.
In this example you can see a few points of interest:
To configure em3 with a Static IP, we must input a command with the IP and Subnet Mask information.
em1 showing IP address, as that is the port that is connected to the network acquiring an IP Address over DHCP.
em3 has no IP Address.
em4 shows "NO-CARRIER," which means no signal is detected on the line.
To configure em3 with a Static IP, we must input a command with the IP and Subnet Mask information.
The Subnet Mask must be in CIDR Notation.
Remember to also put "sudo" at the beginning if you are not the root user.
Example:
Remember to also put "sudo" at the beginning if you are not the root user.
Example:
sudo ip addr add 192.168.1.1/24 dev em3
This assigns an IP address of 192.168.1.1, a Subnet Mask of 255.255.255.0 (/24 in CIDR), to device em3.
Run the following command again to view the changes:
Run the following command again to view the changes:
ip addr

Final Thoughts
Assigning a Static IP requires knowledge of the infrastructure.
The owner of the network must know the proper IP Address, Subnet, and Gateway to establish a connection and not cause conflicts.
A Dell representative would not know this unless they are already familiar with the network.
Understanding Networking, Subnetting, as other aspects are a field in and of itself.
Understanding Networking, Subnetting, as other aspects are a field in and of itself.
You can use search engines to convert Subnet Masks from their four octet form (255.255.255.0, 254.0.0.0, and so on) to their CIDR notation form (
/24, /23, and so on).
Additional Information
See this video:
Affected Products
Support Live Image, PowerEdge R540, PowerEdge R550, PowerEdge R640, PowerEdge R6415, PowerEdge R650, PowerEdge R650xs, PowerEdge R6515, PowerEdge R6525, PowerEdge R660, PowerEdge R660xs, PowerEdge R6615, PowerEdge R6625, PowerEdge R670
, PowerEdge R740, PowerEdge R740XD, PowerEdge R740XD2, PowerEdge R7415, PowerEdge R7425, PowerEdge R750, PowerEdge R750XA, PowerEdge R750xs, PowerEdge R7515, PowerEdge R7525, PowerEdge R760, PowerEdge R760XA, PowerEdge R760xd2, PowerEdge R760xs, PowerEdge R7615, PowerEdge R7625, PowerEdge R770, PowerEdge R7715, PowerEdge R7725, PowerEdge R840, PowerEdge R860, PowerEdge R940, PowerEdge R940xa, PowerEdge R960
...
Article Properties
Article Number: 000196874
Article Type: How To
Last Modified: 22 Apr 2025
Version: 7
Find answers to your questions from other Dell users
Support Services
Check if your device is covered by Support Services.