Dell Command Integration Suite Default Path for Applications
Summary: This page describes why the download size on the clients displays a greater value than the size of the application in Software Gallery.
This article applies to
This article does not apply to
This article is not tied to any specific product.
Not all product versions are identified in this article.
Instructions
Affected Products:
- Dell Command | Integration Suite for System Center
Table of Contents:
Configuration Manager Applications
Dell Command | Integration Suite for System Center (DCIS) and Dell Command | Integration Suite for System Center (DCIS) Configuration Manager Applications created using Dell Software Gallery wizard applications download sizes are huge (as large as several GBs). This causes long download times and unnecessary network traffic and potentially running out of disk space on the client.
Symptoms of this issue include the following:
In Software Gallery when you select an application as in:
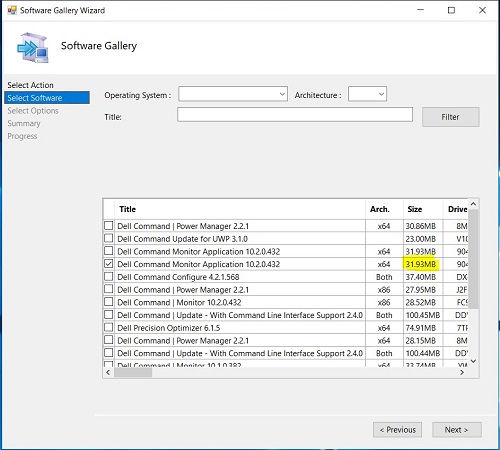
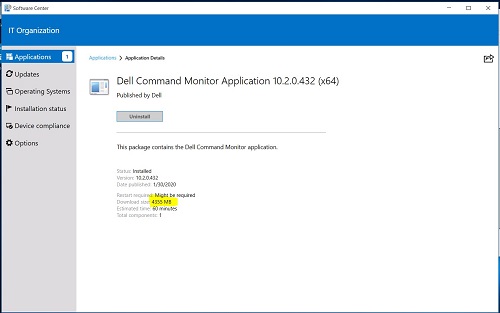
You see that when the application is deployed to the client the download size of the application on the client is greater than the application size in Software Gallery on the server. For example, the above image shows that the application size is listed as 31.9 MB, the corresponding application is listed as having a download size of 4335 MB.
Note: The reason the download size is greater, is due to the content location of the Application having multiple files that are packaged as part of the deployment. This occurs if you are using the default UNC path ..\lib\Packages\Deployment\Dell\Client\ for content location.
Software Gallery Applications Solution
An administrator can resolve this issue with Software Gallery applications by not using the default path and using subfolders for the content location. Below Dell Technologies provide two solutions depending on if you have not created an application yet or if you have already created an application using Software Gallery.
If you have not created an application using Software Gallery, follow these steps:
- Launch System Center Configuration Manager
- Go to the Dell Command | Software Gallery Applications:
- Click Software Library in the lower left of the pane
- Under Overview, expand the Application Management folder
- Right click Applications folder
- Select the Dell Command | Software Gallery from the drop-down
- On the Software Gallery screen Select Action tab, select Publish and click Next
- On the Software Gallery screen Select Software tab, select only one application and click Next
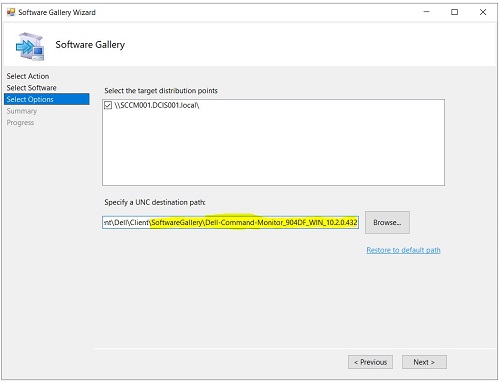
- On the Software Gallery screen Select Options, for the Specify a UNC destination path field, append the folders \SoftwareGallery\<ApplicationName_Driver ID_WIN_Version >\ to the end of the existing ..\OSD\lib\Packages\Deployment\Dell\Client\ text in the field.
The ApplicationName, Driver_ID, and Version can be found on the previous screen.
The new UNC destination path becomes:
..\OSD\lib\Packages\Deployment\Dell\Client\SoftwareGallery\< ApplicationName_Driver ID_WIN_Version >
- On the Software Gallery screen Select Summary. Click Finish
If you have already created an application using Software Gallery, follow these steps:
- Launch System Center Configuration Manager
- Go to the Dell Command | Software Gallery Applications:
- Click Software Library in the lower left of the pane
- Under Overview, expand the Application Management > Applications > Dell Software Gallery Applications folder
- Select the application. Right click and select Properties
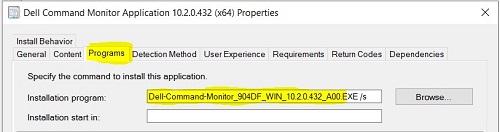
- Select the Deployment Types tab. Select the application under Deployment Types. Click Edit
- Select the Programs tab. From the Programs tab, take note under Installation program the name of the EXE that are needed for the steps below.
Once you have identified the name of the EXE, use this value to create a subfolder under the default UNC path
- Open File Explorer
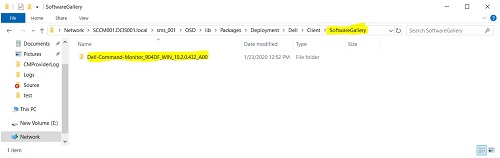
- Create the folder SoftwareGallery under the Dell default UNC path
(..\OSD\lib\Packages\Deployment\Dell\Client\)
If you do not know the Dell default UNC path - Under the folder (..\OSD\lib\Packages\Deployment\Dell\Client\SoftwareGallery\), create another subfolder with the name of the EXE identified from step 2e. See the screenshot below with a sample application folder created
- Go back to the Dell default UNC path
(..\OSD\lib\Packages\Deployment\Dell\Client\) and right click the application with the name of the EXE identified from step 2e as shown in the below screenshot
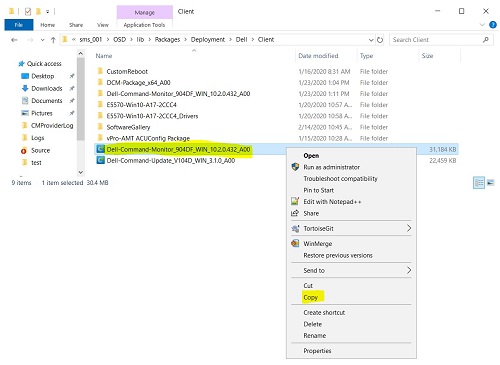
- Select Copy from the drop-down
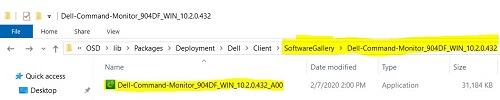
- Click the Folder Software Gallery and then the click the folder with the name of the EXE you created from Step 2e. For example:
…\OSD\lib\Packages\Deployment\Dell\Client\SoftwareGallery\Dell-Command-Monitor_904DF_WIN_10.2.0.432 - Once you are in the folder,
Right click and from the drop-down select Paste. The folder should look like the screenshot below, but with a different Name.
- Create the folder SoftwareGallery under the Dell default UNC path
- Go to the Dell Command | Software Gallery Applications:
- Click Software Library in the lower left of the pane
- Under Overview, expand the Application Management > Applications > Dell Software Gallery Applications folder
- Select the application. Right click and select Properties
- Select the Deployment Types tab. Select the application under Deployment Types. Click Edit
- Select the Content tab. Click Browse.

- Go and select the folder in the Dell default UNC path and select the folder you created (Name of EXE) from Step 2e.
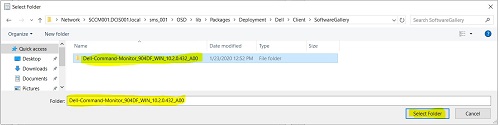
- Click Select the folder
- On the Content tab, click Apply
- On the Content tab, click OK. This closes the screen
- On the Deployment Types tab, click Apply
- On the Deployment Types tab, click OK. This closes the screen
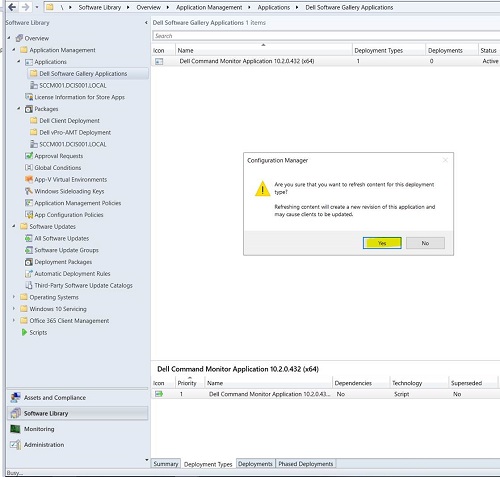
- Select the Deployment Types tab. Right-click and select Update Content
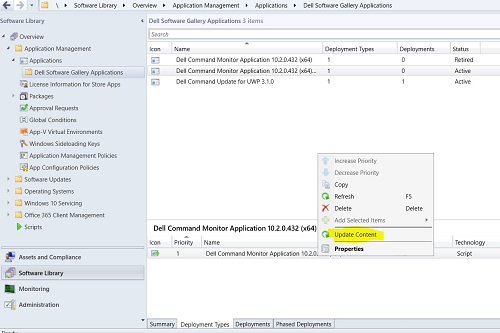
- Click Yes to update contents for this deployment type.
- You must distribute the contents again to your clients with the updated deployment types
- Click Yes to update contents for this deployment type.
Article Properties
Article Number: 000177191
Article Type: How To
Last Modified: 06 May 2026
Version: 7
Find answers to your questions from other Dell users
Support Services
Check if your device is covered by Support Services.