CloudIQ: Enabling Cybersecurity in CloudIQ
Summary: Cybersecurity monitoring is a feature in CloudIQ that assesses if infrastructure security configurations adhere to a user’s chosen policy, proactively notifies them of misconfigurations, and recommends actions to quickly reestablish security. It also provides vulnerability awareness with applicable Security Advisories. More capabilities will continue to be added in the future. CloudIQ Cybersecurity supports Dell PowerEdge, PowerStore, and PowerMax systems, and support for other Dell systems is under development. ...
This article applies to
This article does not apply to
This article is not tied to any specific product.
Not all product versions are identified in this article.
Instructions
There are several steps to fully enable CloudIQ Cybersecurity assessments and notifications.
- Enabling Products Cybersecurity Data Collections
- Enabling CloudIQ User Cybersecurity Roles
- Customization and enabling of product evaluation test plan
- Enabling Cybersecurity Email Notifications
This article discusses those steps and provides links to more detailed instructions where applicable.
Enabling Cybersecurity Data Collections
The first step to enable cybersecurity is to enable the collections at the system level.
- PowerMax - Cybersecurity collections must be enabled in Unisphere. See KB#00062039 for detailed instructions (A Dell Support account is required to view this article)
- PowerEdge - Cybersecurity collections must be enabled in OpenManage Enterprise. See KB#000189403 for detailed instructions.
- PowerStore - Cybersecurity collections are automatically enabled with CloudIQ data collection.
- PowerProtect Data Domain - Cybersecurity collections must be enabled in System Manager - See KB# 000183656 for detailed instructions.
Enabling CloudIQ User Cybersecurity Roles
Once Cybersecurity data collections are enabled at the system level, a user must be assigned one of the Cybersecurity roles in CloudIQ in order to enable collections and see the security status. The Cybersecurity Admin role allows users to configure, enable, and disable the security policies and view system security status. The Cybersecurity Viewer role allows users to view the policies and system security status.
Role assignment is completed from the Identity Management menu in CloudIQ. Users must have a role of CloudIQ Admin to this menu and assign roles. See KB#000191817 to determine CloudIQ Admins for a company.
Note: CloudIQ Admins must assign themselves one of the Cybersecurity roles to access the Cybersecurity information in CloudIQ.
The following procedure outlines how CloudIQ Admins assign Cybersecurity roles to users.
A Company Administrator, set under MyService360, is automatically assigned the CloudIQ Admin role. This allows access to the Identity Management menu where the CloudIQ Admin can manage user roles.
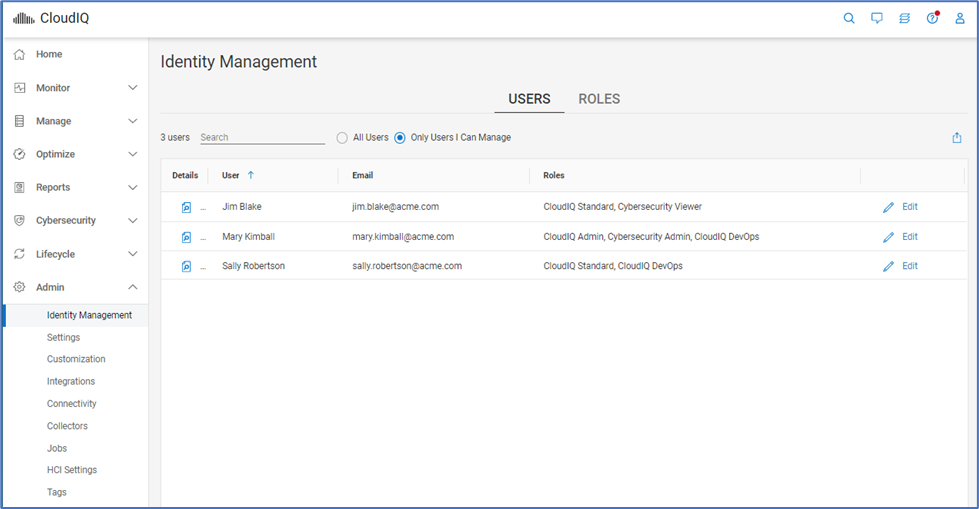
Role-based security is accessed from the Admin > Identity Management menu.
Users Tab
-
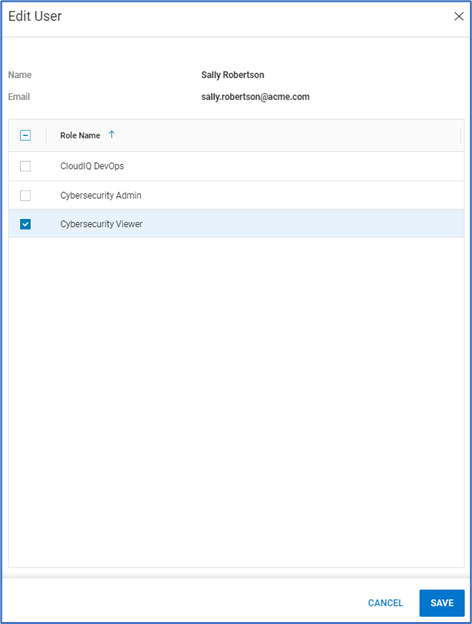
From the Users tab, click Edit next to a CloudIQ user.
-
Select either Cybersecurity Admin or Cybersecurity Viewer roles.
-
Click Save.
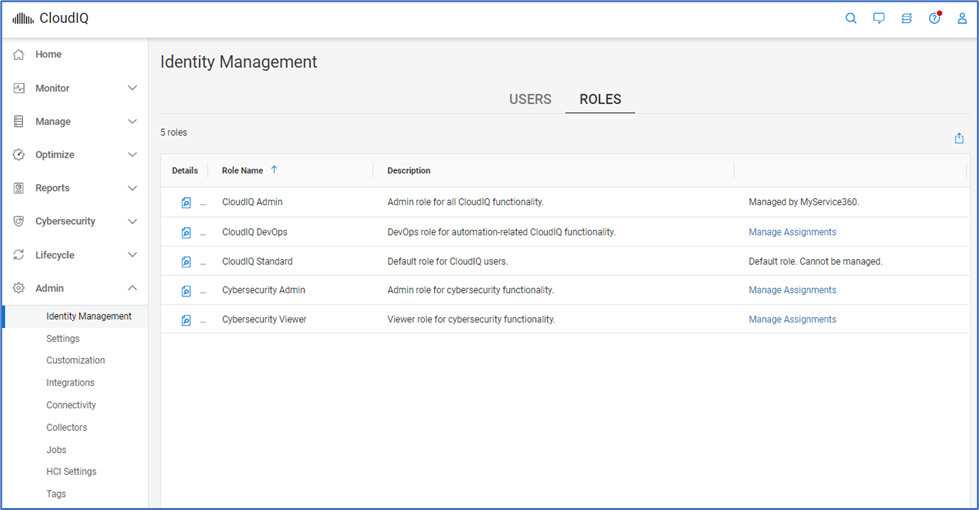
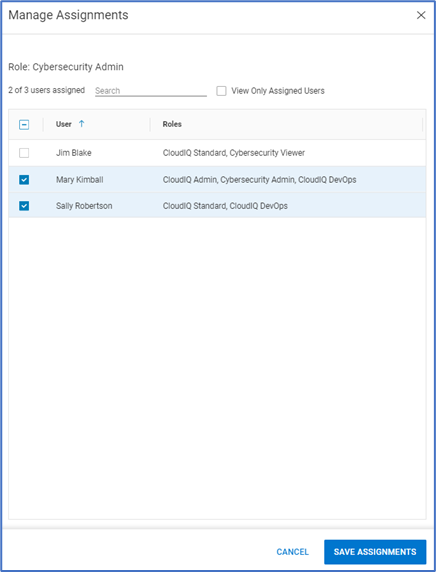
Roles Tab
- Alternatively, from the Roles tab, select Manage Assignments for either the Cybersecurity Admin role or Cybersecurity User role.
-
Select the CloudIQ user or users to assign to this role.
-
Select Save Assignments.
Enabling Cybersecurity Policies
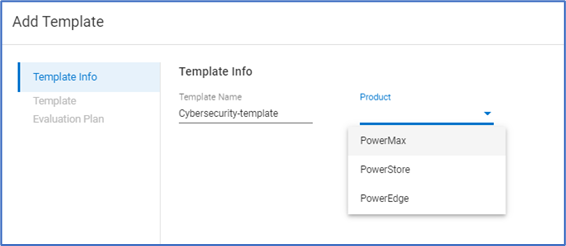
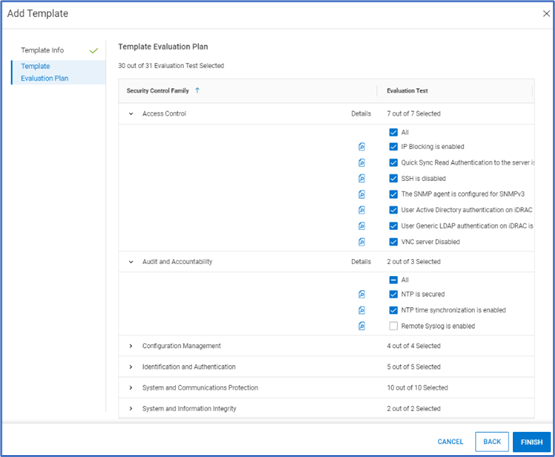
Once a user has been assigned the Cybersecurity Admin role, they must assign and enable an Evaluation Plan. The preferred mechanism to do this is by creating and assigning a Template. This is done from the Templates tab on the Cybersecurity > Policy page.
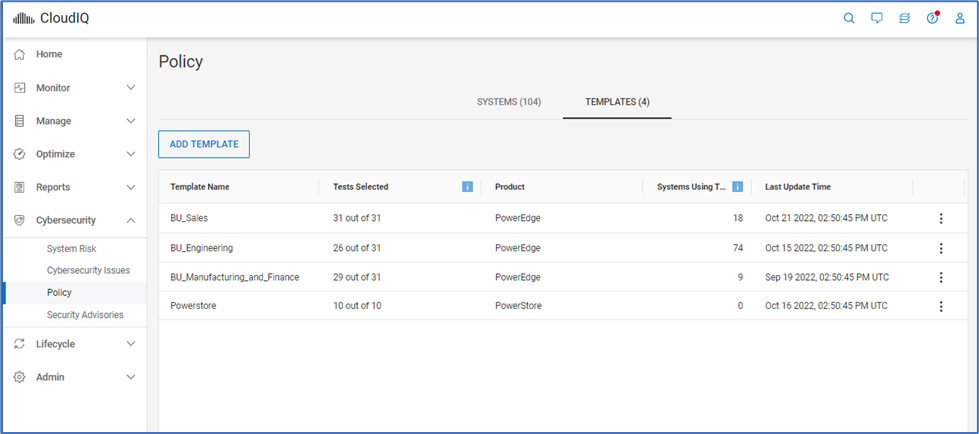
- Click Add Template.
- Provide a template name and choose the Product.
- Choose which tests should be in the Evaluation Plan and click Finish.
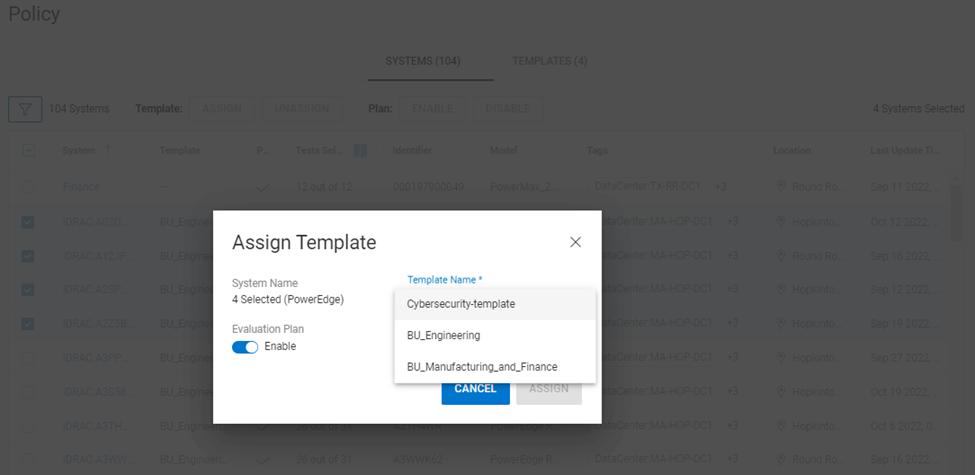
- Once the template is created, the user assigns it to systems from the Cybersecurity > Policy > Systems tab.
- Select one or more systems and click the Assign button.
Note: A template can only be assigned to one system type.
- Choose the template and verify that the Evaluation Plan button is Enabled. Evaluation plans can be disabled as needed during times of maintenance, decommissioning, and so on.
- Click Assign to complete the assignment. The configuration of the selected systems is now validated against the selected tests in the Evaluation Plan.
Enabling Cybersecurity Email Notifications
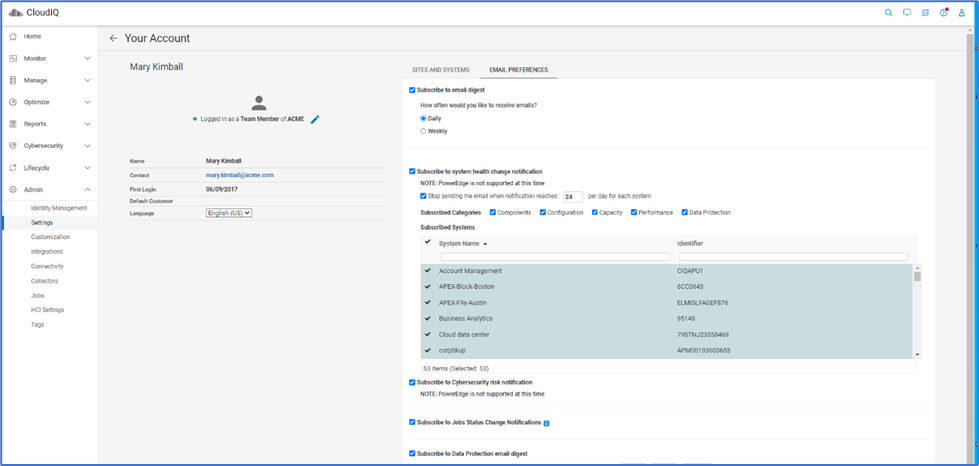
After systems have an active Evaluation Plan, the risk status of each system can be seen from the System Risk page. Users can also enable email notifications to alert them when a security violation is identified. This is set on a per-user basis from the Admin > Settings page. The user selects Your Account and then selects the Email Preferences tab and checks the Subscribe to Cybersecurity risk notification box.
Affected Products
PowerFlex rack, ScaleIO, CloudIQArticle Properties
Article Number: 000205045
Article Type: How To
Last Modified: 28 Mar 2025
Version: 8
Find answers to your questions from other Dell users
Support Services
Check if your device is covered by Support Services.