Error Validating Policy Message in Dell Remote Management Console
Summary: In version 9.5 and later of Dell Security Management Server (formerly Dell Data Protection | Enterprise Edition) and Dell Security Management Server Virtual (formerly Dell Data Protection | Virtual Edition), we get an "Error Validating Policy" message in RMC if there is an existing policy syntax issue. This was reported as an "internal server error" in previous 9.x versions. ...
Symptoms
Affected Products:
- Dell Security Management Server
- Dell Data Protection | Enterprise Edition
- Dell Security Management Server Virtual
- Dell Data Protection | Virtual Edition
Affected Versions:
- v9.5 and later

Figure 1: (English Only) Error Validating Policy message
Cause
Not Applicable
Resolution
This policy check can be disabled by modifying the core server configuration file PolicyService.config with the property name StrictValidation, changing the value from 'true' to 'false'.
In the core server logs we get the exact policy and value that is causing issues:
2016-10-24 09:43:01,657 ERROR POLICY [57] - Invalid Value for 90039 - Script Control Approve Scripts in Folders (and Subfolders): \ApprovedScripts\
2016-10-24 09:43:01,657 ERROR POLICY [57] - Exception in ArbitrateValue: uid - 90039
System.ArgumentException: Invalid Value for 90039
    at Credant.Policy.Policy.set_Value(String value):q!
    at Credant.Policy.Enterprise.Assembler.ArbitrateValue(Policy currentPolicy)
Steps to editing PolicyService.config
- Open Services on the Dell Security Management Server
- Stop the Dell Core Server Service.
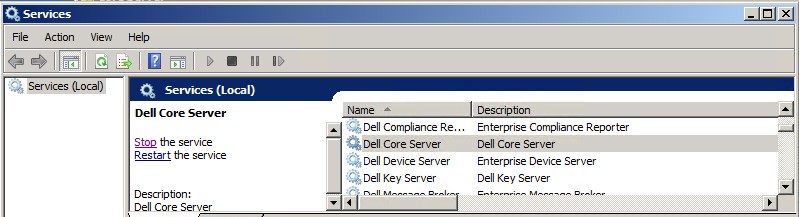
Figure 2: (English Only) Stop the Dell Core Server Service
- Go to
C:\Program Files\Dell\Enterprise Edition\Core Serverand editPolicyService.configwith a text editor.

Figure 3: (English Only) Edit PolicyService.config
- Scroll down the file to locate
StrictValidation.
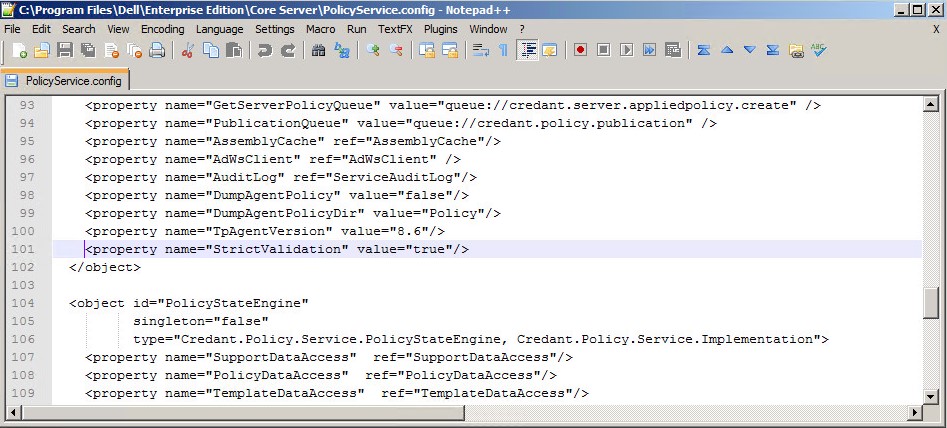
Figure 4: (English Only) Locate StrictValidation
- Change
StrictValidationfrom true to false (located below).
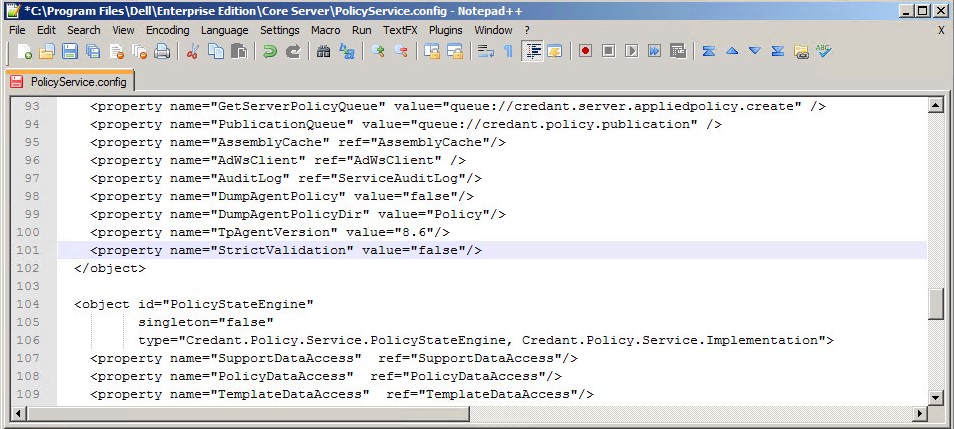
Figure 5: (English Only) Change StrictValidation from true to false
- Save
Policyservice.configand exit the text editor. - Start the Dell Core Server Service.
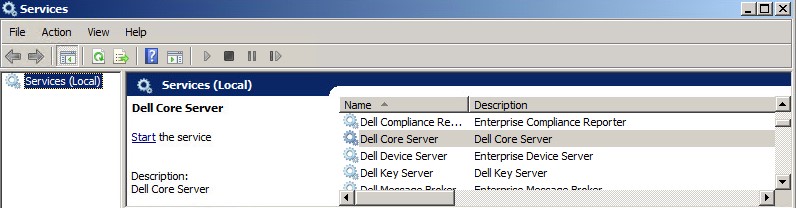
Figure 6: (English Only) Start the Dell Core Server Service
Steps to editing PolicyService.config:
- Open the Virtual Appliance.
- Go to Basic Configuration.

Figure 7: (English Only) Go to Basic Configuration
- Under Basic Configuration, scroll down to Stop Application (shown below).
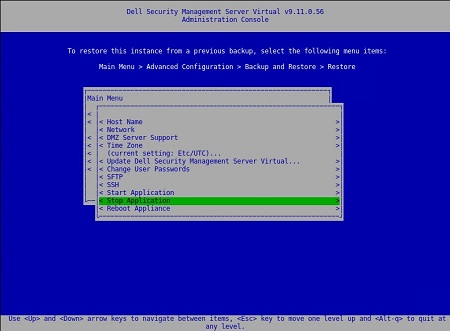
Figure 8: (English Only) Stop Application
- Confirm service shutdown.

Figure 9: (English Only) Confirm Stop Application
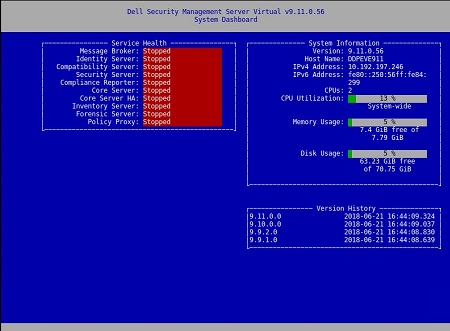
Figure 10: (English Only) Confirm service shutdown
- From the Main Menu, scroll down to Launch Shell.
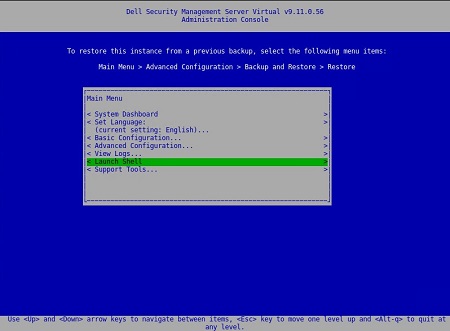
Figure 11: (English Only) Launch Shell
- Switch user from
dellconsoletodellsupport:su dellsupport.

Figure 12: (English Only) Switch user
- Go to the core-server folder:
cd /opt/dell/server/core-server.

Figure 13: (English Only) Type cd /opt/dell/server/core-server
- Type command:
sudo vi PolicyService.config.

Figure 14: (English Only) Type sudo vi PolicyService.config
- Enter i to edit file (notice at the bottom of the file –INSERT--, this indicates you can edit).

Figure 15: (English Only) Enter i to edit file
- Scroll down the file to locate
StrictValidation.

Figure 16: (English Only) Locate StrictValidation
- Change
StrictValidationfrom true to false (located below).
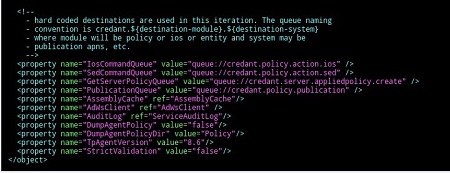
Figure 17: (English Only) Change StrictValidation from true to false
- Press Esc (notice the –-INSERT- - disappears).
- Type
:wq(as shown below) this saves the changes that have been made.
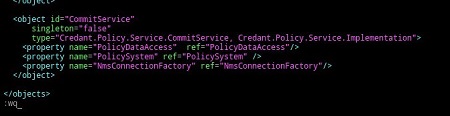
Figure 18: (English Only) Type :wq
- After typing
:wqand pressing enter, you see the below:
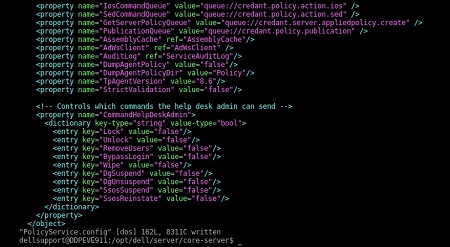
Figure 19: (English Only) Confirm file updated
- Notice that you return back to the core-server path. Type exit, to leave that specified path.

Figure 20: (English Only) Type exit
- The next path, enter exit once more. You return to the Main Menu on the Virtual Appliance.
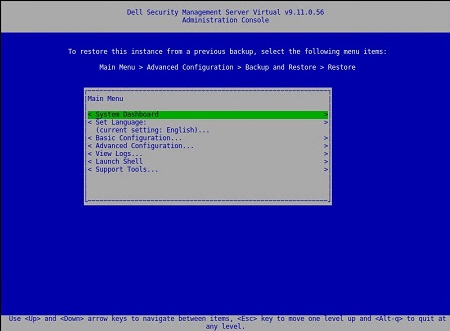
Figure 21: (English Only) Main Menu on the Virtual Appliance
- Select Basic Configuration.
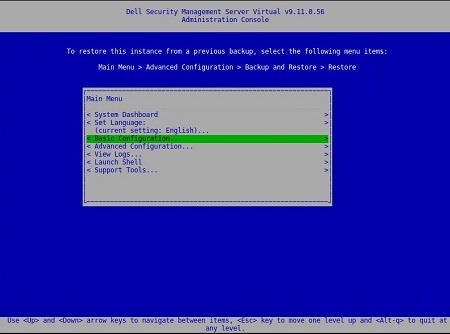
Figure 22: (English Only) Select Basic Configuration
- Scroll down to Start Application.

Figure 23: (English Only) Start Application
- You receive the below prompt:

Figure 24: (English Only) Select Yes to Start the Application
- Select Yes. Services begin to start.

Figure 25: (English Only) Services begin to start
After Server Status indicates Running on each service, you will no longer receive: Error Validating Policy
Steps to editing PolicyService.config
- Open the Virtual Appliance.
- Go to Basic Configuration.

Figure 26: (English Only) Go to Basic Configuration
- Under Basic Configuration, scroll down to Stop Application (shown below).
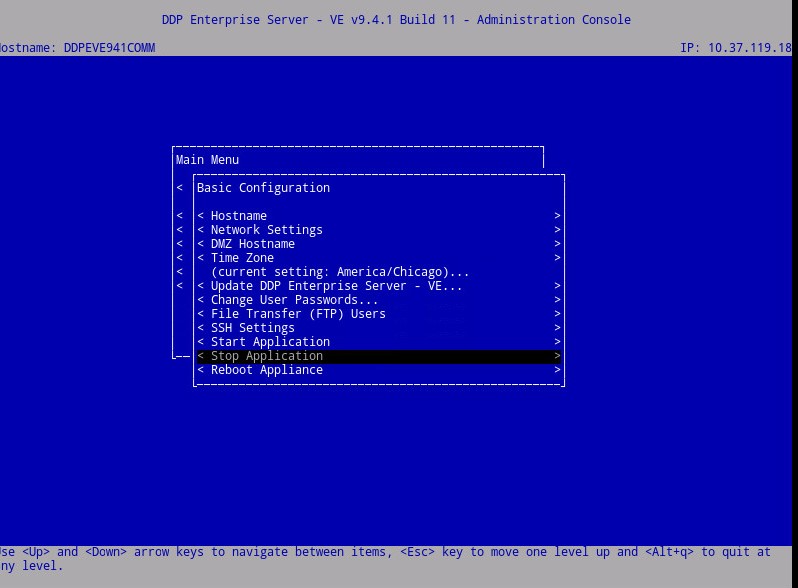
Figure 27: (English Only) Stop Application
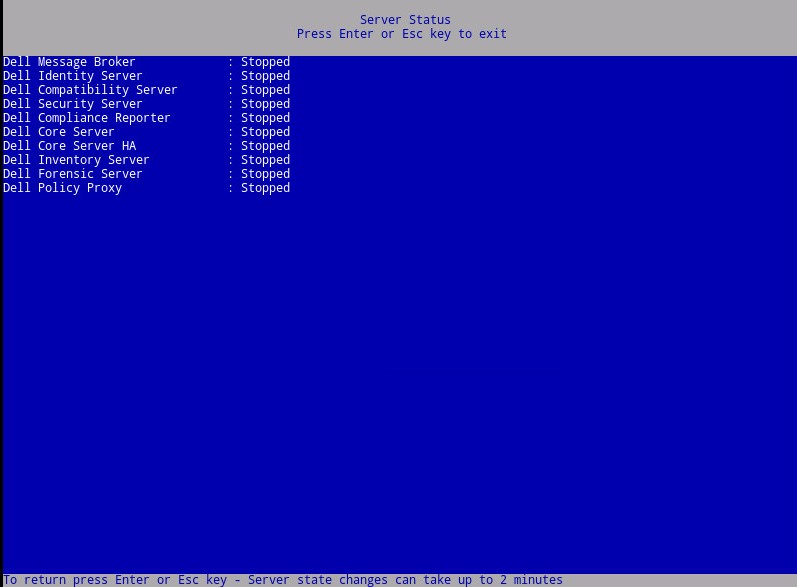
Figure 28: (English Only) Confirm Serves Stopped
- From Main Menu, scroll down to Launch Shell.

Figure 29: (English Only) Launch Shell
- (Shown below) Switch user from
ddpconsoletoddpsupport:su ddpsupport
- Go to the core-server folder:
cd /opt/dell/server/core-server - Type command:
sudo vi PolicyService.config
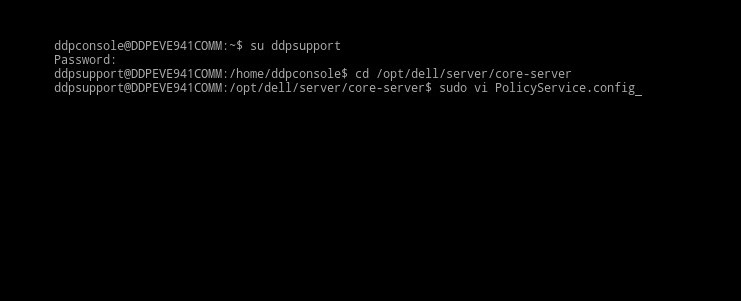
Figure 30: (English Only) Switch user, Go to the core-server folder, Type command: sudo vi PolicyService.config
- Enter
ito edit file (notice at the bottom of the file –INSERT--, this indicates you can edit).
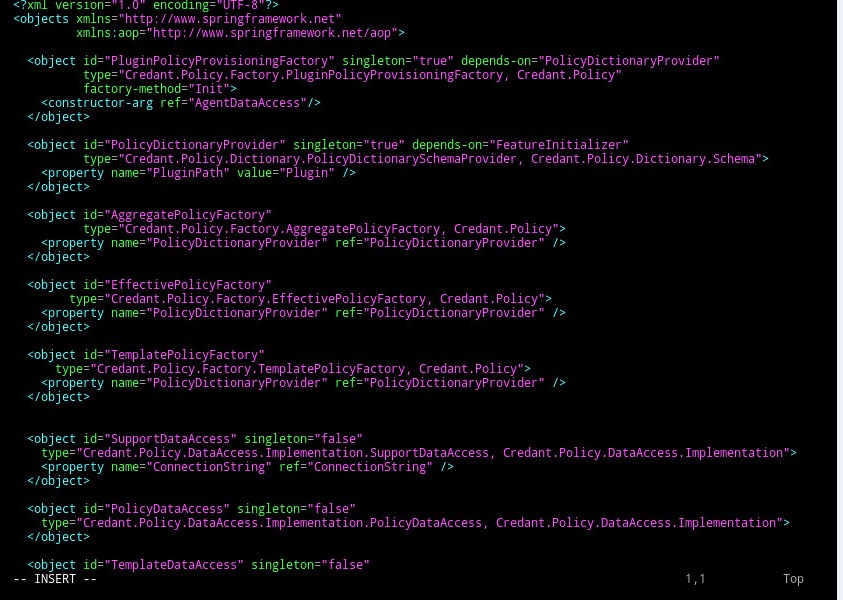
Figure 31: (English Only) Enter i to edit file
- Scroll down the file to locate
StrictValidation
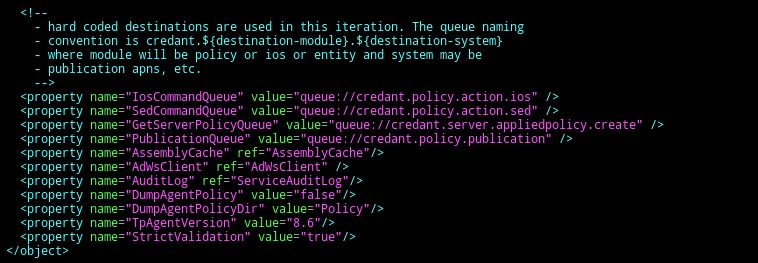
Figure 32: (English Only) Locate StrictValidation
- Change
StrictValidationfrom true to false (located below).
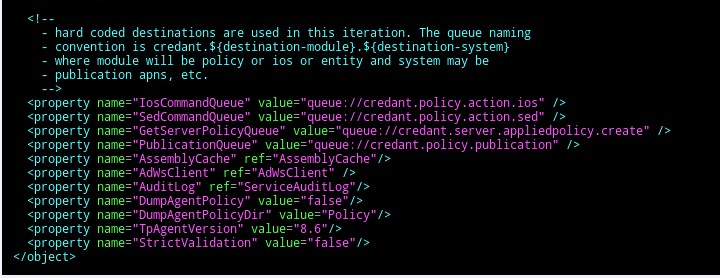
Figure 33: (English Only) Change StrictValidation from true to false
- Press
Esc(notice the –-INSERT- - disappears).

Figure 34: (English Only) Press Esc
- Type
:wq(as shown below) this saves the changes that have been made.
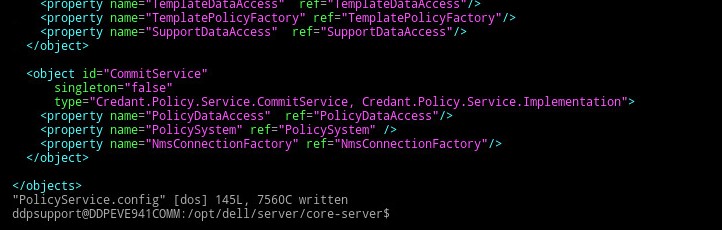
Figure 35: (English Only) Type :wq
- After typing
:wqand pressing enter, you see the below:

Figure 36: (English Only) Confirm file updated
- Notice that you return back to the core-server path. Enter exit, to leave that specified path.

Figure 37: (English Only) Type exit
- The next path, enter exit once more. You return to the Main Menu on the VE Appliance.
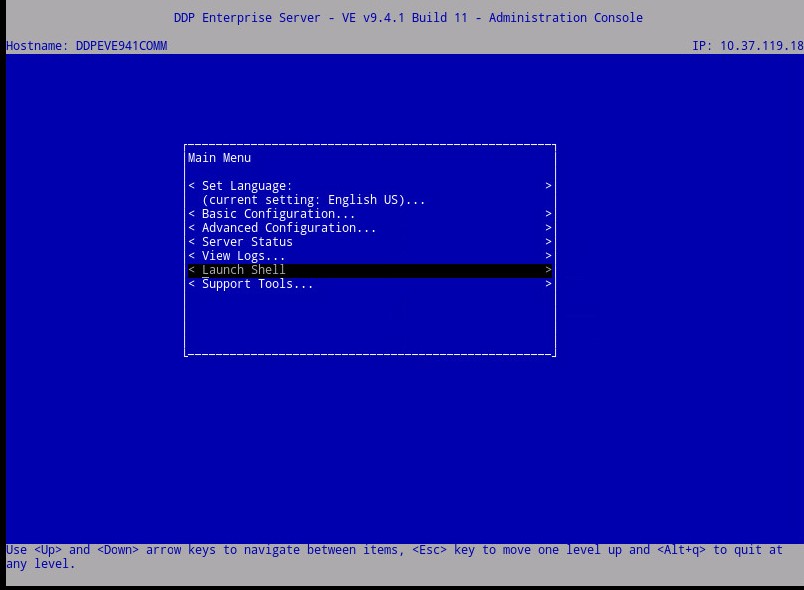
Figure 38: (English Only) You return to the Main Menu on the VE Appliance
- Scroll up to Basic Configuration.
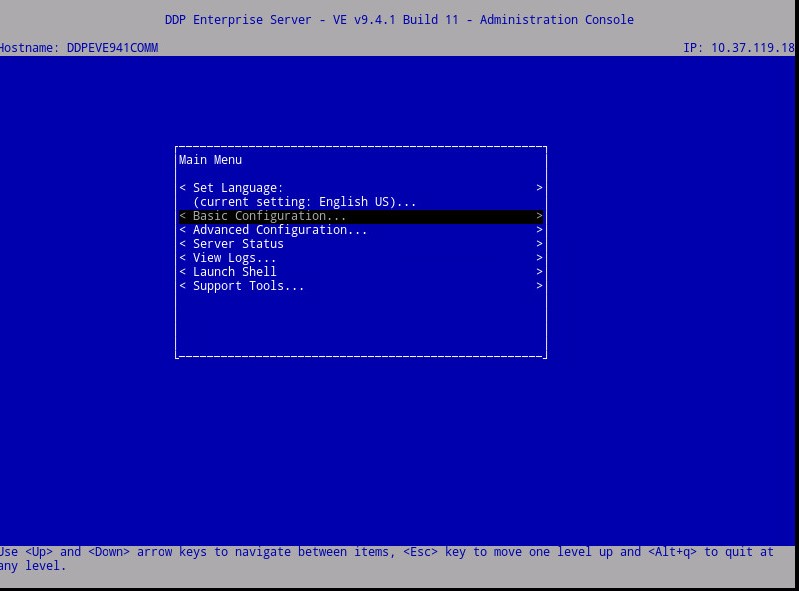
Figure 39: (English Only) Select Basic Configuration
- Scroll down to Start Application.

Figure 40: (English Only) Start Application
- You receive the below prompt:

Figure 41: (English Only) Select Yes to start the VE services
- Select Yes. Services begin to start.

Figure 42: (English Only) Services begin to start
After Server Status indicates Running on each service, you will no longer receive: Error Validating Policy
To contact support, reference Dell Data Security International Support Phone Numbers.
Go to TechDirect to generate a technical support request online.
For additional insights and resources, join the Dell Security Community Forum.