如何备份和还原 Dell Security Management Server Virtual
요약: 了解如何使用这些说明备份和还原 Dell Security Management Server Virtual 和 Dell Data Protection Virtual Edition。
이 문서는 다음에 적용됩니다.
이 문서는 다음에 적용되지 않습니다.
이 문서는 특정 제품과 관련이 없습니다.
모든 제품 버전이 이 문서에 나와 있는 것은 아닙니다.
지침
本指南介绍如何备份和还原 Dell Security Management Server Virtual(以前称为 Dell Data Protection Virtual Edition)。
受影响的产品:
- Dell Security Management Server Virtual
- Dell Data Protection Virtual Edition
受影响的操作系统:
- Linux
Dell Security Management Server Virtual 的备份和还原功能因版本而异。单击 9.11.0 及更高版本 或 8.2.0 至 9.10.1 以了解更多信息。有关版本信息,请参阅 如何确定 Dell Data Security 服务器版本。
注意: 如果正在使用 Dell Endpoint Security Suite Enterprise(以前称为 Dell Data Protection Endpoint Security Suite Enterprise),则必须单独备份和还原 Advanced Threat Prevention 证书。有关更多信息,请参阅如何 为 Dell Data Security 服务器备份和还原 Advanced Threat Prevention 证书。
9.11.0 及更高版本
有关更多信息,请单击创建备份、卸载备份、加载备份或还原备份。
创建备份
- 登录到 Dell Security Management Server Virtual 管理控制台。
 注:
注:- Dell Security Management Server Virtual 的默认凭据为:
- 用户名:
delluser - 密码:
delluser
- 用户名:
- 管理员可以更改产品的虚拟设备菜单中的默认密码。
- Dell Security Management Server Virtual 的默认凭据为:
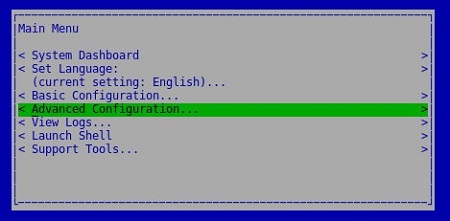
- 从 主菜单中,选择 Advanced Configuration ,然后按 Enter 键。
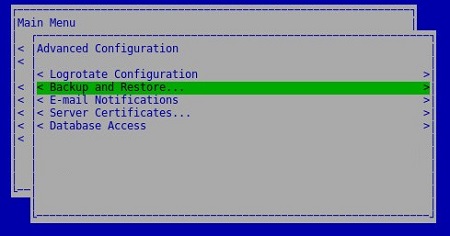
- 选择 Backup and Restore,然后按 Enter 键。
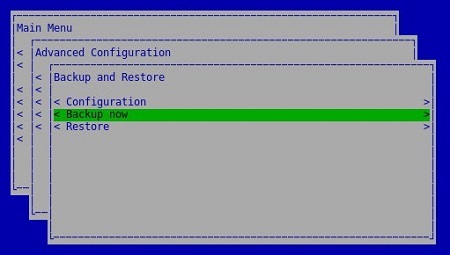
- 选择 Backup Now,然后按 Enter 键。
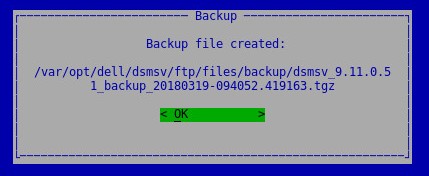
- 在 OK 上按 Enter 键以确认
dsmsv_<VERSION>_backup_<TIMESTAMP>.tgz。
 注:
注:<VERSION>= Dell Security Management Server Virtual 的版本<TIMESTAMP>= 执行备份的时间
卸载备份
要成功卸载备份,Dell Security Management Server Virtual 需要:
- 已完成的备份
- 第三方 FTP(文件传输协议)客户端
- FTP 客户端的示例包括(但不限于):
- Filezilla
- WinSCP
- CuteFTP
- FTP 客户端的示例包括(但不限于):
- 存储设备(除 Dell Security Management Server Virtual 之外)
注:
- 戴尔既不认可也不支持任何列出的第三方产品。列出的客户端是客户可以使用的潜在产品的示例。有关设置、配置和管理的信息,请与产品的制造商联系。
- 您的 FTP 客户端 UI 可能与以下屏幕截图示例不同。
- 启动 FTP 客户端。
- 在 FTP 客户端中,使用 FTP 用户登录到 Dell Security Management Server Virtual。
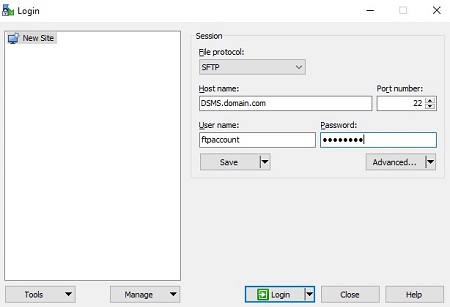 注意: 必须在 Dell Security Management Server Virtual 中创建 FTP 用户。请参阅如何在 Dell Security Management Server Virtual 中创建 FTP 用户 或更多信息。
 - 转至
/backup/。
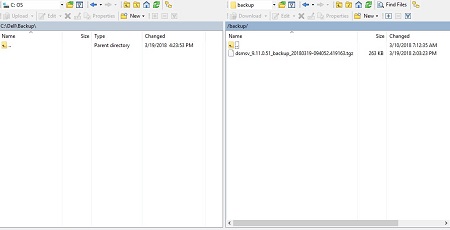
- 选择并传输相应的
dsmsv_<VERSION>_backup_<TIMESTAMP>.tgz文件复制到辅助存储设备。
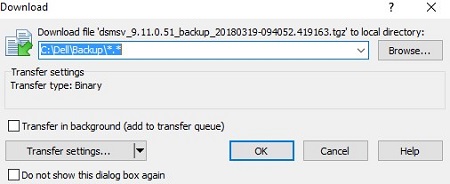 注:
注:<VERSION>= Dell Security Management Server Virtual 的版本<TIMESTAMP>= 执行备份的时间
- 关闭 FTP 客户端。
加载备份
要成功加载备份,Dell Security Management Server Virtual 需要:
- 已卸载的 Dell Security Management Server Virtual 备份
- 第三方 FTP(文件传输协议)客户端
- FTP 客户端的示例包括(但不限于):
- Filezilla
- WinSCP
- CuteFTP
- FTP 客户端的示例包括(但不限于):
- 存储设备(除 Dell Security Management Server Virtual 之外)
注:
- 戴尔既不认可也不支持任何列出的第三方产品。列出的客户端是客户可以使用的潜在产品的示例。有关设置、配置和管理的信息,请与产品的制造商联系。
- 您的 FTP 客户端 UI 可能与以下屏幕截图示例不同。
- 启动 FTP 客户端。
- 在 FTP 客户端中,使用 FTP 用户登录到 Dell Security Management Server Virtual。
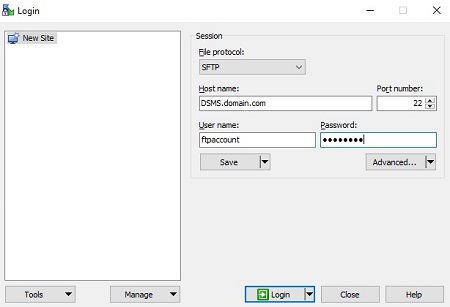 注意: 必须在 Dell Security Management Server Virtual 中创建 FTP 用户。有关详细信息,请参阅 如何在 Dell Security Management Server Virtual 中创建 FTP 用户 。
 - 转至
/backup/。
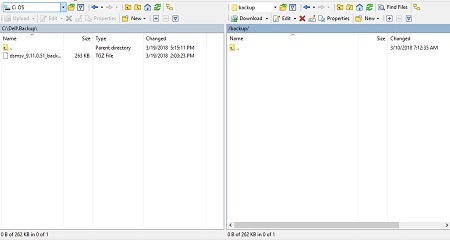
- 移动
dsmsv_<VERSION>_backup_<TIMESTAMP>.tgz从存储设备到/backup/。
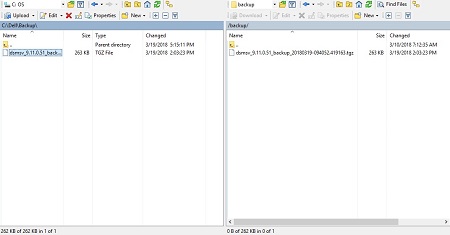 注:
注:<VERSION>= Dell Security Management Server Virtual 的版本<TIMESTAMP>= 执行备份的时间
- 关闭 FTP 客户端。
还原备份
- 登录到 Dell Enterprise Server Virtual 管理控制台。
 注:
注:- Dell Security Management Server Virtual 的默认凭据为:
- 用户名:
delluser - 密码:
delluser
- 用户名:
- 管理员可以更改产品的虚拟设备菜单中的默认密码。
- Dell Security Management Server Virtual 的默认凭据为:
- 从 主菜单中,选择 Advanced Configuration ,然后按 Enter 键。
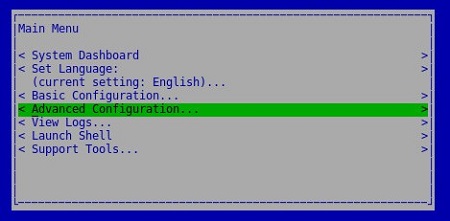
- 选择 Backup and Restore,然后按 Enter 键。
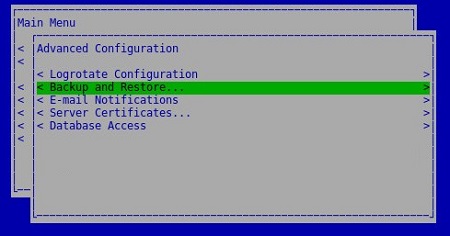
- 选择 Restore,然后按 Enter 键。
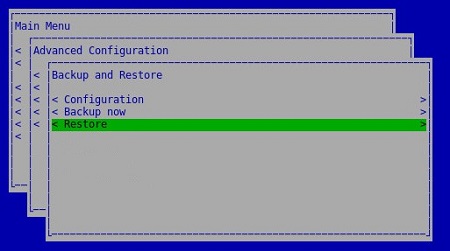
- 选择 Yes 以确认用于创建备份的实例已关闭,然后按 Enter 键。

- 选择合适的
dsmsv_<VERSION>_backup_<TIMESTAMP>.tgz然后按 Enter。
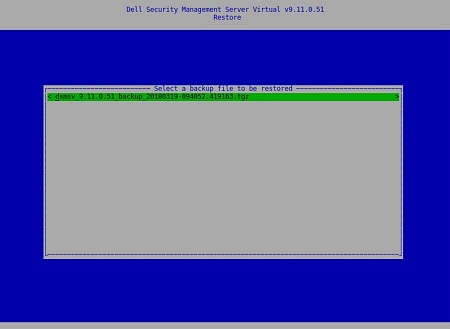 注:
注:<VERSION>= Dell Security Management Server Virtual 的版本<TIMESTAMP>= 执行备份的时间
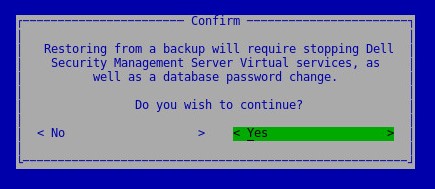
- 选择 Yes 以确认将关闭服务且必须更改数据库密码,然后按 Enter 键。
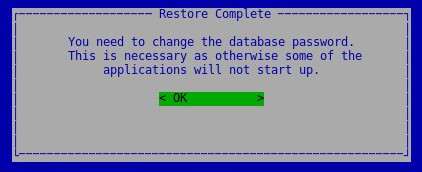
- 在出现 OK 时按 Enter 键。
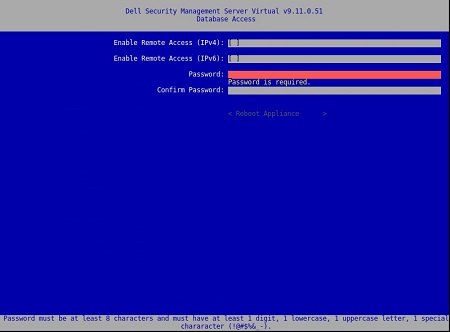
- 在 “Database Access ”菜单中:
- (可选)选中 Enable Remote Access (IPv4) 或 Enable Remote Access (IPv6) from external source(例如 pgAdmin)。
- 输入然后确认新数据库密码。
- 选择 Reboot Appliance,然后按 Enter 键。
8.2.0 至 9.10.1
有关更多信息,请单击创建备份、卸载备份、加载备份或还原备份。
创建备份
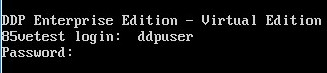
- 登录到 Dell Enterprise Server Virtual 管理控制台。
 注:
注:- Dell Security Management Server Virtual 的默认凭据为:
- 用户名:
ddpuser - 密码:
ddpuser
- 用户名:
- 管理员可以更改产品的虚拟设备菜单中的默认密码。
- Dell Security Management Server Virtual 的默认凭据为:
- 从 主菜单中,选择 Advanced Configuration ,然后按 Enter 键。
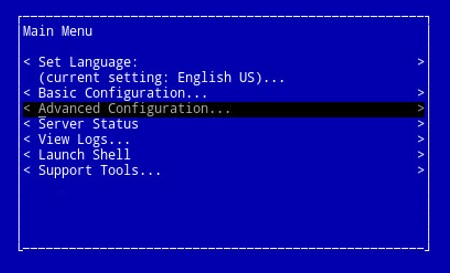
- 选择 Backup and Restore,然后按 Enter 键。
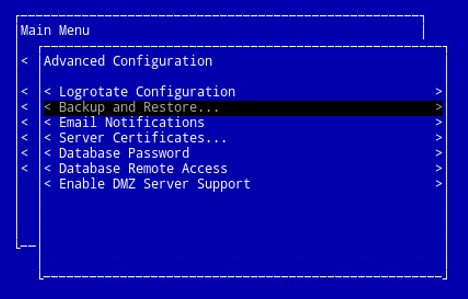
- 选择 Backup now,然后按 Enter 键。
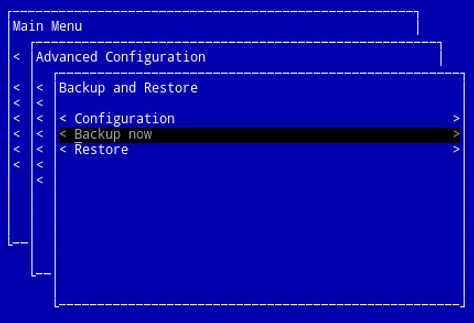
- 备份将运行。转到步骤 6。
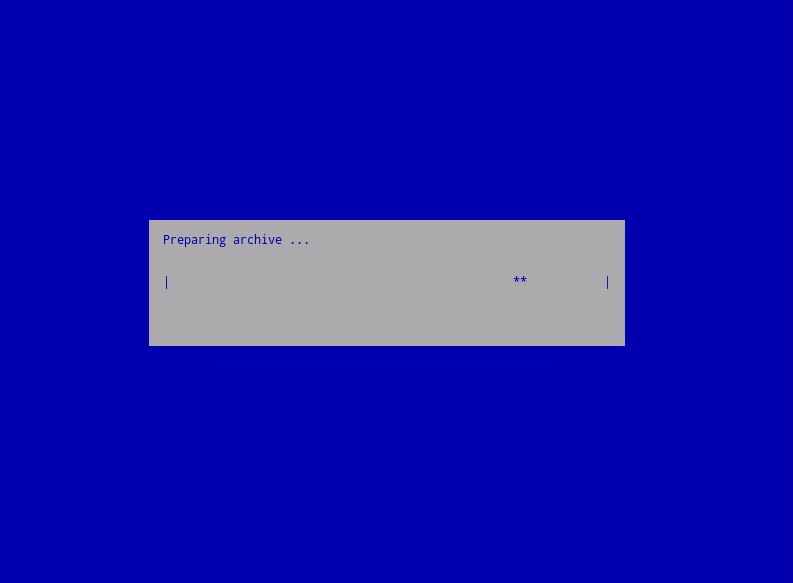
- 在 OK 上按 Enter 键以确认
ddp_<VERSION>_fullback_<TIMESTAMP>.tar.gz。
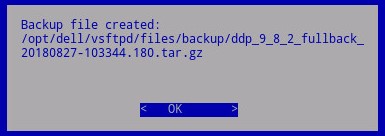 注:
注:<VERSION>= Dell Data Protection Virtual Edition 版本<TIMESTAMP>= 执行备份的时间
卸载备份
要成功卸载备份,Dell Security Management Server Virtual 需要:
- 已完成的备份
- 第三方 FTP(文件传输协议)客户端
- FTP 客户端的示例包括(但不限于):
- Filezilla
- WinSCP
- CuteFTP
- FTP 客户端的示例包括(但不限于):
- 存储设备(除 Dell Security Management Server Virtual 之外)
注:
- 戴尔既不认可也不支持任何列出的第三方产品。列出的客户端是客户可以使用的潜在产品的示例。有关设置、配置和管理的信息,请与产品的制造商联系。
- 您的 FTP 客户端 UI 可能与以下屏幕截图示例不同。
- 启动 FTP 客户端。
- 在 FTP 客户端中,使用 FTP 用户登录到 Dell Security Management Server Virtual。
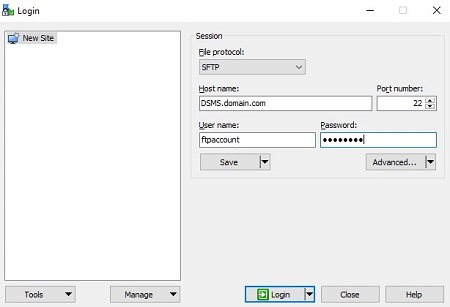 注意: 必须在 Dell Security Management Server 中创建 FTP 用户。有关详细信息,请参阅 如何在 Dell Security Management Server Virtual 中创建 FTP 用户 。
 - 转至
/backup/。
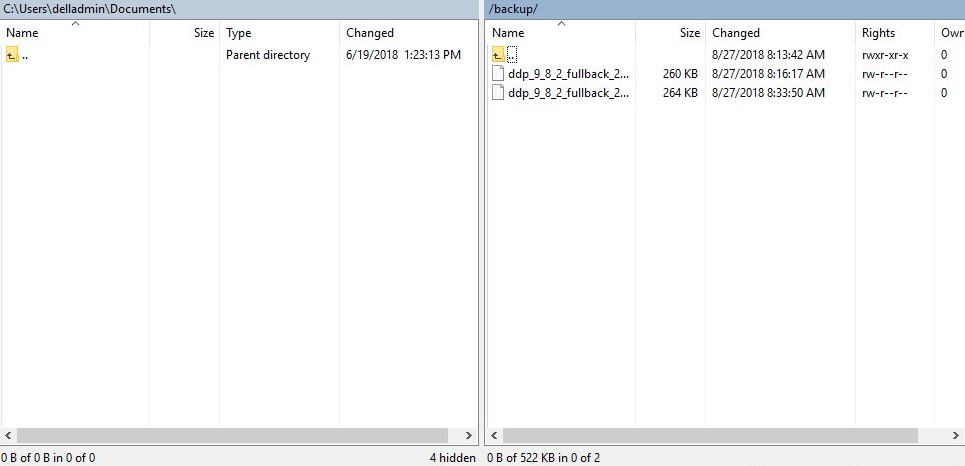
- 选择并传输相应的
ddp_<VERSION>_fullback_<TIMESTAMP>.tar.gz文件复制到辅助存储设备。
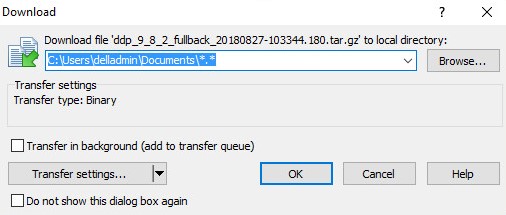 注:
注:<VERSION>= Dell Data Protection Virtual Edition 版本<TIMESTAMP>= 执行备份的时间
- 关闭 FTP 客户端。
加载备份
要成功加载备份,Dell Security Management Server Virtual 需要:
- 已卸载的 Dell Security Management Server Virtual 备份
- 第三方 FTP(文件传输协议)客户端
- FTP 客户端的示例包括(但不限于):
- Filezilla
- WinSCP
- CuteFTP
- FTP 客户端的示例包括(但不限于):
- 存储设备(除 Dell Security Management Server Virtual 之外)
注:
- 戴尔既不认可也不支持任何列出的第三方产品。列出的客户端是客户可以使用的潜在产品的示例。有关设置、配置和管理的信息,请与产品的制造商联系。
- 您的 FTP 客户端 UI 可能与以下屏幕截图示例不同。
- 启动 FTP 客户端。
- 在 FTP 客户端中,使用 FTP 用户登录到 Dell Security Management Server Virtual。
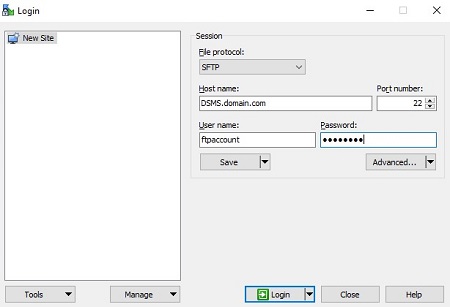 注意: 必须在 Dell Security Management Server 中创建 FTP 用户。有关详细信息,请参阅 如何在 Dell Security Management Server Virtual 中创建 FTP 用户 。
 - 转至
/backup/。
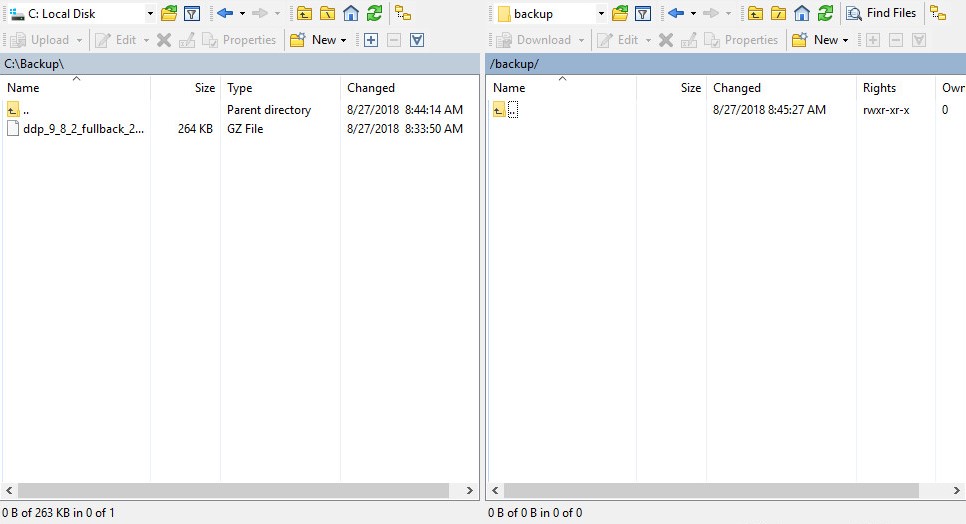
- 移动
ddp_<VERSION>_fullback_<TIMESTAMP>.tar.gz从存储设备到/backup/。
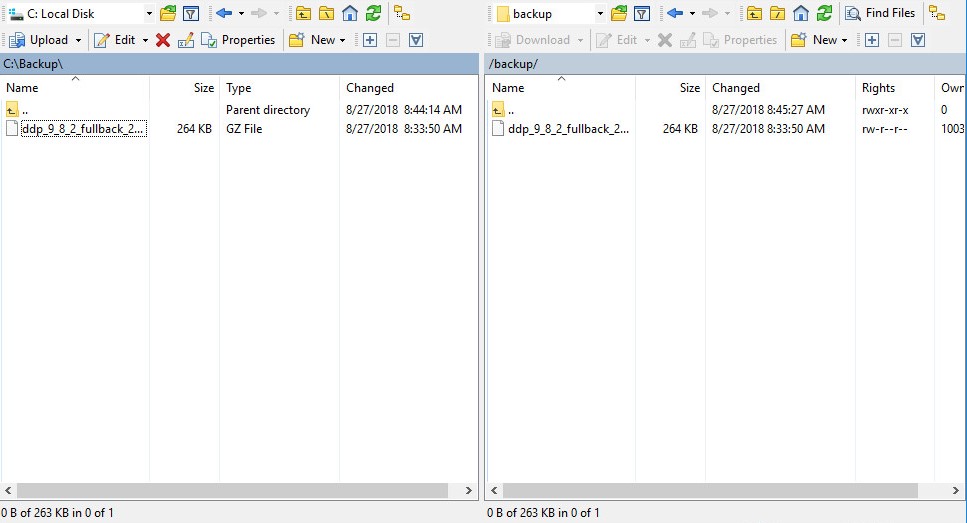 注:
注:<VERSION>= Dell Data Protection Virtual Edition 版本<TIMESTAMP>= 执行备份的时间
- 关闭 FTP 客户端。
还原备份
- 登录到 Dell Enterprise Server Virtual 管理控制台。
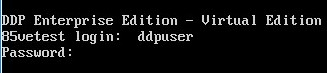 注:
注:- Dell Security Management Server Virtual 的默认凭据为:
- 用户名:
ddpuser - 密码:
ddpuser
- 用户名:
- 管理员可以更改产品的虚拟设备菜单中的默认密码。
- Dell Security Management Server Virtual 的默认凭据为:
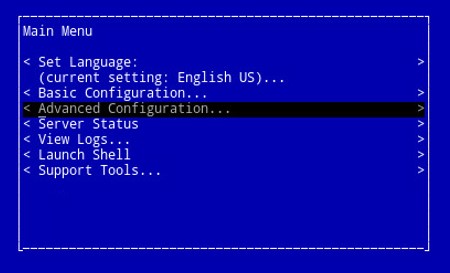
- 从 主菜单中,选择 Advanced Configuration ,然后按 Enter 键。
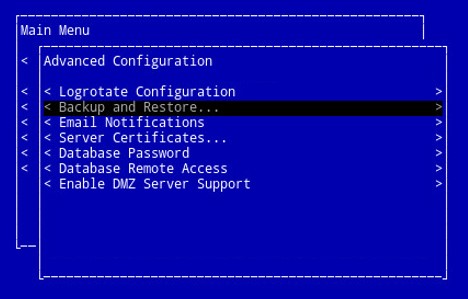
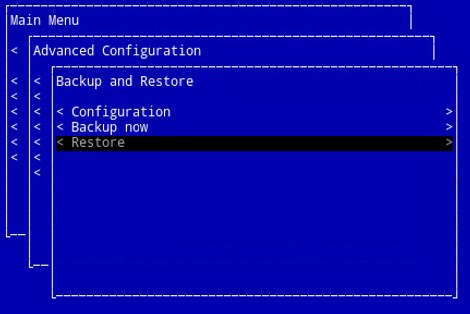
- 选择 Backup and Restore,然后按 Enter 键。
- 选择 Restore,然后按 Enter 键。
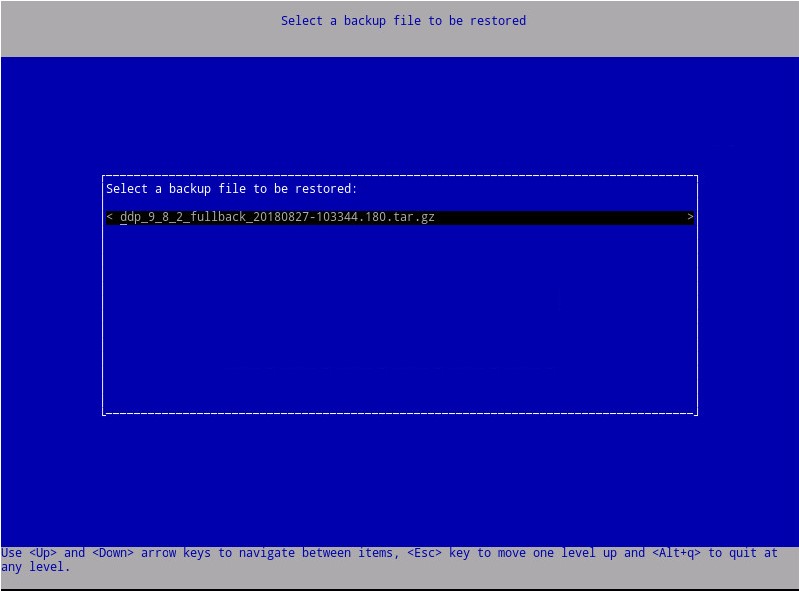
- 选择合适的
ddp_<VERSION>_fullback_<TIMESTAMP>.tar.gz然后按 Enter。
 注:
注:<VERSION>= Dell Data Protection Virtual Edition 版本<TIMESTAMP>= 执行备份的时间
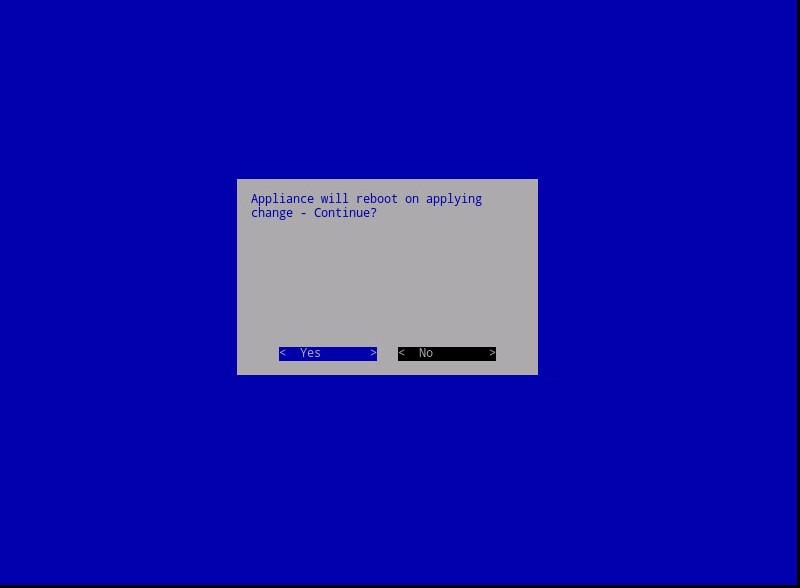
- 选择 Yes 以在还原完成时重新启动虚拟设备,然后按 Enter 键。
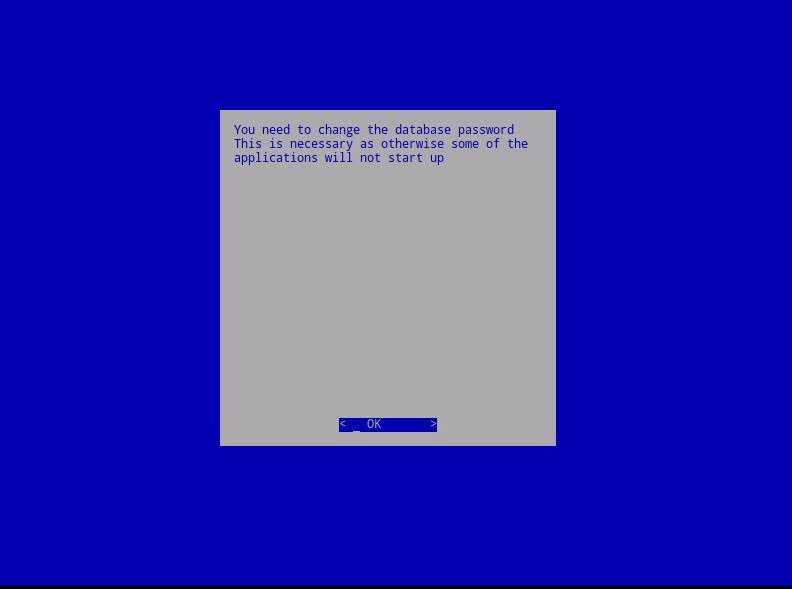
- 在出现 OK 时按 Enter 键。
- 备份还原。转到步骤 9。
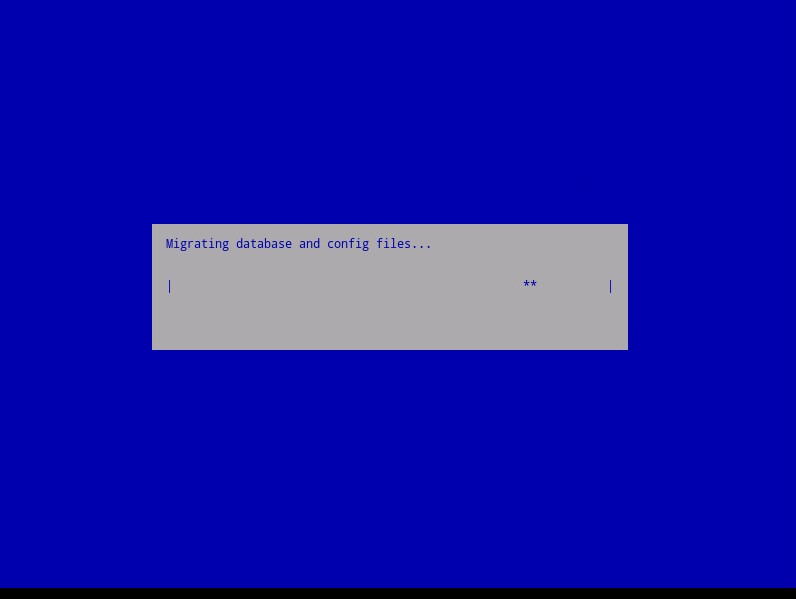
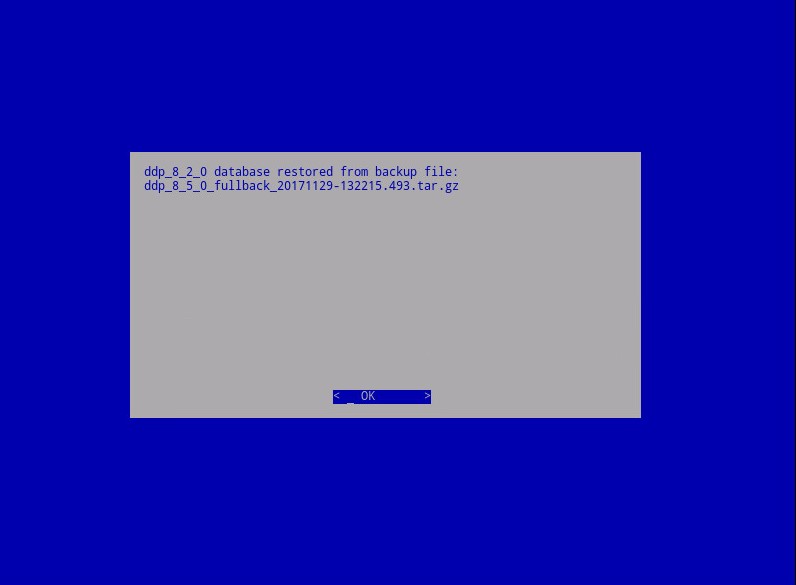
- 还原时,在出现 OK 时按 Enter 键。
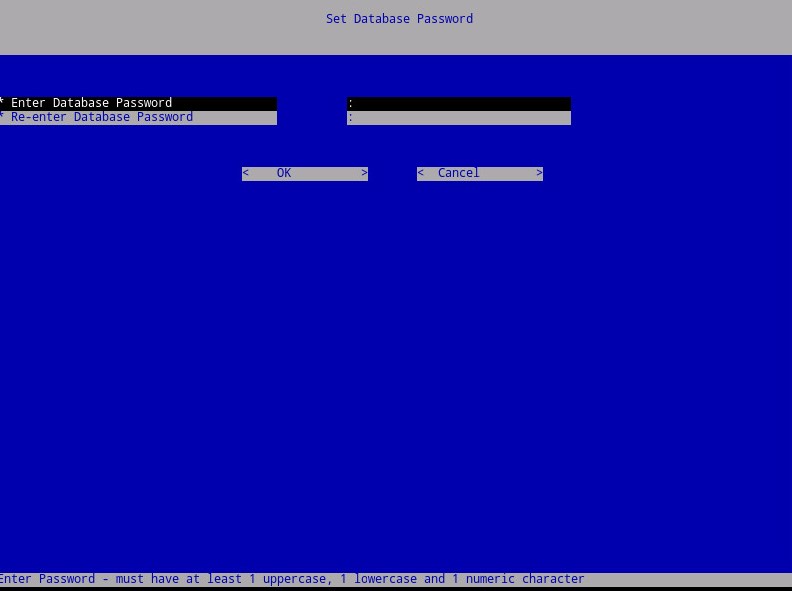
- 输入并重新输入新数据库密码。完成后,在出现 OK 时按 Enter 键,以重新启动虚拟设备。
추가 정보
비디오
해당 제품
Dell Encryption문서 속성
문서 번호: 000124658
문서 유형: How To
마지막 수정 시간: 14 7월 2026
버전: 15
다른 Dell 사용자에게 질문에 대한 답변 찾기
지원 서비스
디바이스에 지원 서비스가 적용되는지 확인하십시오.