VRTX: Disk replacement procedure for VRTX-Chassis
Summary: This article explains how to deal with a disk problem on a Shared PERC 8 Card of a VRTX.
This article applies to
This article does not apply to
This article is not tied to any specific product.
Not all product versions are identified in this article.
Instructions
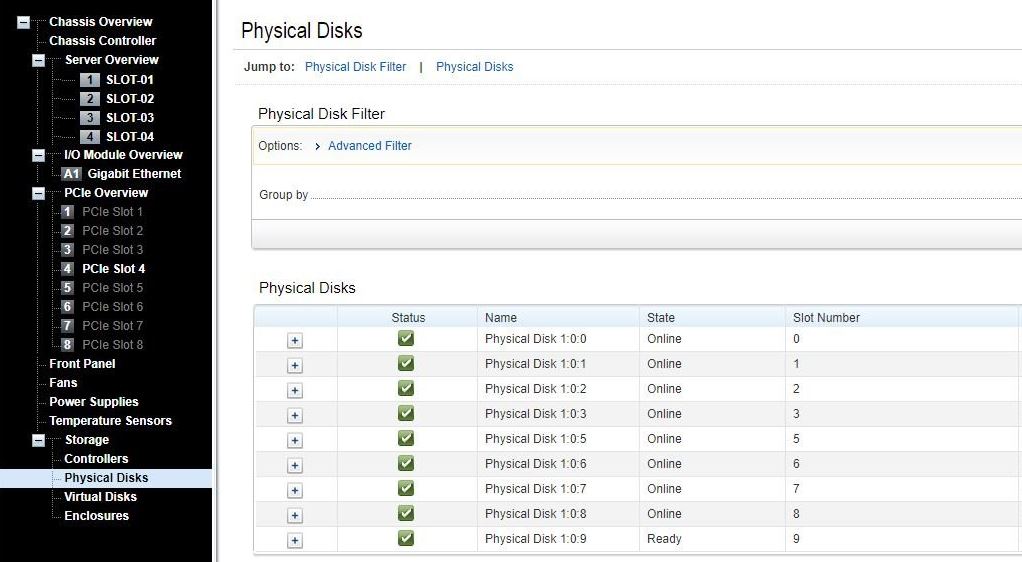
First you must find out whether an HDD or SSD has failed or is predicted to fail. This you can check at the CMC in the Storage section under the Physical Disks:
You should do a backup of your data first.
When you must replace a FAILED hard drive
You can just pull the affected one and replace it while the VRTX is running. The rebuild or reconstruction process should start automatically.
Note: Insert the Disk while the Shared PERC 8 is working, so it can recognize the insertion.
When you must replace a PREDICT TO FAIL or ONLINE hard drive
Dell highly recommends a downtime for the chassis to eliminate the risk of a logical issue.
As the Shared PERC 8 does not provide the option to set a working disk offline, you should follow this procedure.
- Back up your data
- Check the drive number (you do not have indication LEDs when the chassis is off).
- Shut down all servers.
- Shut down the VRTX-Chassis.
- Pull out the affected disk.
- Restart the Chassis.
- When the POST is done and the Shared PERC 8 is shown with the disks in the CMC, you can insert the new disk and restart the server.
Note: Insert the Disk while the Shared PERC 8 is working, so it can recognize the insertion.
If you cannot plan a downtime, you can pull the hard drive without the procedure above but you should have as less I/O as possible to minimize the risk of a logical failure on the Virtual Disk (Puncturing).
PowerEdge: How to fix Double Faults and Punctures in RAID Arrays
Note: If you take out the disk and you have configured hot spares, the PERC card automatically tries to use one of them to rebuild a hard drive that is in a failed state. The automatic rebuild is not available if there is no hot spare with enough capacity to rebuild the failed hard drive. You must ensure a hard drive with enough storage in the subsystem is set as a hot spare for rebuilding the hard drive. While this process is running, the replacement disk have to wait for this procedure to be finished first. The controller will do the best to get the RAID to an optimal level on the hot spare first and the reconstruction to the replacement disk after that.
Info: Unable to Rebuild A Fault Tolerant Virtual Disk
Issue: Cannot rebuild a fault tolerant virtual disk. For more information, see the alert log for virtual disks.
Fix: The replacement disk is too small or not compatible with the virtual disk. Replace the failed disk with a good compatible hard drive with equal or greater capacity.
Issue: Cannot rebuild a fault tolerant virtual disk. For more information, see the alert log for virtual disks.
Fix: The replacement disk is too small or not compatible with the virtual disk. Replace the failed disk with a good compatible hard drive with equal or greater capacity.
Info: Physical Disk Displayed As Blocked By Management Application
Issue: One or more hard drives are displayed as Blocked and cannot be configured.
Fix: Ensure that the hard drive is supported by SCSI-3 Persistent Reservation (PR). Update the hard drive and Shared PERC 8 to the latest firmware available on dell.com/support.
Issue: One or more hard drives are displayed as Blocked and cannot be configured.
Fix: Ensure that the hard drive is supported by SCSI-3 Persistent Reservation (PR). Update the hard drive and Shared PERC 8 to the latest firmware available on dell.com/support.
Affected Products
POWEREDGE VRTXArticle Properties
Article Number: 000219642
Article Type: How To
Last Modified: 13 Feb 2025
Version: 4
Find answers to your questions from other Dell users
Support Services
Check if your device is covered by Support Services.