How to Manually Update SupportAssist for Business PCs to The Latest Version
Summary: This article provides details on how to manually update SupportAssist for Business PCs to the latest version when auto update fails.
This article applies to
This article does not apply to
This article is not tied to any specific product.
Not all product versions are identified in this article.
Instructions
Affected Products:
- SupportAssist for Business PCs
Affected Versions:
- v3.2.x
- v3.3.x
Affected Operating Systems:
- Windows 11
- Windows 10
Steps to update:
Note:
- The file works on computers with v3.3.x and earlier installed.
- The file should be run as administrator.
- The file runs in silent mode.
- The file checks for .net 6.0 on the computer. If not present, it downloads and installs .net v6.0.28, and then continues to download and install SupportAssist v3.6 .msi.
- If a manual upgrade fails, the file uninstalls any existing versions of the SupportAssist for Business PCs application on the computer and installs v3.6 .msi.
- Open the command prompt in Administrator Mode.
- Go to the location where the file is saved (in the example below it is c:\SupportAssist).
- Run command by typing SupportAssistUpgradeTool.exe and press Enter.
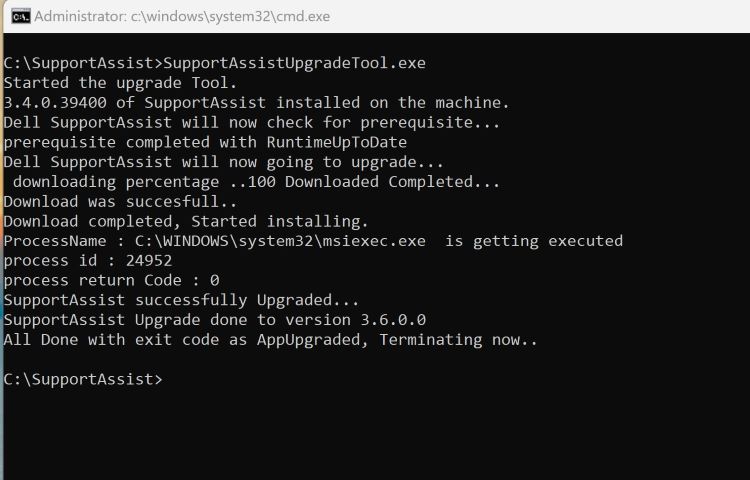
Figure 1: (English Only) Type SupportAssistUpgradeTool.exe in the command prompt
Note: Logs can be found at C:\Windows\temp\SupportAssist.
- Check if the computers are updated to v3.6 on the TechDirect Inventory page after running the command.
Affected Products
SupportAssist for Business PCsArticle Properties
Article Number: 000225269
Article Type: How To
Last Modified: 21 May 2024
Version: 1
Find answers to your questions from other Dell users
Support Services
Check if your device is covered by Support Services.