PowerStore: Create SSL Certificate from Microsoft Certificate Authority to Enable Secure LDAP; LDAPS
Summary: Enabling Secure LDAP (LDAPS) Authentication requires importing SSL certificates during the LDAP Configuration with Directory Services settings. The instruction below is only if the customer is using a Microsoft certificate authority server. ...
This article applies to
This article does not apply to
This article is not tied to any specific product.
Not all product versions are identified in this article.
Instructions
Active Directory (Windows Server)
- Login to LDAP Server using RDP
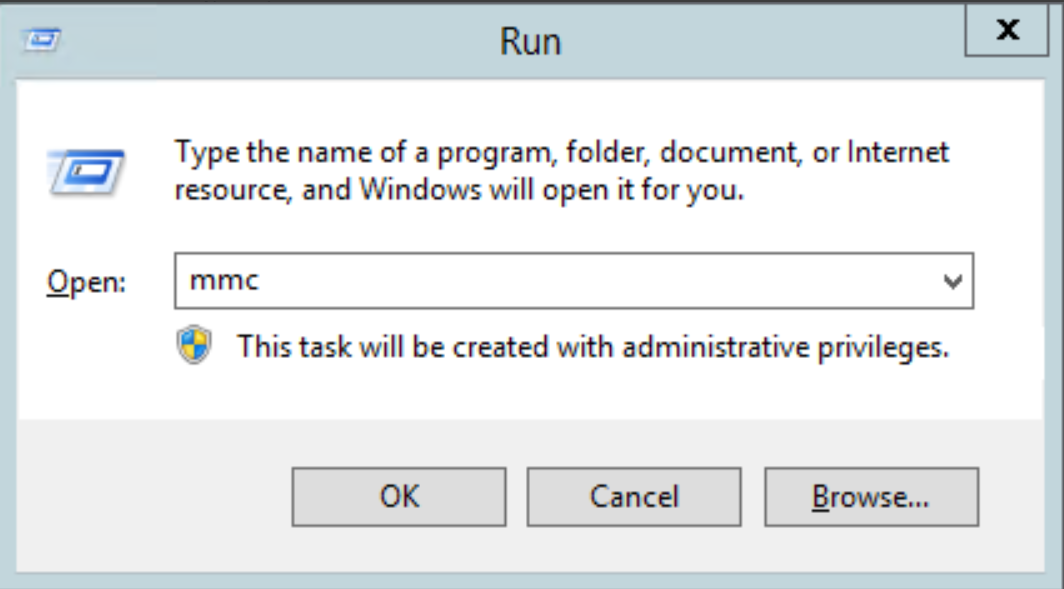
- Once logged in, on the Windows Server hit the
Windows key + R, which should bring up the Run application
- If for some weird reason you do not have a Windows key; at the bottom left of the screen you see the Windows icon, click it.
- Then you start typing in the word Run and that should bring up a search panel on the right side of your screen, click on the Run application.
- Once the Run application opens, type in the words
MMCinto the text field by the word Open and then click on the OK button.
- This should open a fresh Microsoft Common Console Document
- At the top left, click on File > Add/Remove Snap-in; this should open an Add or Remove Snap-ins window
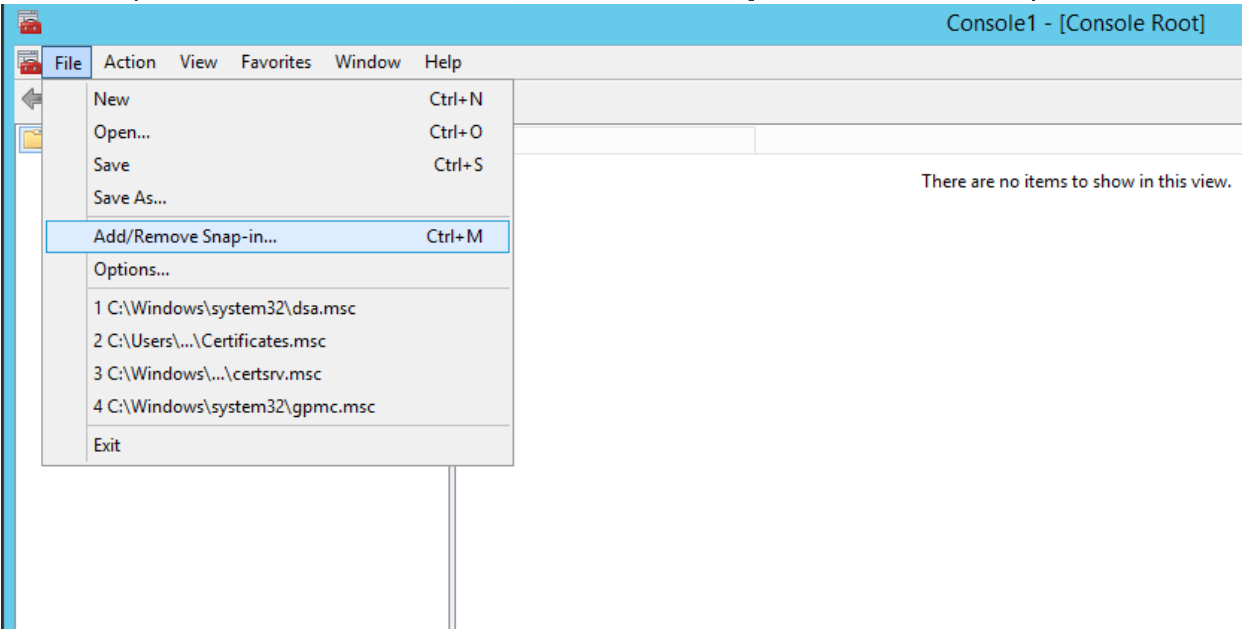
- On the left box titled Available Snap-ins, the first snap-in to select is Certificates, once it is highlighted, click the Add button in the middle of the window

- Select the Computer button
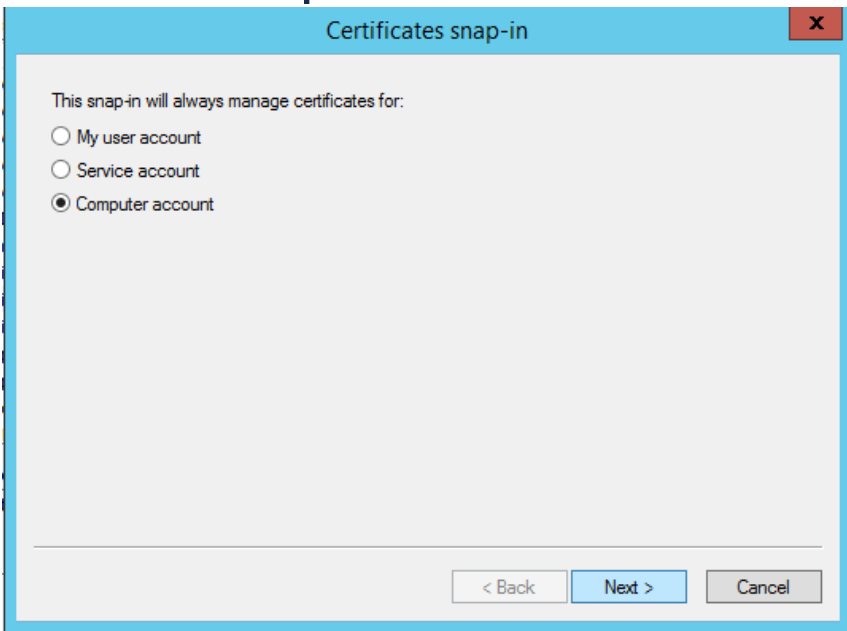
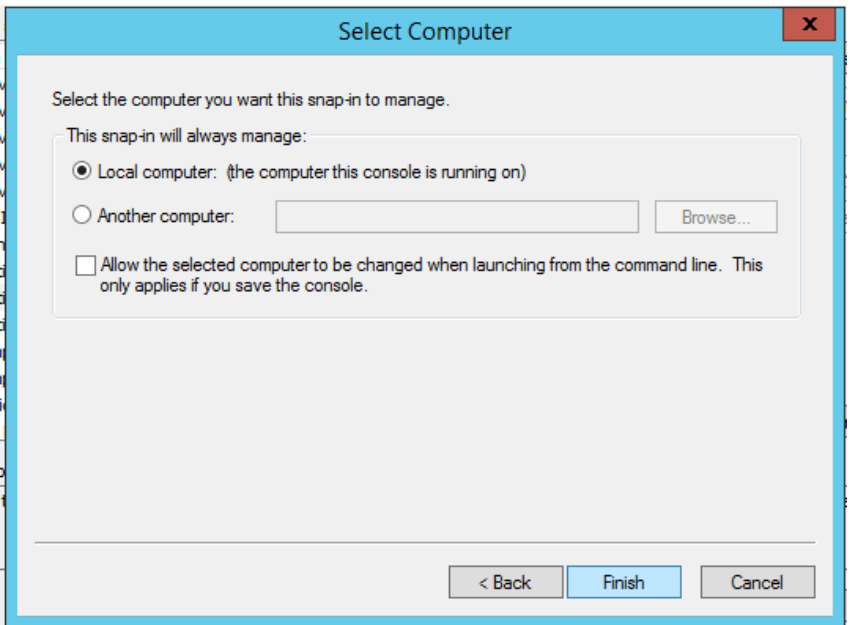
- Click on Computer Account and click the Next button, then click the Finish button
- Add the Certification Authority snap-in, click the Add button, and then click the Finish button
- Select Certificate Templates snap-in and click the Add button
- Your Selected snap-ins should look like this once you are done
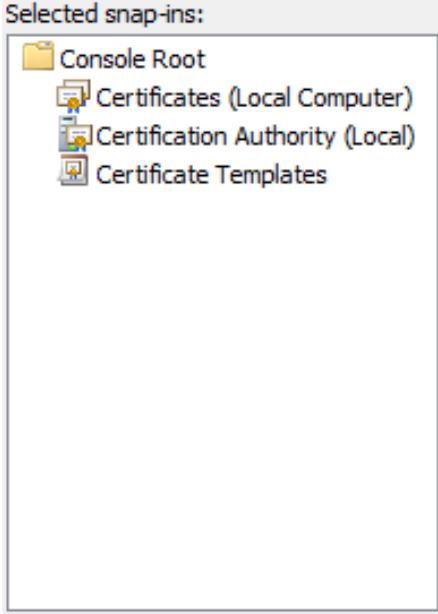
- Click OK
- Save this console, so you do not have to add the snap-ins every time. Click on File Save as and then save it with whatever name you want and wherever you want
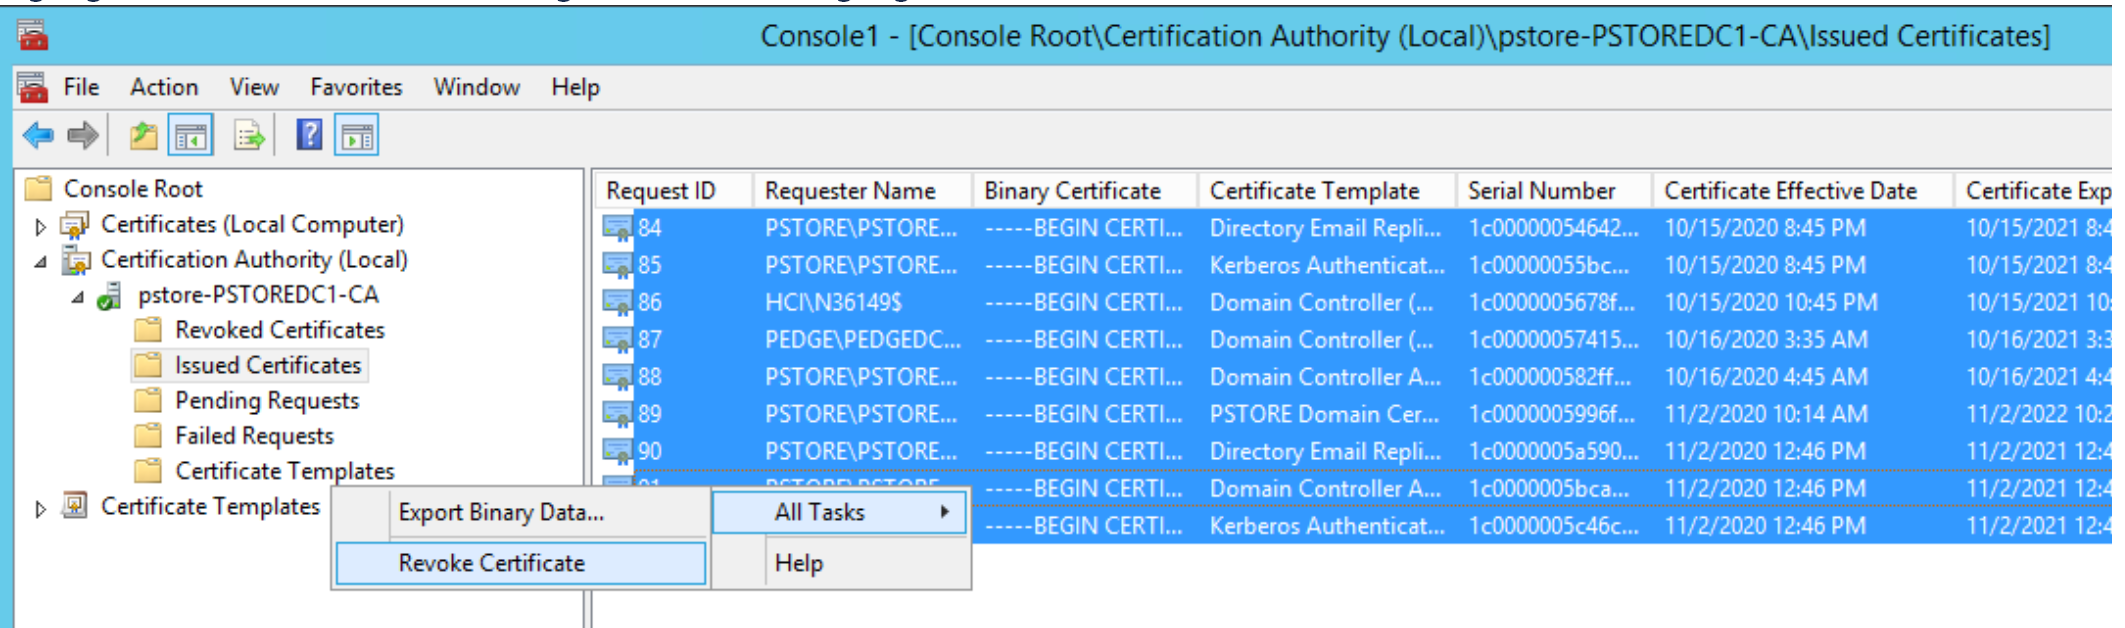
- Ensure all currently issued certificates are revoked, on the left panel Console Root Certification Authority (Local) Issued Certificate
- Highlight all of the certificates issued to PowerStore, right-click on the highlighted certificates, and select All Tasks Revoke Certificate
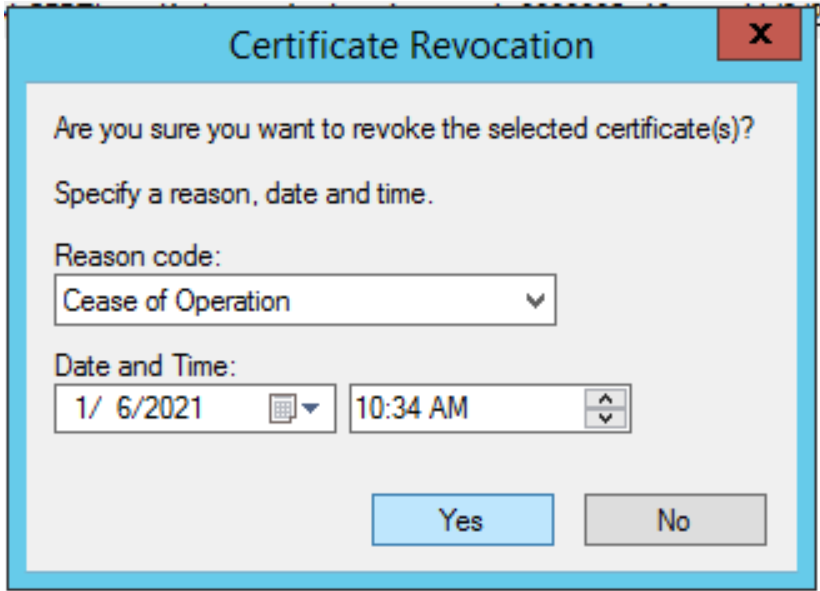
- A Certificate Revocation message appears. You give the Reason Code if you would like, then click the Yes button
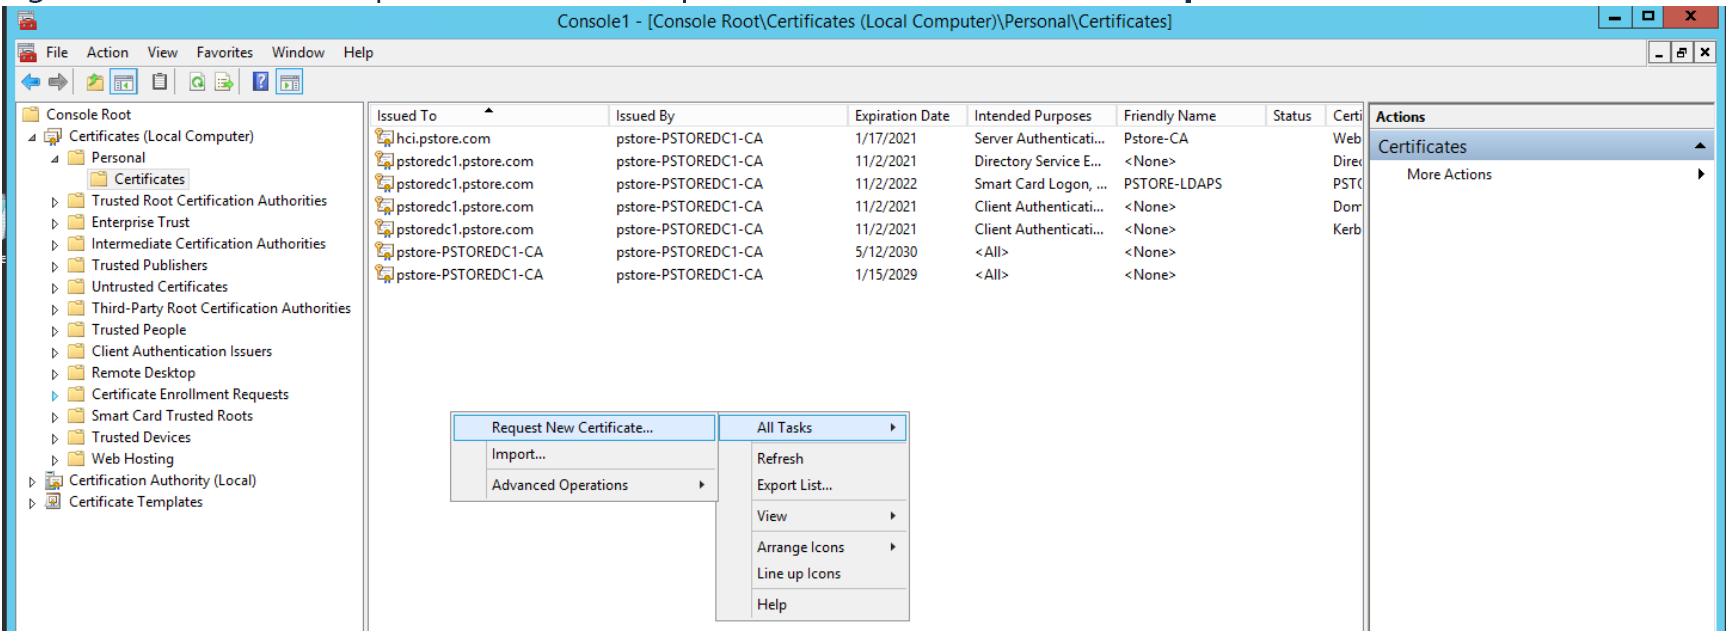
- Under Console Root Certificates (Local Computer) Personal Certificates
- Right-click in the white space in the middle panel and select All Tasks Request New Certificate
- This opens the Certificate Enrollment window, click the Next button, then the Next button again
- On the Request Certificates section, find and click the check box by the Domain Controller Authentication
- There should be a Details drop-down, click it, and then you should see a Properties button, click it
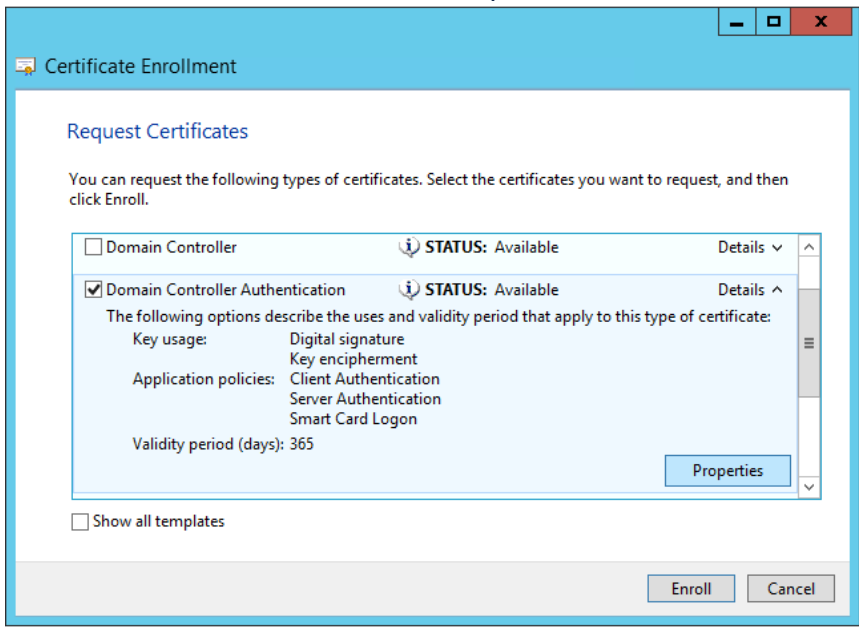
- You enter a Friendly Name if you would like to keep track of certificates you generate
- Click on the Subject tab and under Subject name for the Type, select Common name from the drop-down, and then enter in the full computer name for the LDAP server for the Value, then click Add
- You find the Full Computer Name by opening a File Explorer, on the left side right-click This PC, and select Properties. You should be able to see the Full Computer Name under the Computer name, domain, and workgroup settings section
- Under the Alternative name section, add whatever you would like. For this exercise, DNS and an IP Address (v4) were added
- Select DNS as your Type and enter the Full Computer Name as we did above for the Common Name, then click Add
- Select IP Address (v4) and enter in the LDAP Server IPv4 address for the LDAP Server, then click Add
- This is what your Certificate Properties should look like once you have added everything
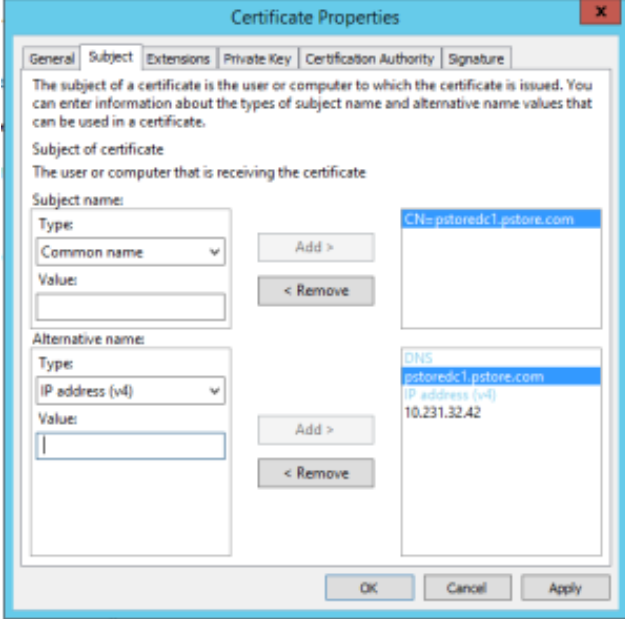
- Click Apply, then click OK
- Click Enroll
- Once the new certificate is generated, you export it to the Desktop so the contents of the certificate are seen
- Right-click the new certificate All Tasks Export
- Click Next
- Click Next (leave as default)
- For the format, select Base-64 encoded X.509 (.CER), then click Next
- Browse to the location you would like to save this certificate and with whatever name you would like, then click Next
- Click Finish. if successful, you should get a pop-up window with a success message The export was successful
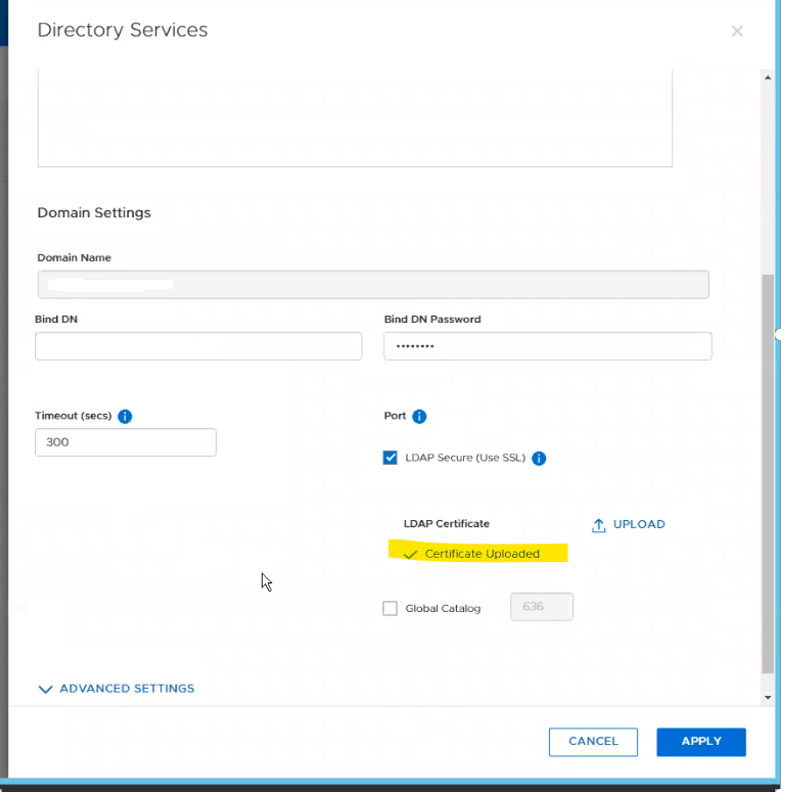
- Now you have successfully generated a new certificate for the LDAP server and are ready to import it into the Management Console following steps: PowerStore > Settings > Authentication > Configure LDAP while selecting LDAPS Authentication.
Affected Products
PowerStore, PowerStore 1000X, PowerStore 1000T, PowerStore 3000X, PowerStore 3000T, PowerStore 5000X, PowerStore 5000T, PowerStore 7000X, PowerStore 7000TProducts
PowerStore 9000X, PowerStore 9000TArticle Properties
Article Number: 000184370
Article Type: How To
Last Modified: 08 May 2026
Version: 7
Find answers to your questions from other Dell users
Support Services
Check if your device is covered by Support Services.