VEP4600でUSBを使用してVersaをクリーン インストールする方法
Summary: この文書では、USBペンドライブを使用して、VEP4600でVersa 21.2.3のクリーン インストールを実行する詳細な手順について説明します。
This article applies to
This article does not apply to
This article is not tied to any specific product.
Not all product versions are identified in this article.
Instructions
-
Versaリンクの下にログインし、[General]タブで[Software Download]を選択します。

- Versa ISOの適切なバージョンをダウンロードします(Versa 21.2.3を選択しています)

- Rufusを使用してブータブルUSBを準備します。ISOイメージを選択し、[Partition Scheme]がGPTに設定されていることを確認し、[Start]をクリックします。

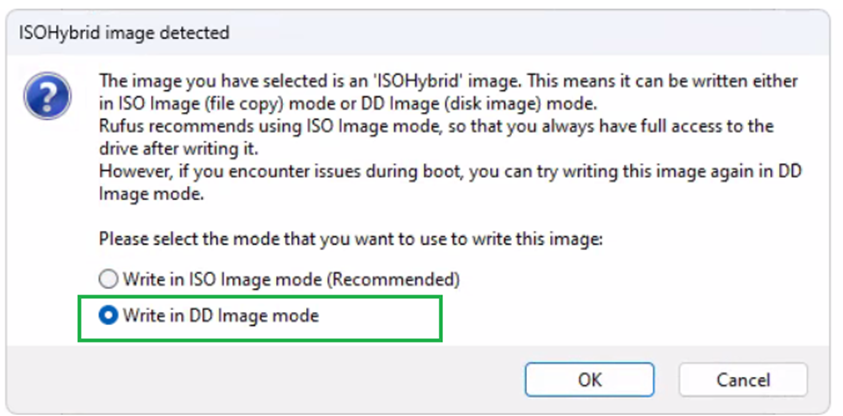
- 次の画面で[Write in DD Image mode]を選択し、[OK]をクリックします。
- ステータスに[Ready]と表示されたら、[Close ]をクリックします 。プロセスを再度開始しないでください。

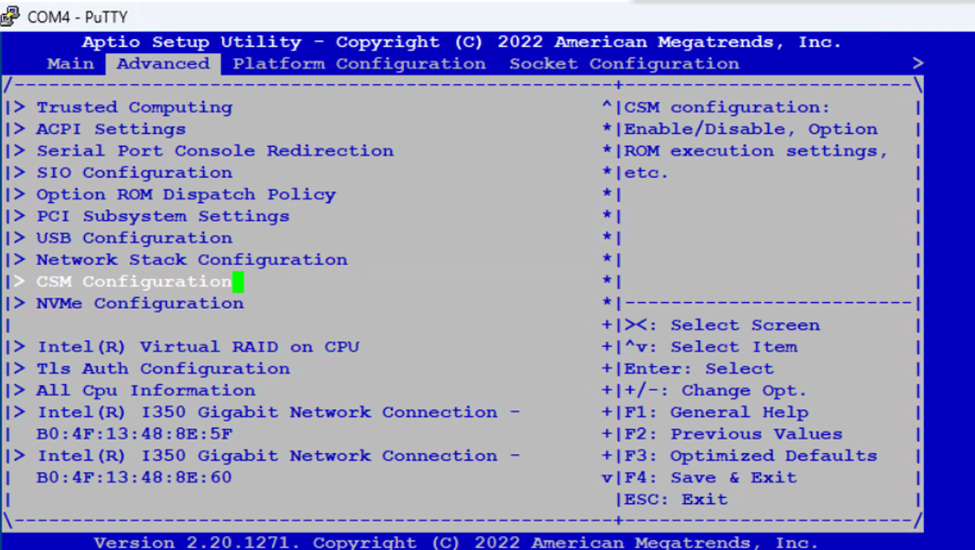
- VEPボックスにペン ドライブを挿入し、ボックスを再起動してDELを押してBIOSを起動します。
- [ 詳細設定]タブに移動し、[CSM構成を 選択]を選択 します。
- [Boot Filter Option]を[Legacy only]に設定し、ESCを押してメイン メニューに移動します。

- [Boot]に移動し、[Boot Option Priorities]を選択し、挿入したUSBペン ドライブを選択します。

- [保存して終了]に移動します。[ 変更を保存して終了]を選択し、[はい] を選択します 。F4を押さないでください。一部のBIOSバージョンでは、変更は保存されません。

-
USBから起動し、「Error setting up gfxboot」というエラーが表示されます。
Type “versa-branch-usb” and Press Enter twice to see the Video modes available.

- Tabキーを使用して、下の画面で[Cancel]を選択し、Enterを押します。

- 使用中 のパーティションをアンマウントするには、[YES]を選択します。

- 最初のオプションを選択し、Enterキーを押します。

- 内蔵SSDドライブを選択してVersa OSをインストールする

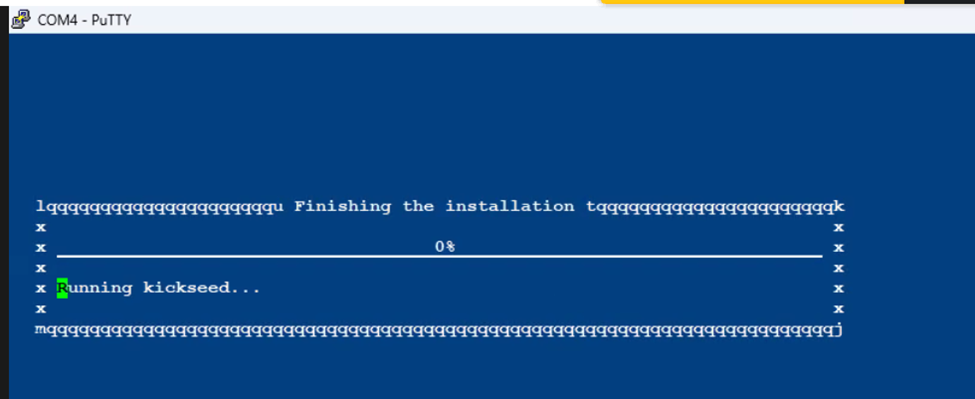
- インストールには時間がかかり、Kickseedを実行している0%で停止します。これは正常です。プロセスを中止しないでください
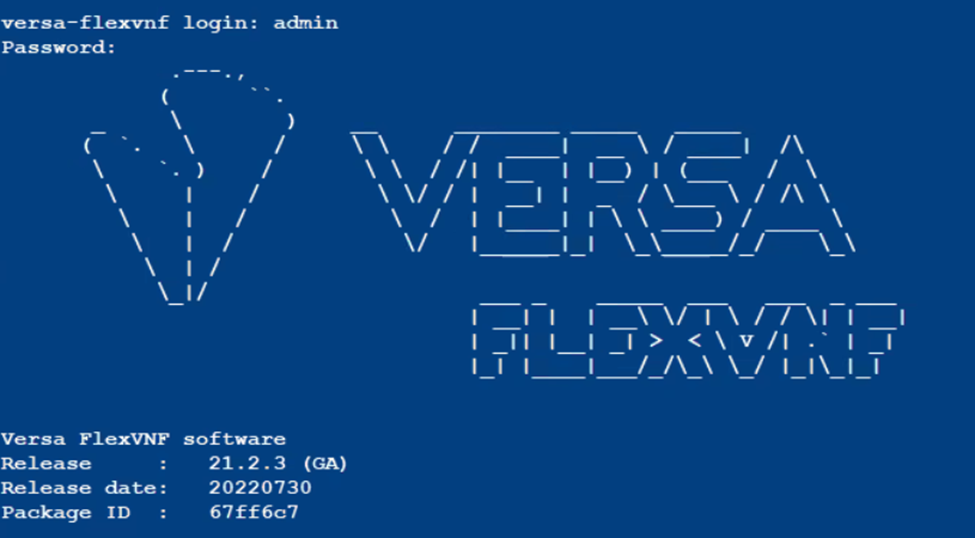
- インストールが完了すると、VEP Boxが自動的に再起動し、VERSA OSが起動します。

-
Login using default credentials, admin/versa123
- 「cli」と入力して、コマンド ライン モードに入ります。
show system details to validate the Version of Versa Installed

Additional Information
Affected Products
DELL NETWORKING VEP4600 16-CORE, Dell Networking VEP4600 4-CORE, DELL NETWORKING VEP4600 8-COREArticle Properties
Article Number: 000218067
Article Type: How To
Last Modified: 10 Nov 2023
Version: 2
Find answers to your questions from other Dell users
Support Services
Check if your device is covered by Support Services.